Cleveland Dbl Puck STC…
June 12, 2018In case anyone needs it, here is the free STC SA63GL to run Cleveland 199-62 “double puck” breaks on a 180/185.
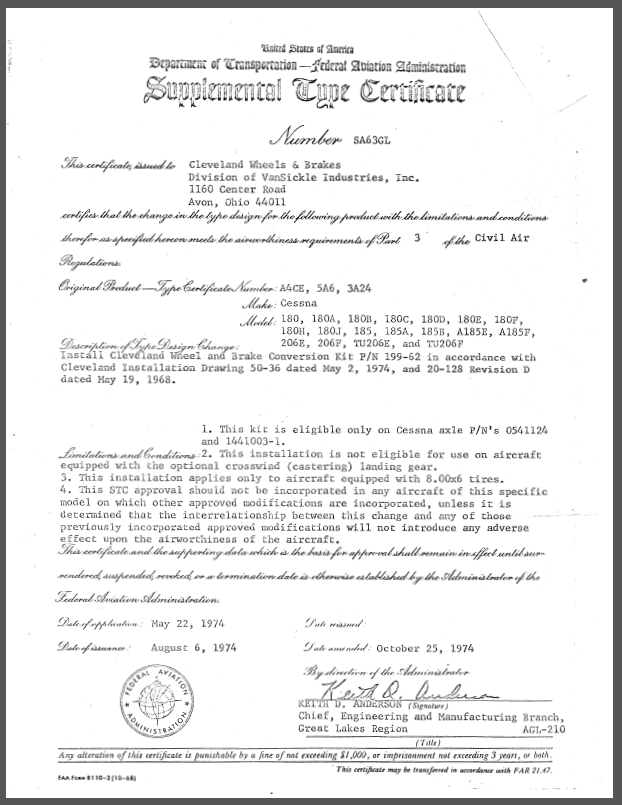
Download here: SA63GL


In case anyone needs it, here is the free STC SA63GL to run Cleveland 199-62 “double puck” breaks on a 180/185.
Download here: SA63GL
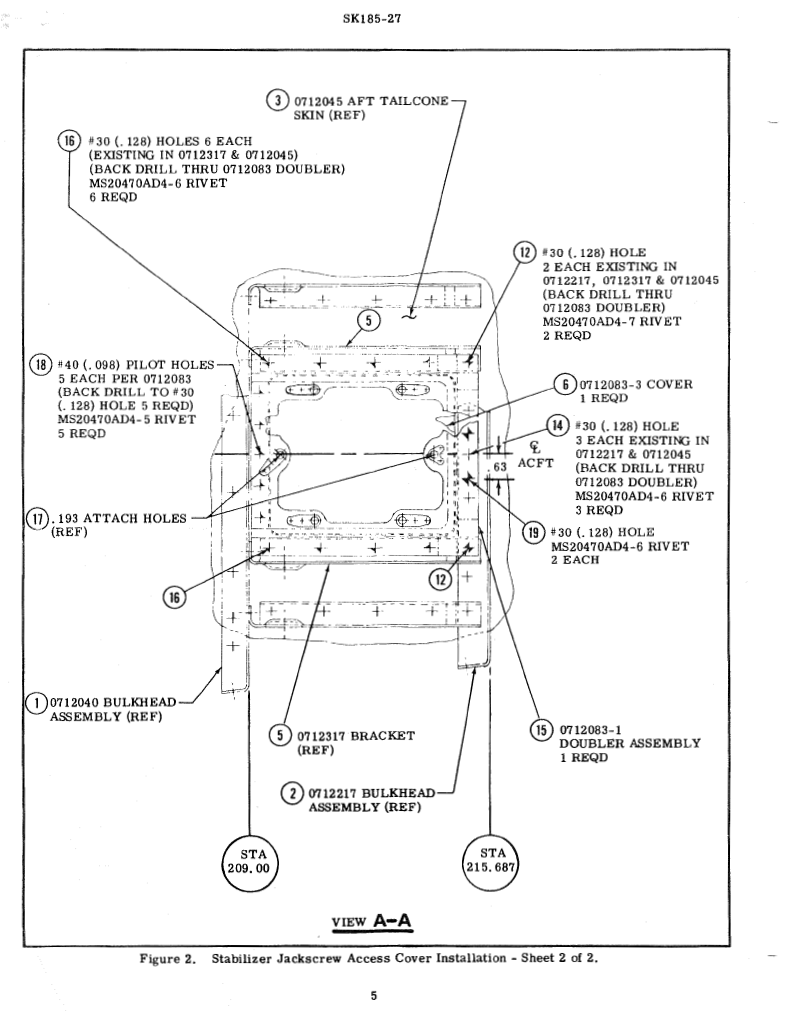
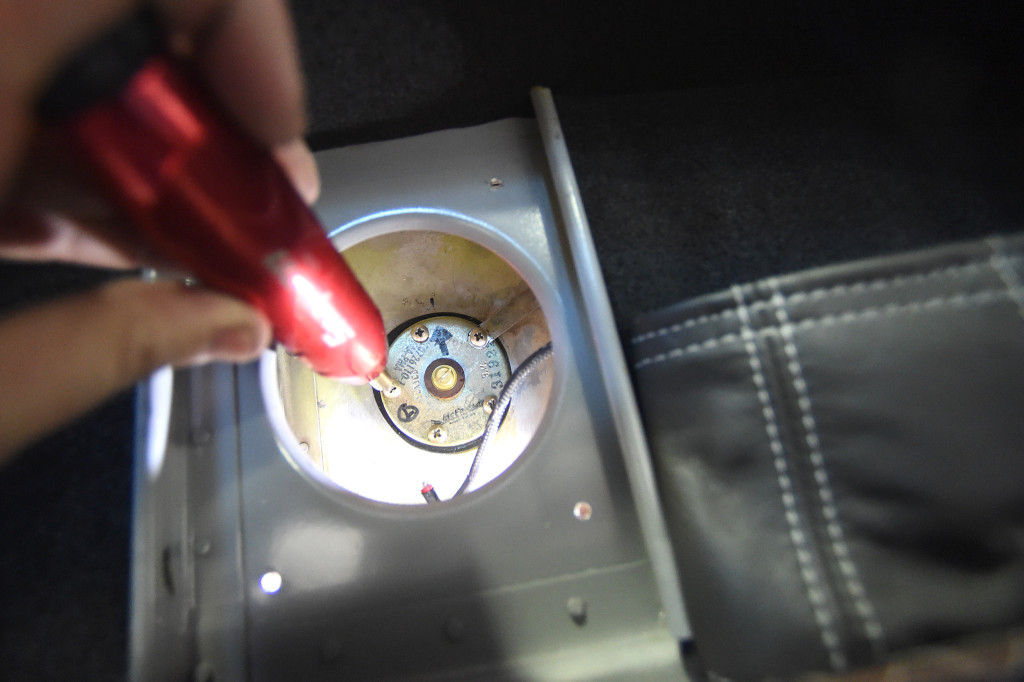
Just finished installing a 185-27 jackscrew inspection kit into an A185F. It’s a real handy mod and a good thing to think about… Thought I’d post the install manual in PDF if it’s helpful to anyone.
Download here: SK185-27
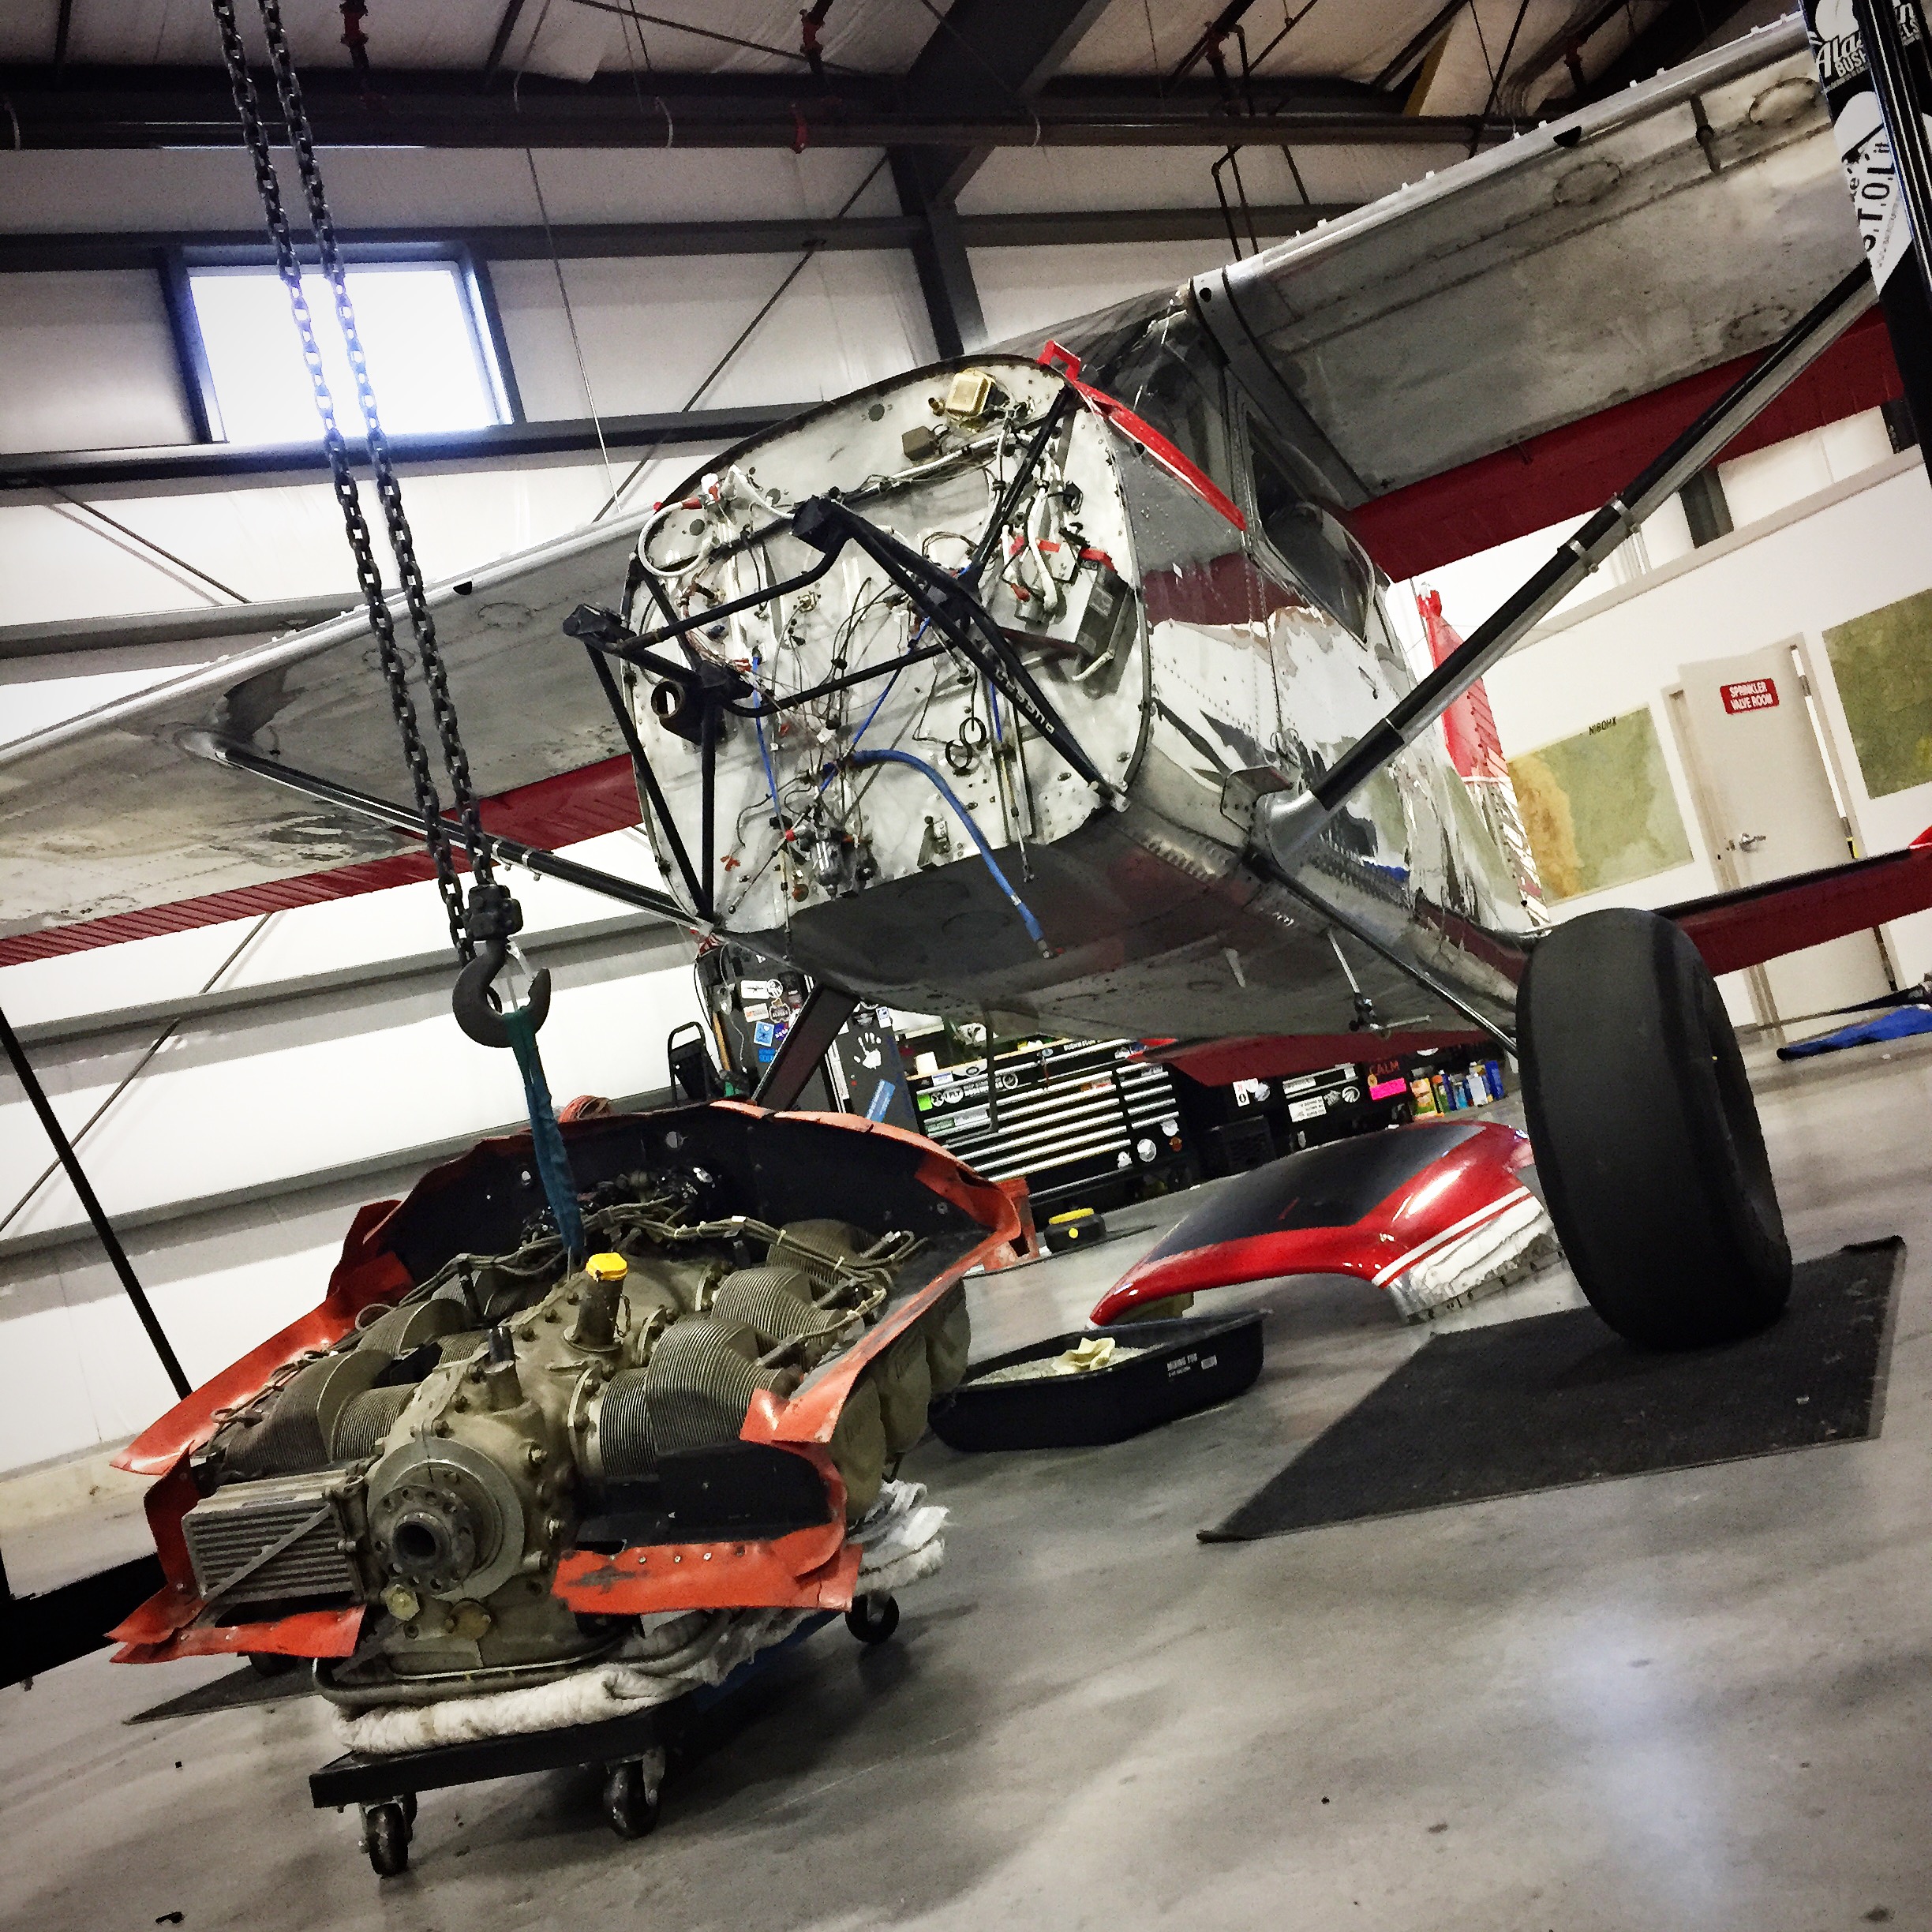
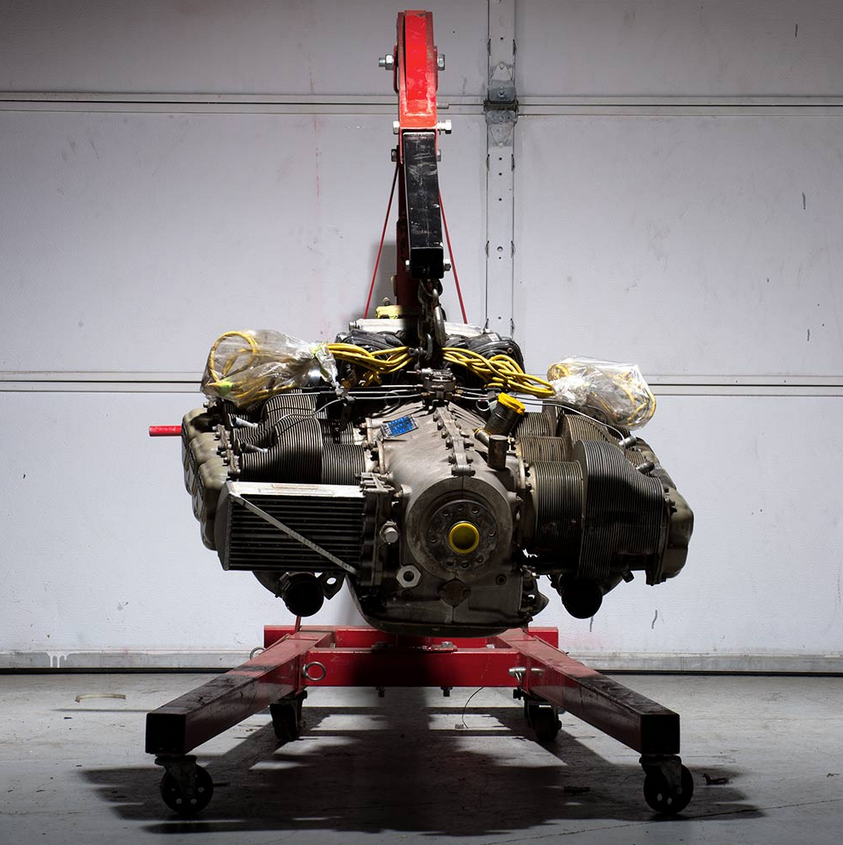
I pulled my 470 and quickly sold my 470 back in November thinking I would only be down for a month or two, but after a long spring, I finally have some time on my hands, and am going to get my new motor back in the bird! We finished the O-520 PPonk last month, and Im very excited to get it installed.
I took my time in the process, and hand painted each individual part before assembly. The net result is a real pretty engine.
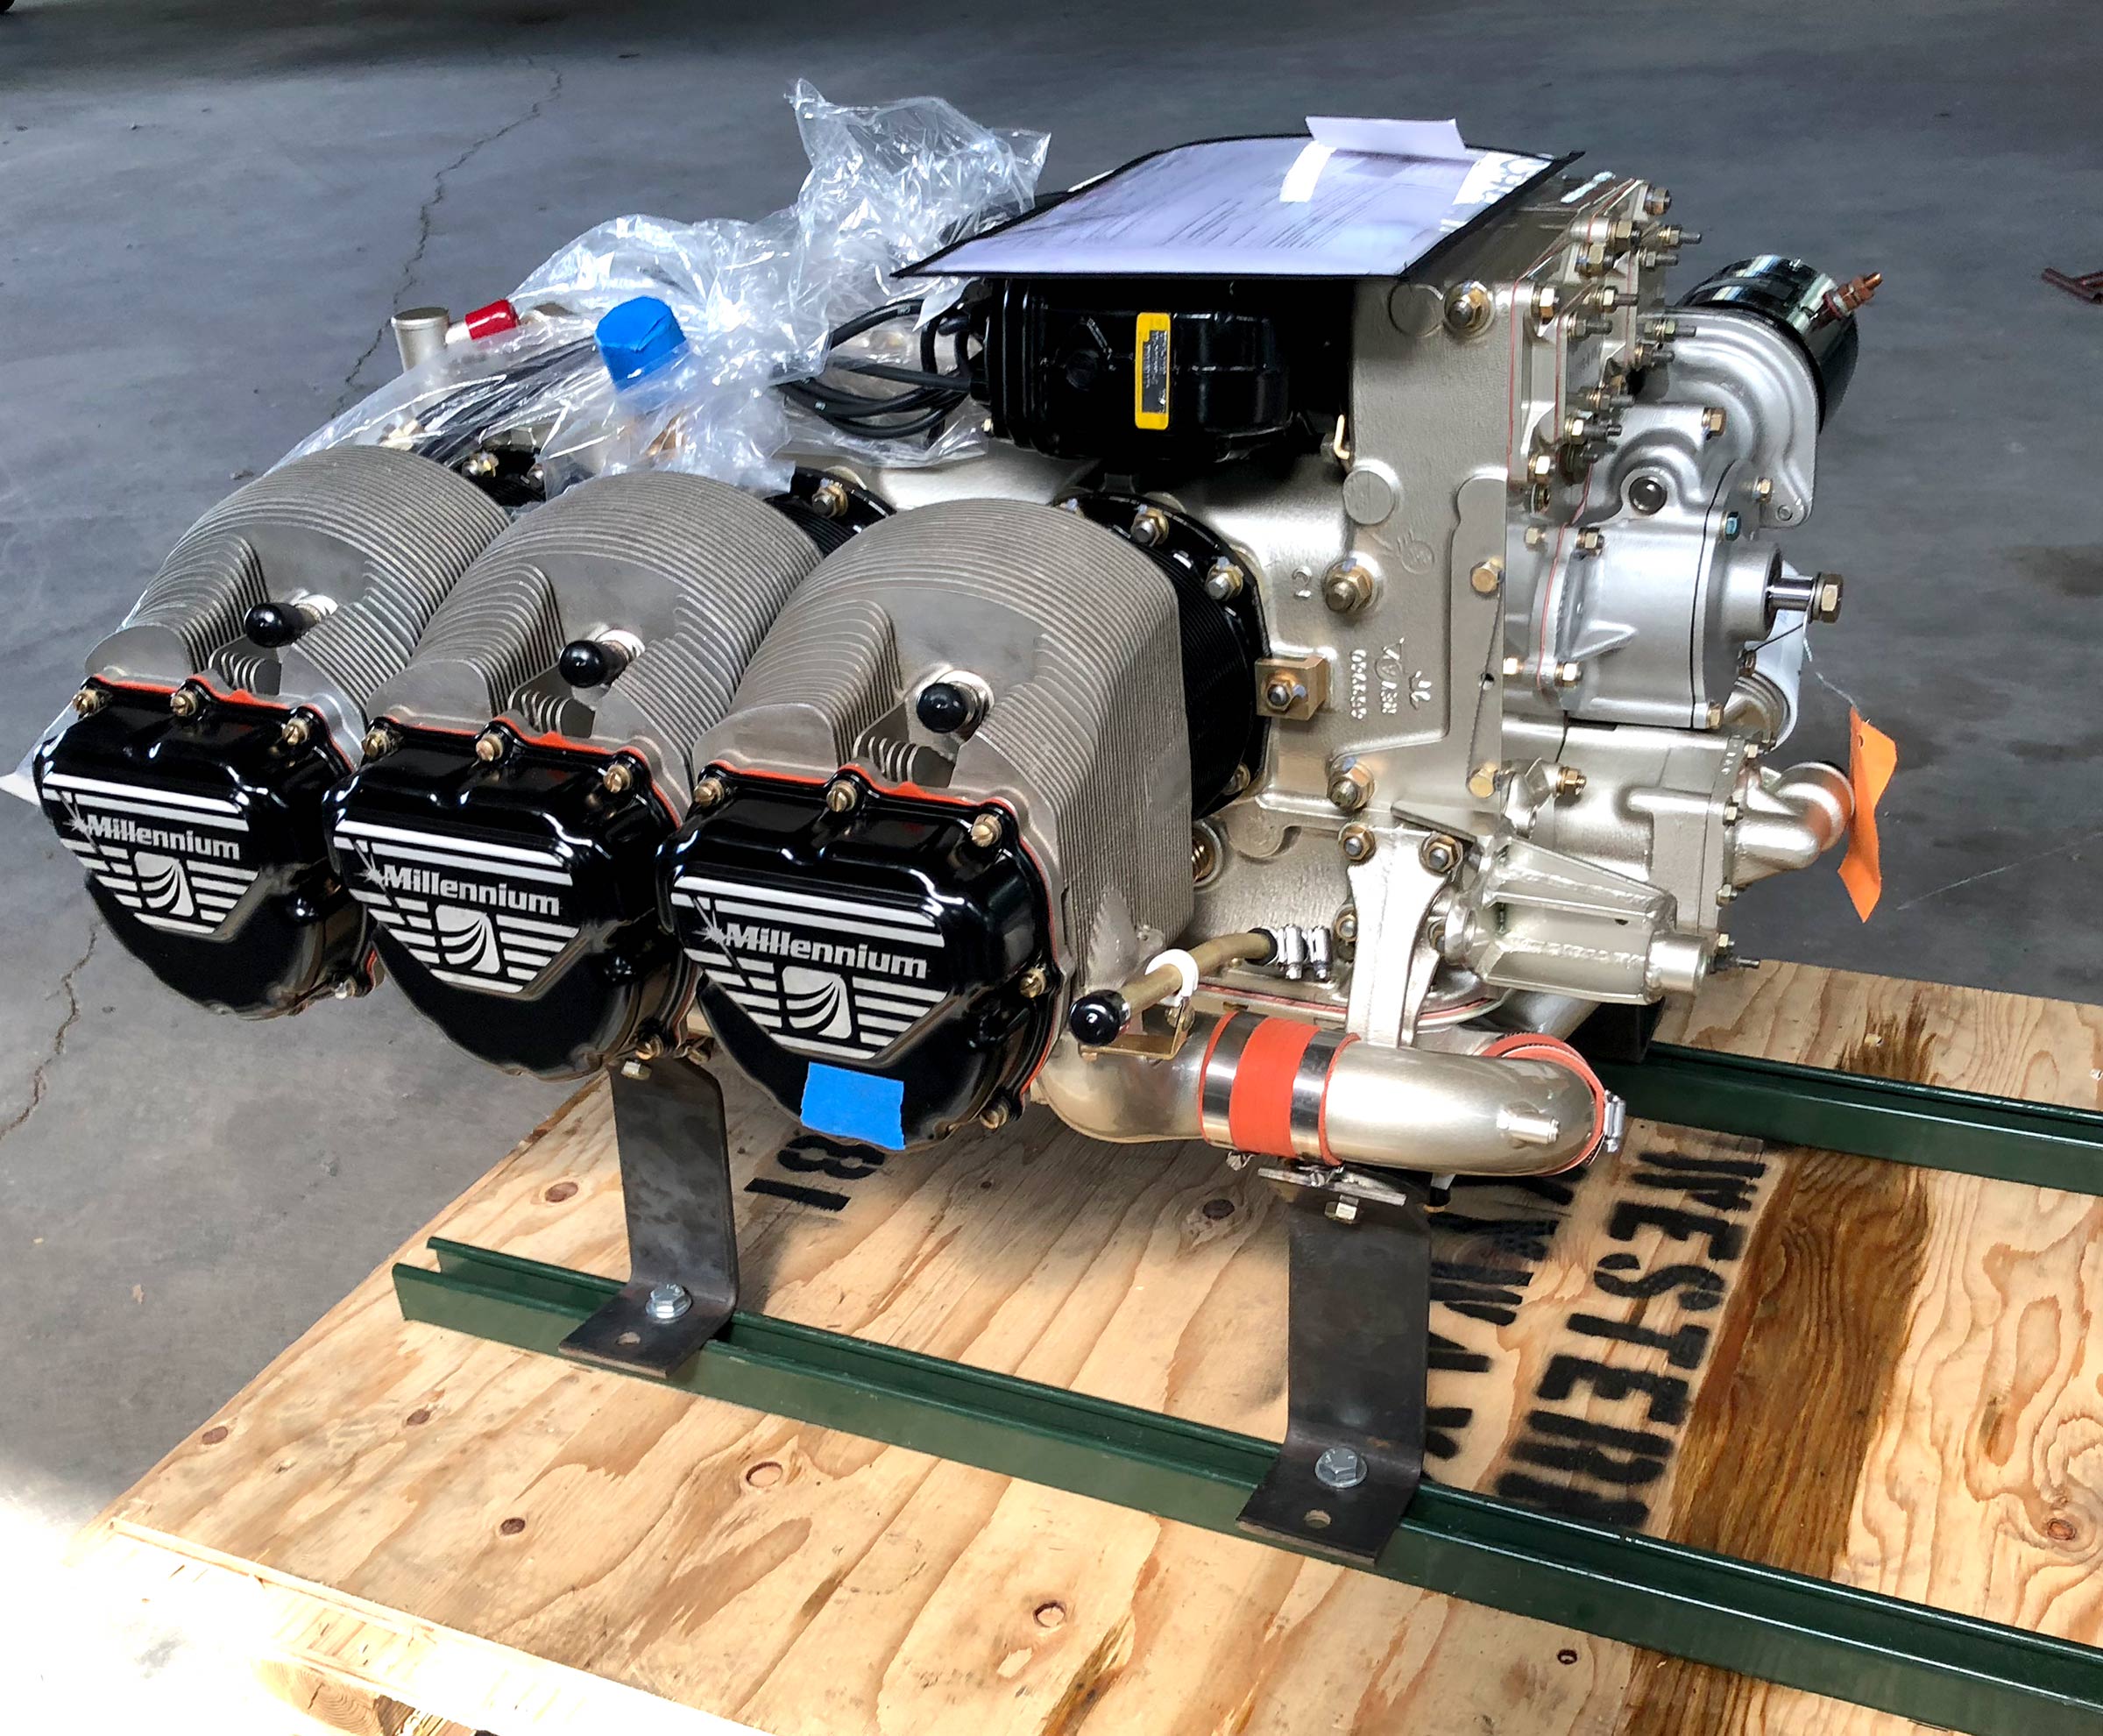
I took an IO-520F and used the PPonk STC to turn it into an O-520. If you are unfamiliar with the PPonk mod, it takes a IO-520D/F, pulls off the fuel injection, adds low compression pistons, changes the fwd crossover tube, and adds a carb. This mod will get you about 265HP. http://pponk.com/
I ended up buying six brand Millennium new cylinders, but was surprised at the consistency out of the box. In the end, we pulled them completely apart and got them perfect. With a little care and obsessive attention to detail, she dyno’d at just under 300hp. I’m hoping it’ll be screamer! I also made the decision to run high comp pistons (legally by DER approval) so she should perform at altitude as well.
I’ll be running a 3 blade MT up front, and to avoid the chance of kickback and broken starter adapter, decided to go with a Shower of Sparks ignition. This will retard the ignition during start and totally avoid a poor timing/kickback.
The plan will be to eventually pull out the non-impulse coupled mag and install the new Surefly electronic ignition. This is a really cool unit that unlike the clunky Electro-Air is totally self contained inside the mag. This combo (IMHO) will give the best of all worlds. Surefly is hoping to have certification done by Oshkosh. https://www.surefly.net/
I also decided to go with an old style starter adapter, and forgo a Skytec choosing an old skool energizer starter. Yes its a couple more pounds back on the bird, but the piece of mind with that time honored starter is well worth it.
She was pretty much broke in on the test stand, so it should be fun right out of the box. Big thanks to Tim at Unlimited Aero for the support. http://www.unlimitedaeroengines.com/
(unsolicited, but in a land where there is so much friction with service) I wanted to give a quick plug for Mountain Wave Aviation and its new owner Ron.
I have been installing the Mountain Wave nets on birds (as well as on my own buggy) now for 5 years, and have to say that I continue to be impressed with Ron and his customer service, not to mention the quality of the nets.
Folks that have tried to order nets in the past are familiar with their epic lead times… Sometimes over a year. Now that Ron has taken over the company, turn times are lightning fast.
If you want to learn more about the nets, go here: http://mountainwaveaviation.com
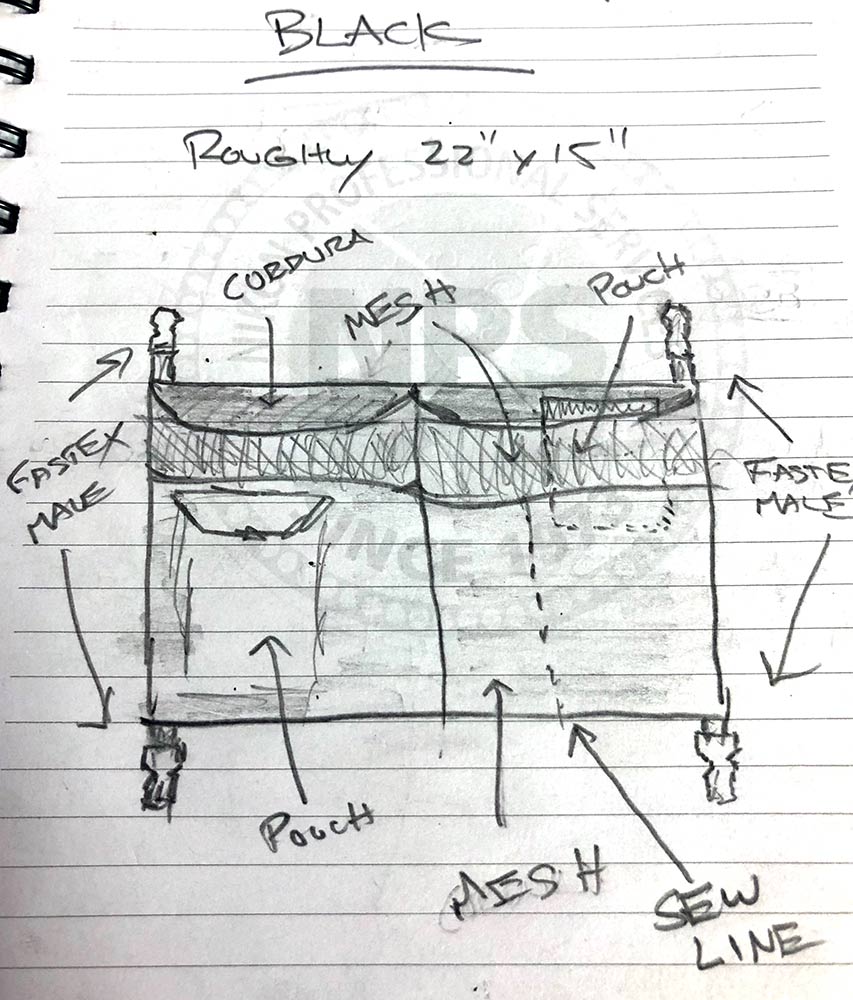
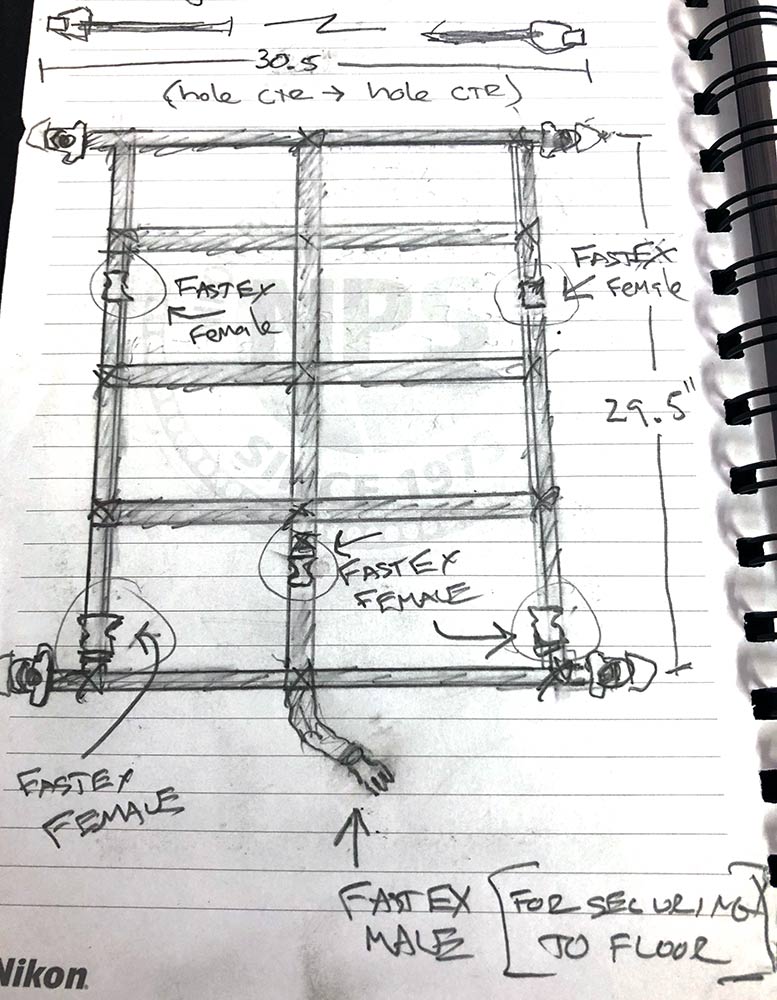
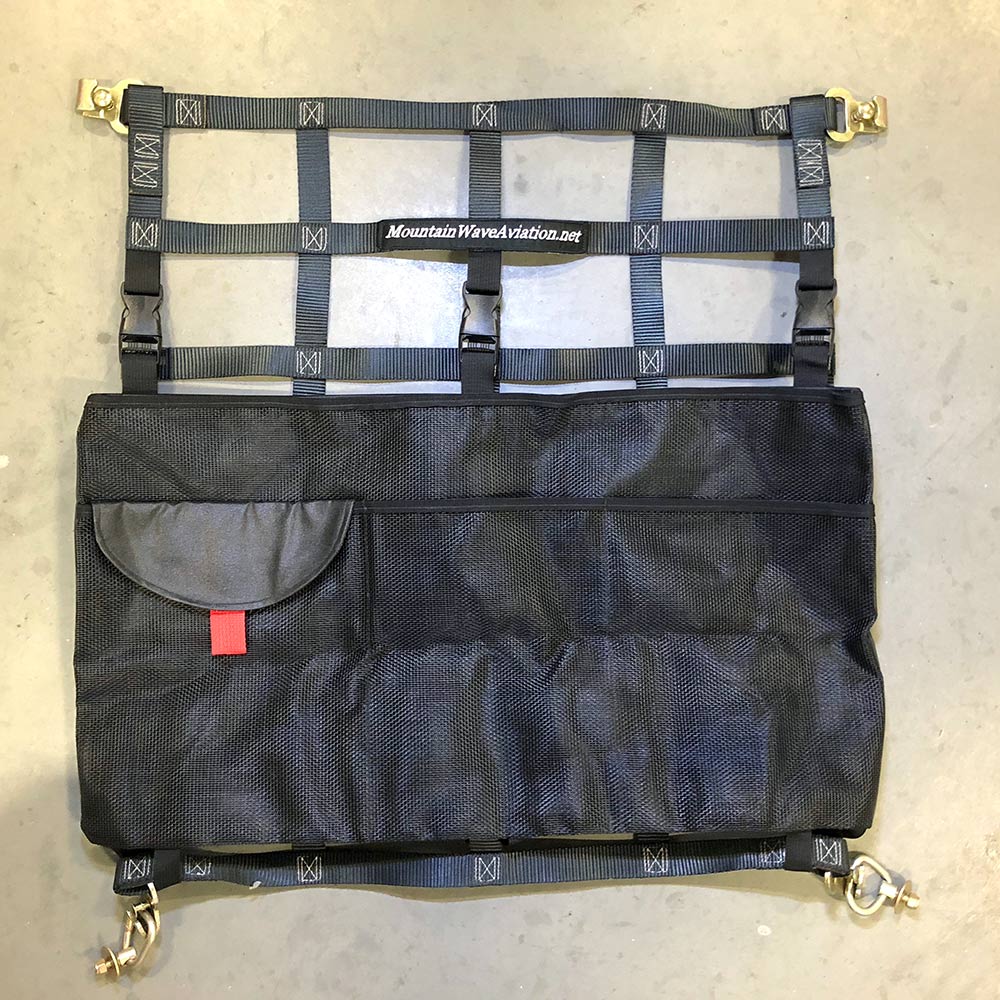
It takes a bunch of additional time and he would prefer not to do custom stuff, but I have also worked with Ron to create some of my own designs, and they have turned out awesome.
My favorite is the rear organizer pocket for the extended baggage. Here are my sketches, and then the final net he made for me. I installed one on my bird as well as a customer’s bird that I just ferried out west.
If your looking for a cool new item to install in your Cessna, check out Ron’s rear carry thru or extended baggage net. Well worth it!
Now that I’m building the 520 for the Wagon, I’ll be selling the 470R and the 2 blade MT. If you know anyone…


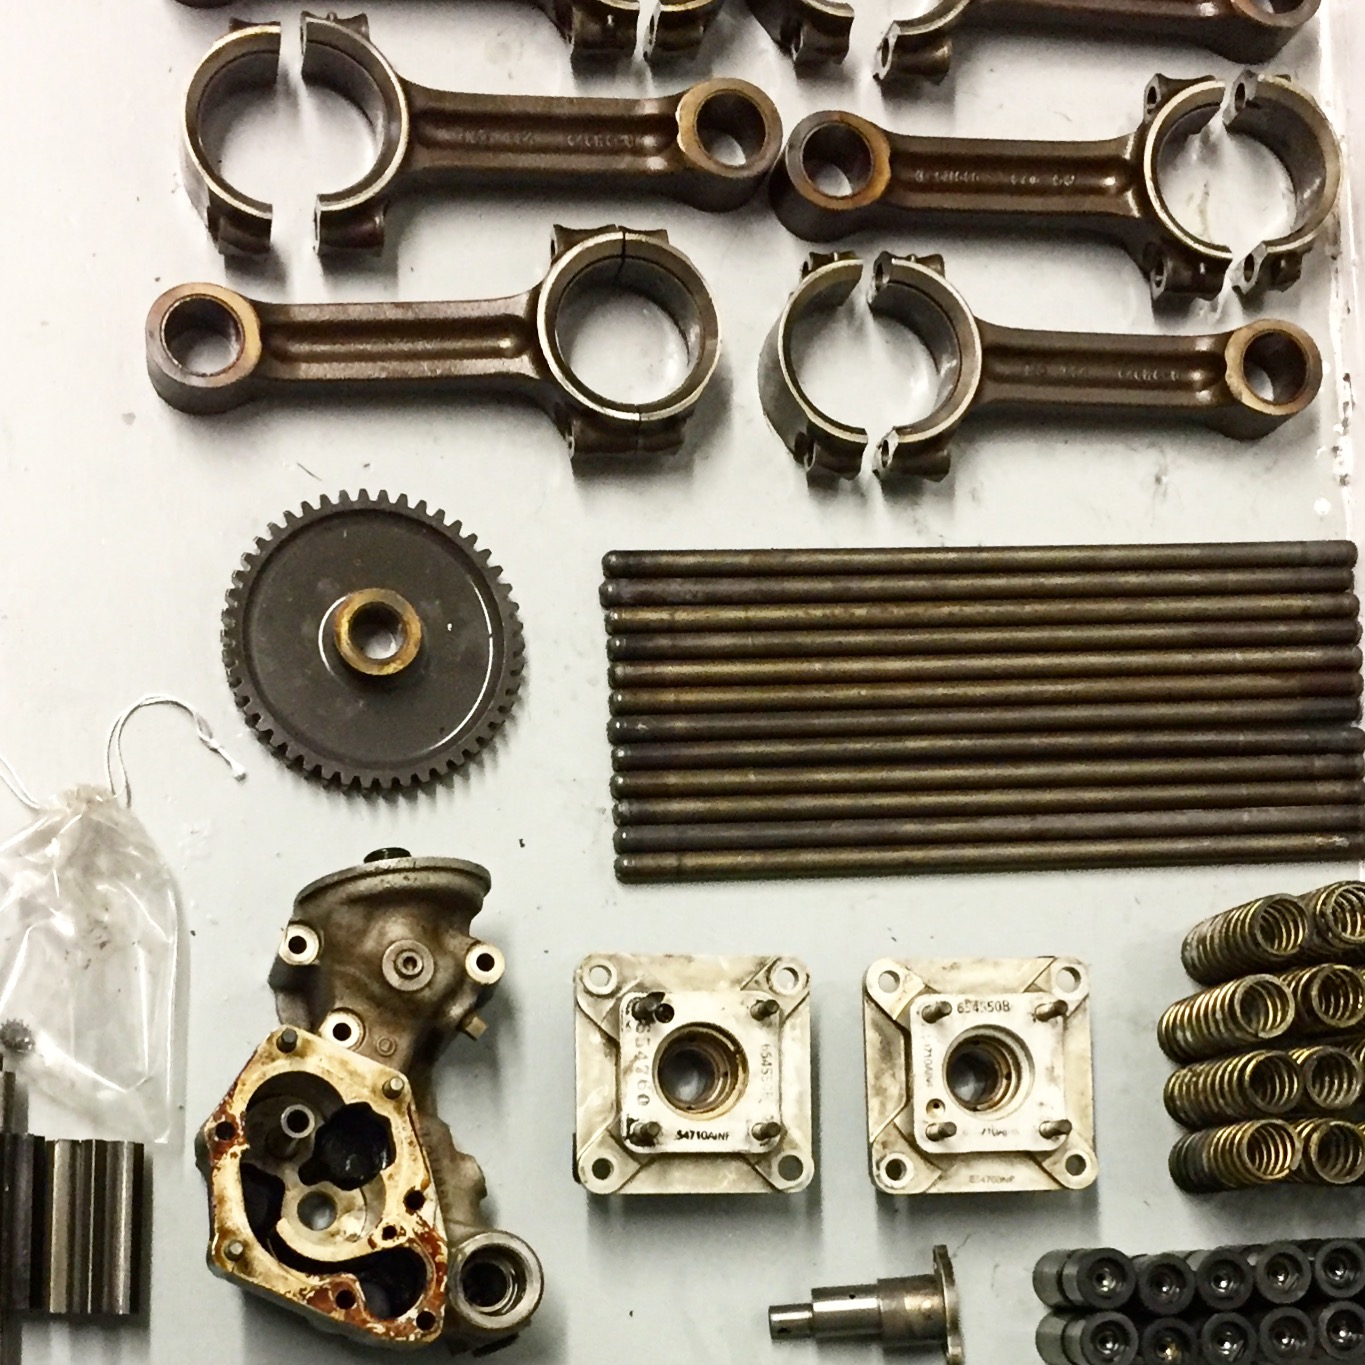
Finally have some free time so I’m diving in deep and starting in on the O-520F core that has been sitting in the corner of the shop.
I will be using the 2000hr TBO PPonk STC with Millennium cylinders (venturi seats). Should give some nice additional HP! The engine is finally apart and the parts are going out for inspection and overhaul.
Orig published over on BCP.org March 2015… This article is for entertainment only and is NOT an approved or instructional material. Consult the proper installation documents for reference.
The install continues…
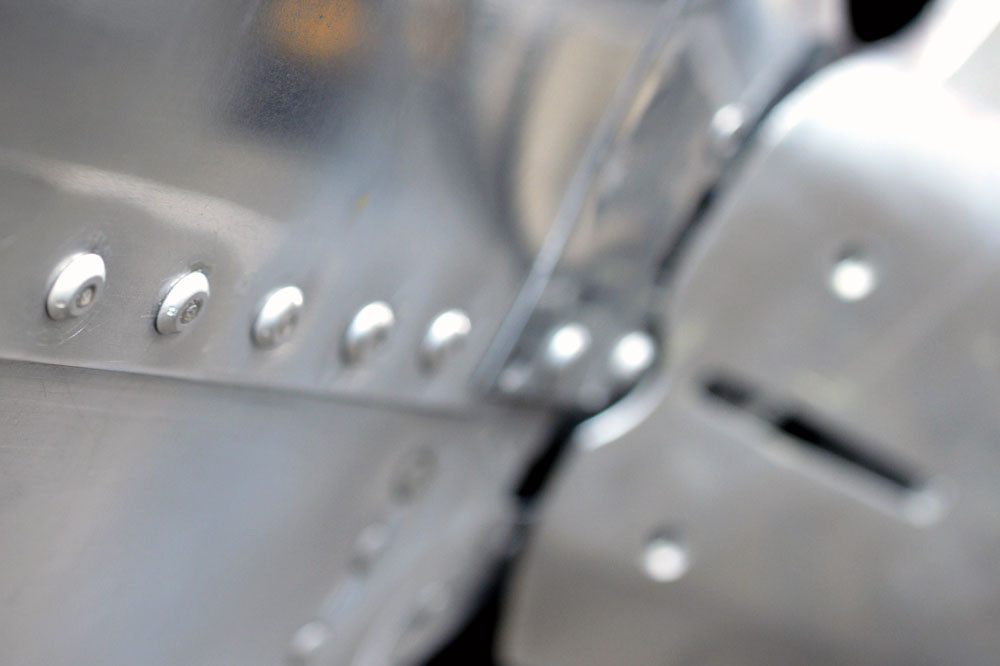
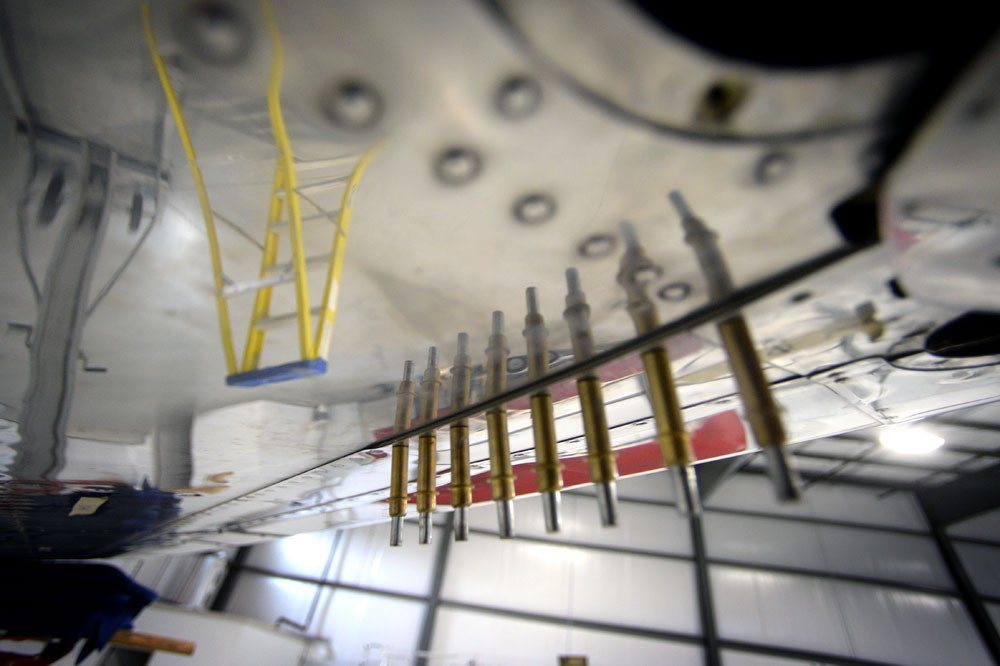
A word about pulling the rivets. Although the kit comes with everything you will need (and some extras for once) it’s always good to understand just WTF is going on. The stainless strap uses Cherry Max and not just cherry rivets. If you and (God forbid your AP) don’t know the difference, its worth learning.
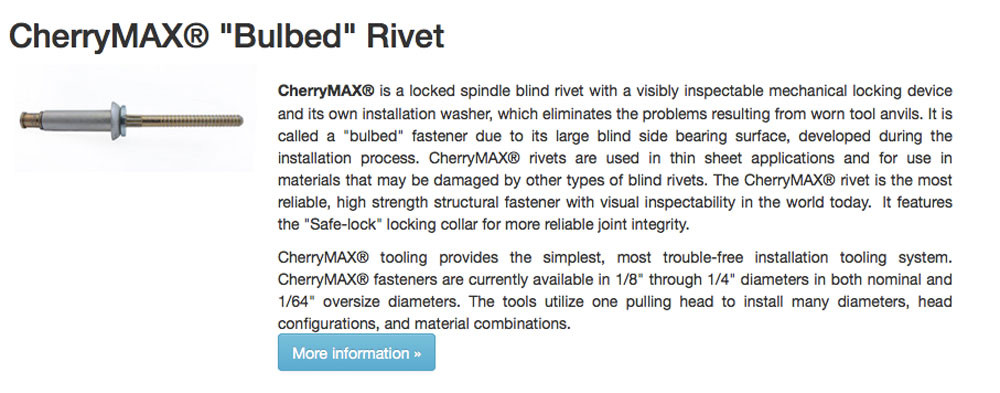
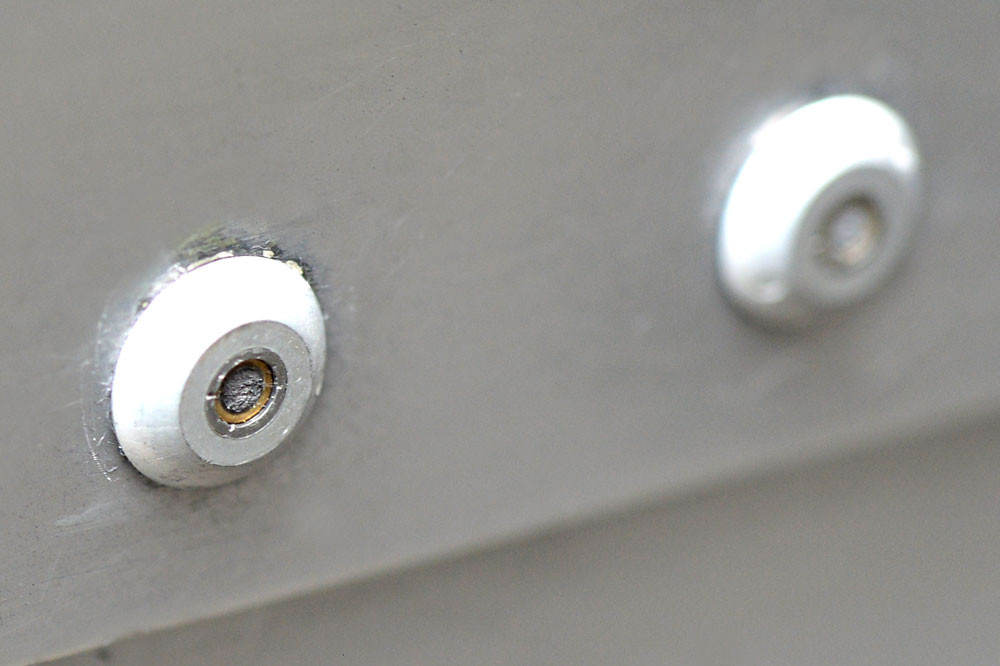
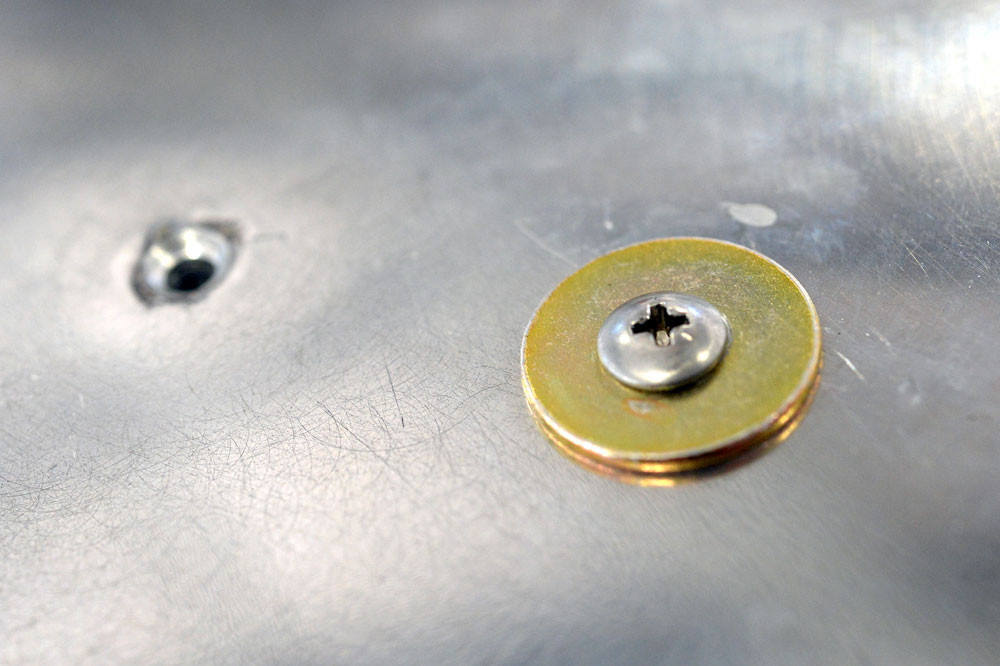
Before you move on, make sure all the rivets lock. In a nutshell, the stem gets pulled and must lock with the steel collar. If it doesn’t, the rivet will not look flush, and if its not flush, its not structurally sound.
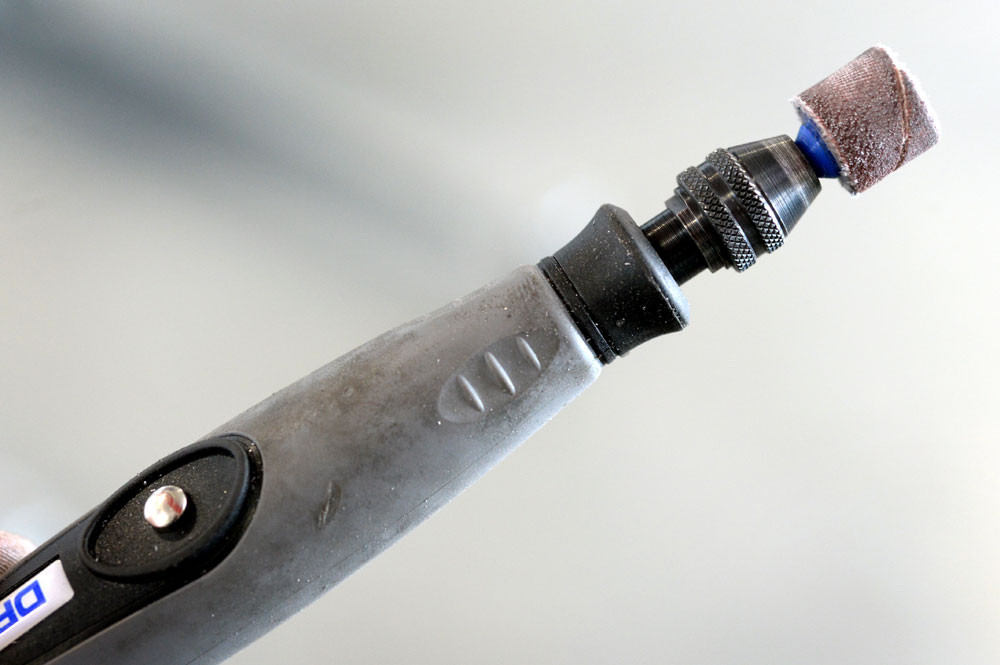
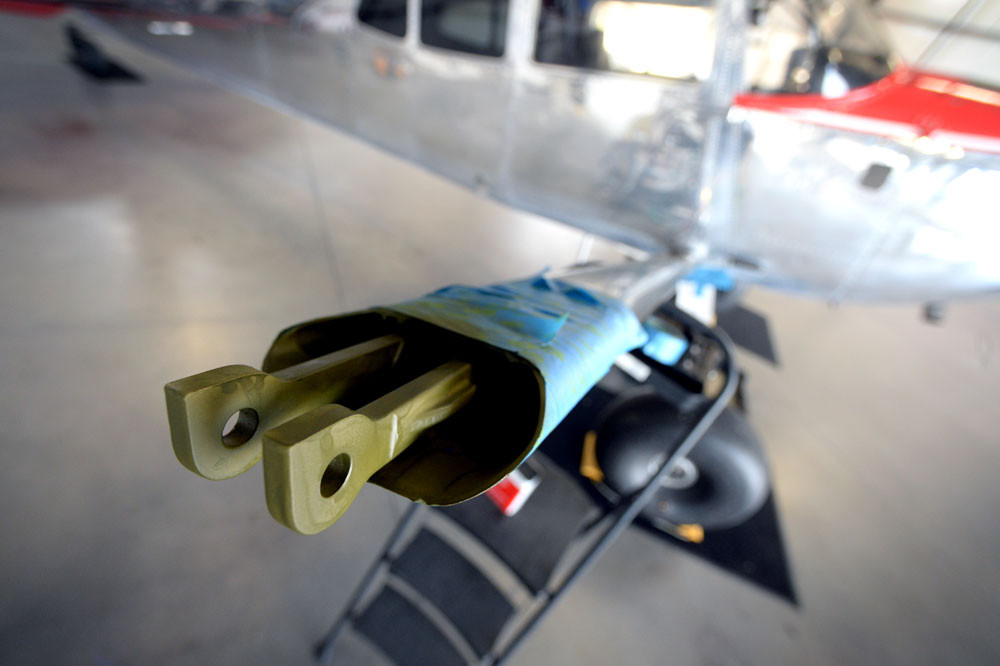
Next step is to dress up the outboard ends of the upper lift strut. Because flush rivets were removed and universal heads were installed, you will have to dish out some material on the inboard and outboard side of the strut in order for the strut to fit back where it belongs… A bit nerve wracking at first, but no biggie as you will be working distal of where the tangs rivet to the strut. Dremel works great here, first with the cutting bit, then the sanding drum.
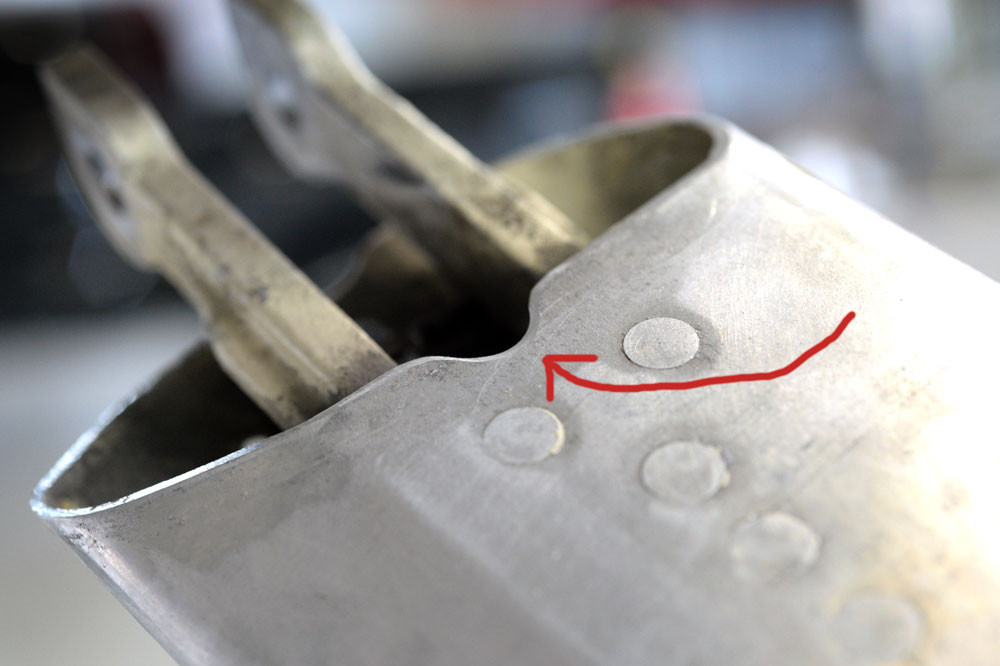
Remember to measure sixteen times and cut once… You can always remove material, but never add it on.
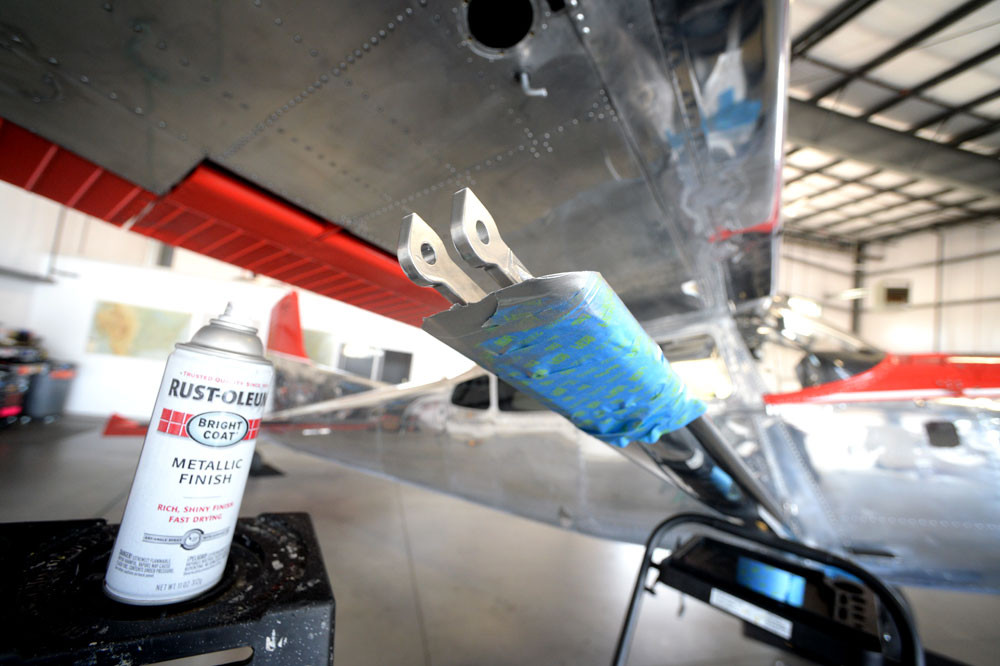
Last thing you might want to think about here before you re-install the lift strut is to rehab the tangs. I cant in good conscious re-install a part without freshening it up, so I hit it the part with some scotch bright, z-chromate, and some metal finish Rustoleum.
Orig published over on BCP.org March 2015… This article is for entertainment only and is NOT an approved or instructional material. Consult the proper installation documents for reference.
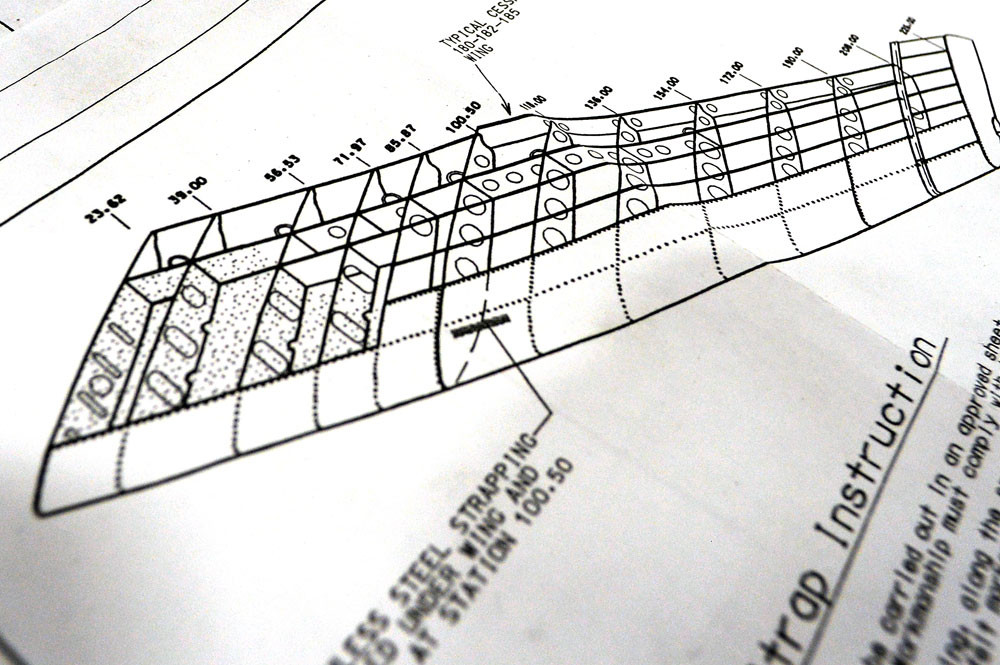
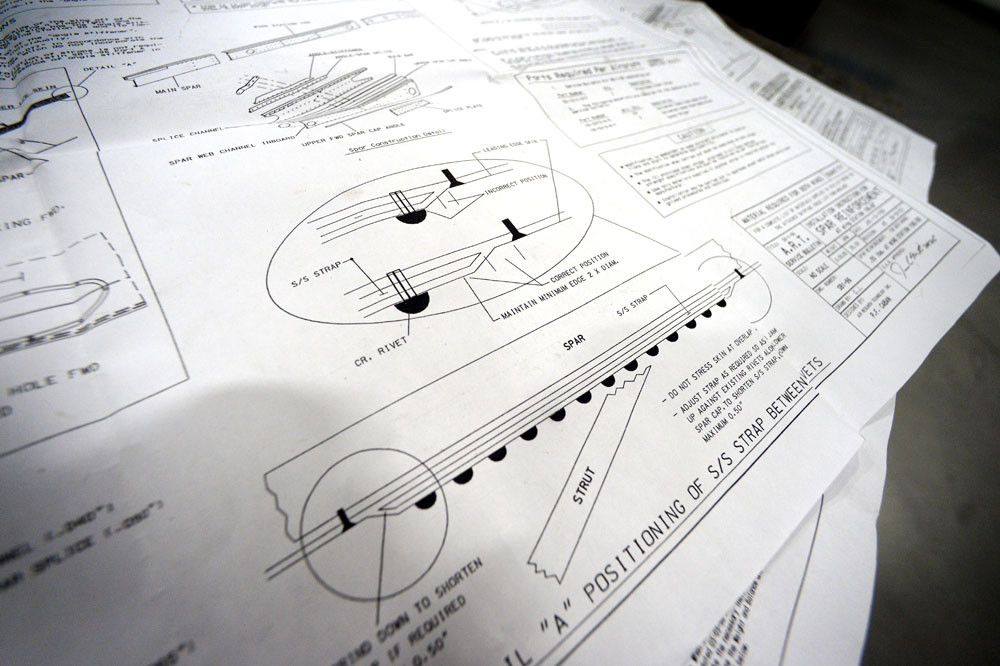
Next I focused on the stainless strap. Again, this is getting sandwiched between the skins at Sta. 100. Note: This step is only required on SOME models. You will have to check your main spar to see if it is needed.

With the strut out of the way, you can now drill the heads of the flush mount rivets. You will be drilling out the 5’s and installing #6 universal head cherry max. Even though you will be eventually enlarging the holes with a #10 bit, take care not to take the easy way out and just drill out the 5’s. Snap the heads, and drive the tails out with a punch…
With the flushies out, slide the stainless strap between the skins and start spotting. Spot drill, remove, drill press, install, spot drill, remove, etc… Stainless sucks so go nice and slow and take your time.

Once the holes are all in, and everything fits, fit the strap and enlarge the holes with a #10. Remove and debur, then install for the final time….
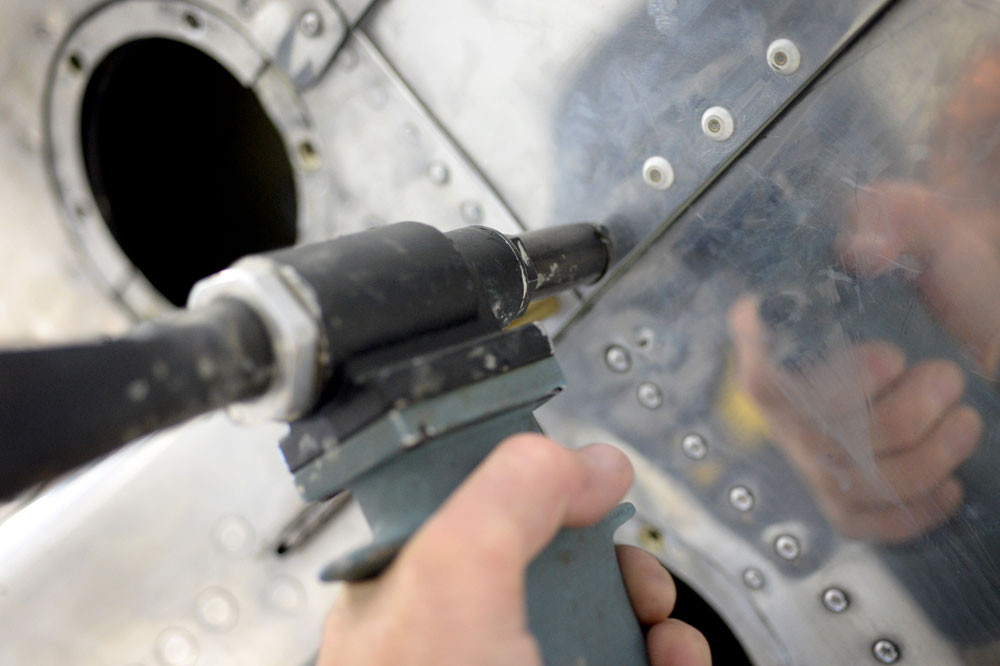
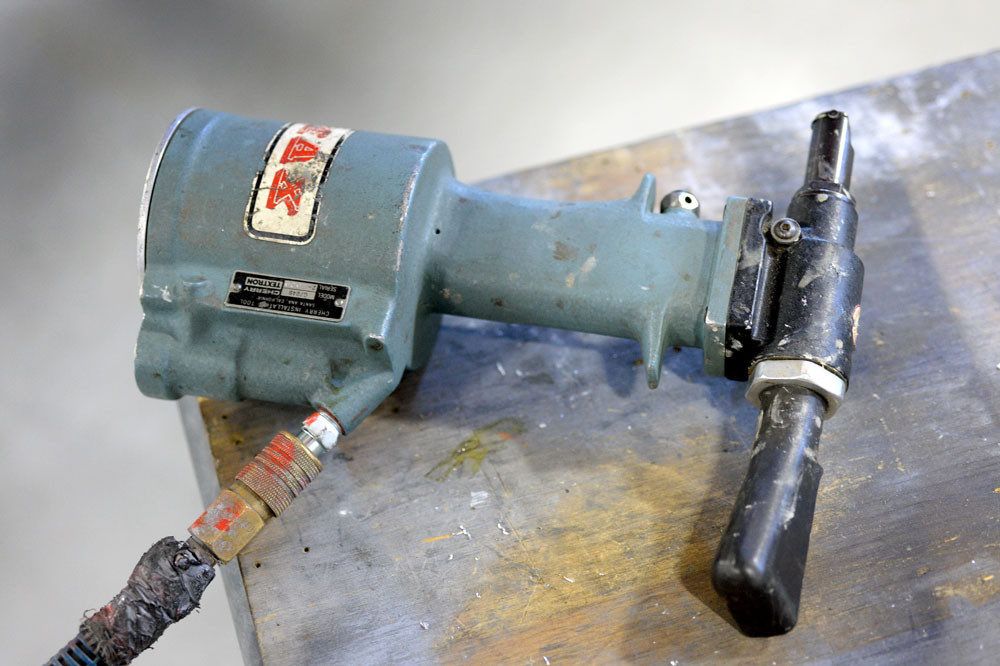
Since clecos wont really pull the sandwich tight enough, I used several #10 fasteners to snug it up real tight. Once you are all set, pull the #6 universal cherry max rivets. The 6’s are damn near impossible to pull by hand, so make sure you have a good pneumatic rivet gun handy.
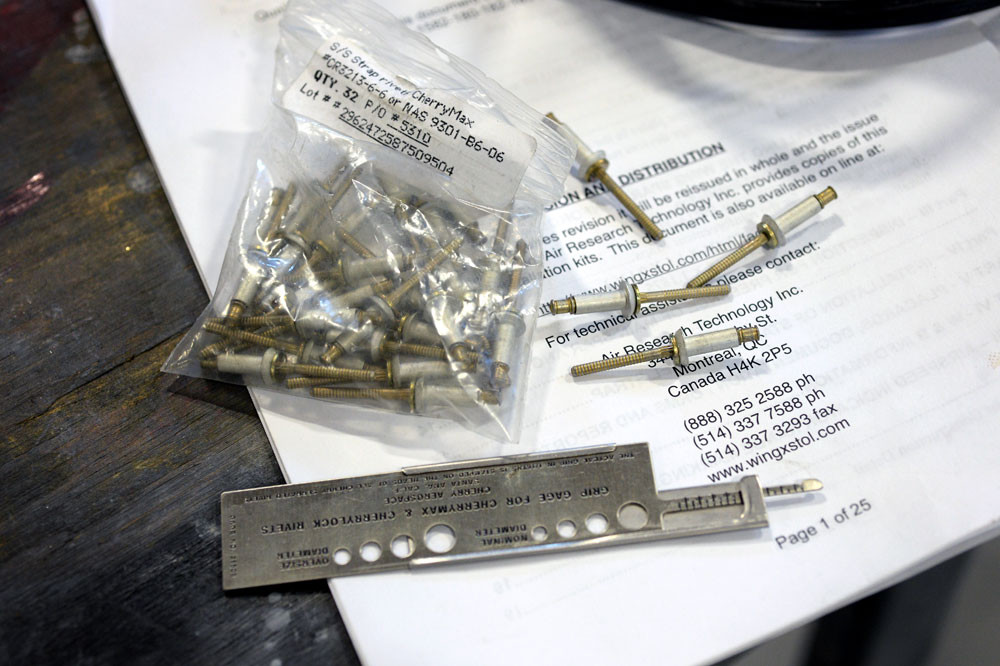
One final note… The kit comes with all the fasteners and rivets you will need. That said, make sure you double check the hole with a grip gauge before you pull the cherry Max. The stainless strap will use 6-6’s for all save one. This is where the skins lap. Here WingX provides a 6-7.
Orig published over on BCP.org March 2015… This article is for entertainment only and is NOT an approved or instructional material. Consult the proper installation documents for reference.
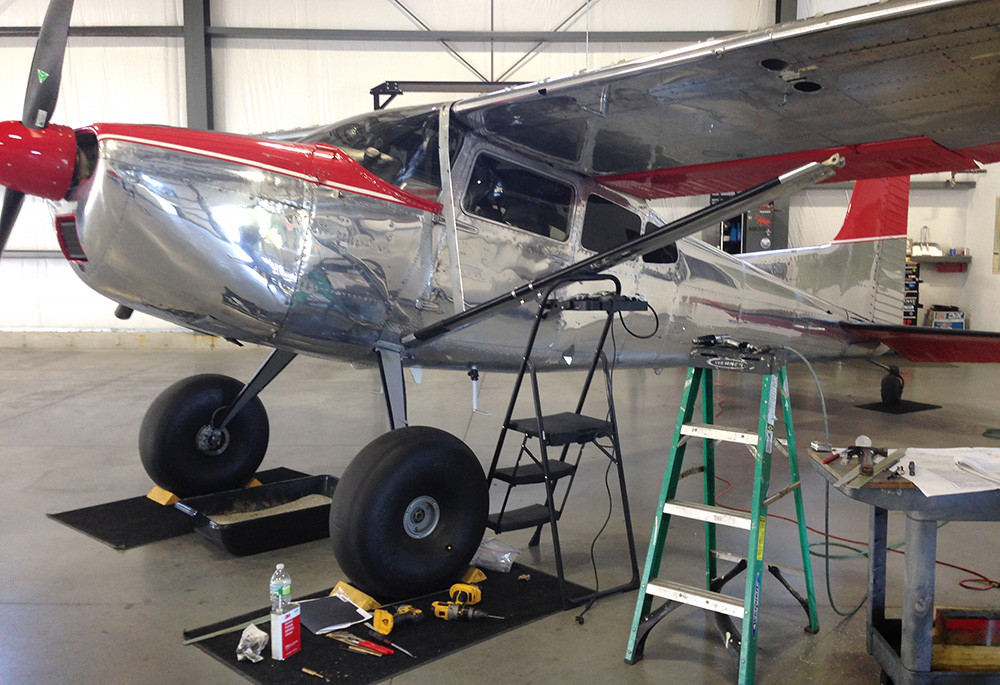
Next on the agenda is to get the strut out of the way so you can gain access to the Sta 100 lower rivets.
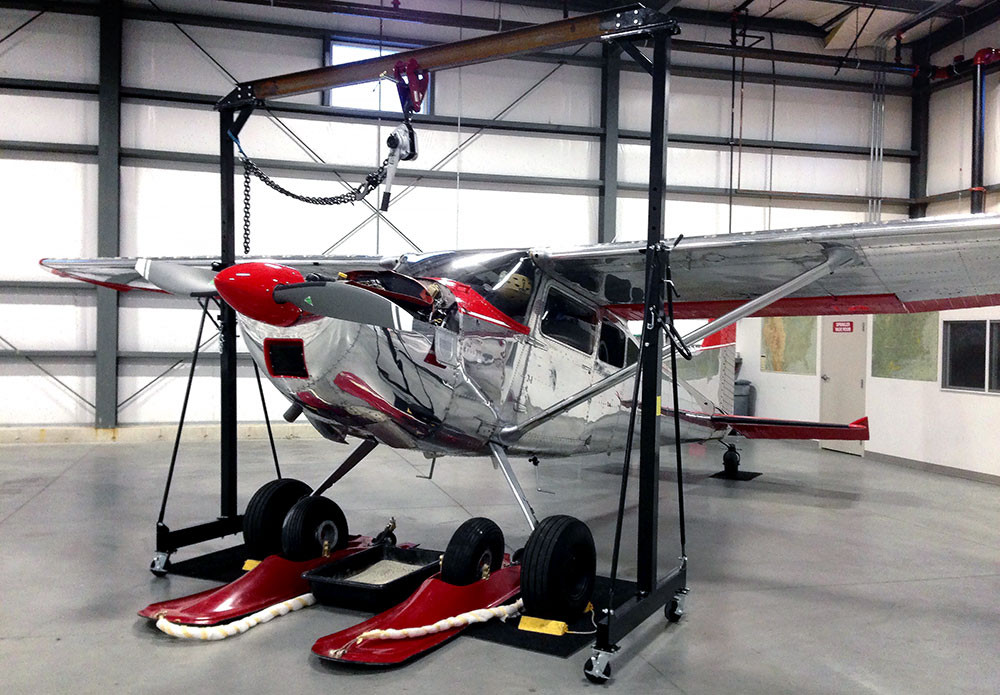
I use a Genie Superlift as it is perfect. Its manual crank allows for very small adjustments and its fork is just wide enough to lay a small cradle on and grab the outboard wing. It is also perfect for lifting the TW to get A/C into flight attitude for weighing, fuel calibration, or whatever… Once you have the bolt loose, releave the tension and drive out the bolt with a brass drift. It’s tough to get a hammer on the drift, so if you can’t get the bolt totally out, careful not to cheat and ease it out with a ratchet… This will gall the inside of the fork and weaken it.

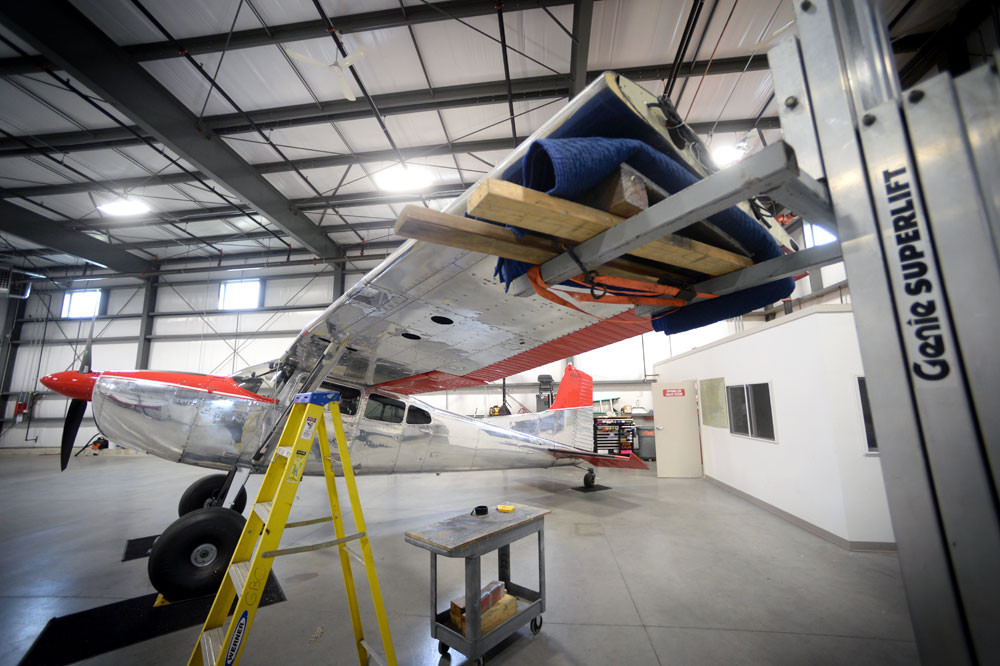
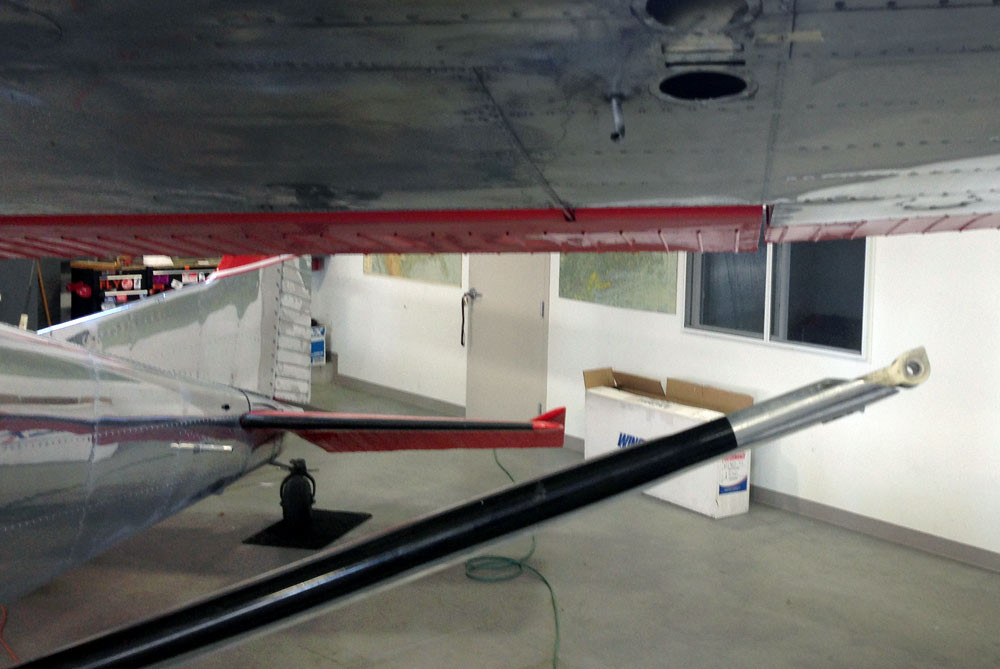
It’s a bit freaky, but crank the wing up just enough to let the strut end drop out. With the strut free, lower it just enough to gain access to the rivet line.
Orig published over on BCP.org March 2015… This article is for entertainment only and is NOT an approved or instructional material. Consult the proper installation documents for reference.
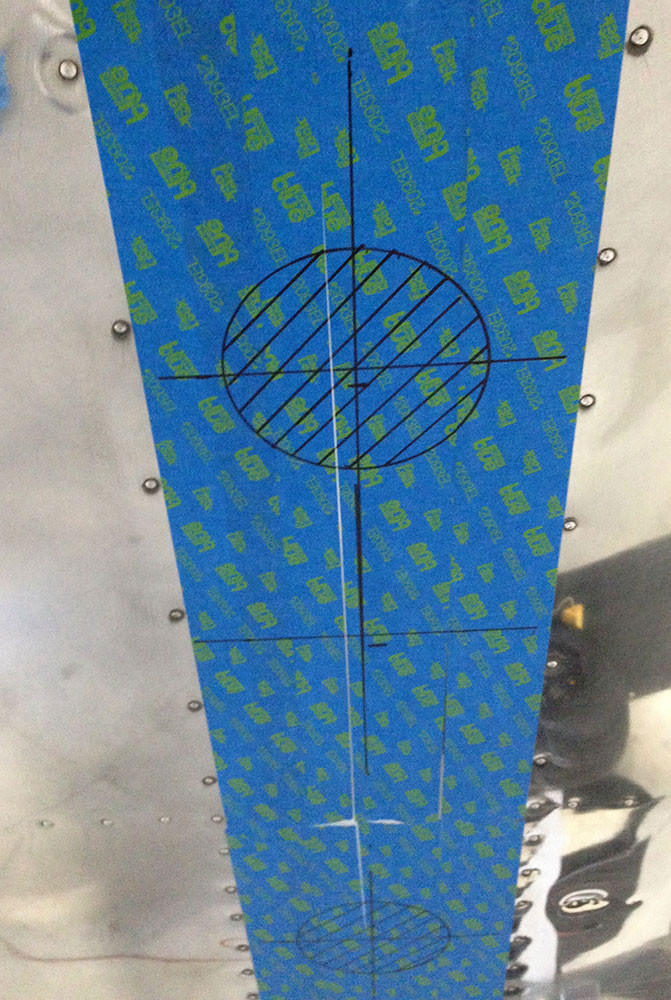
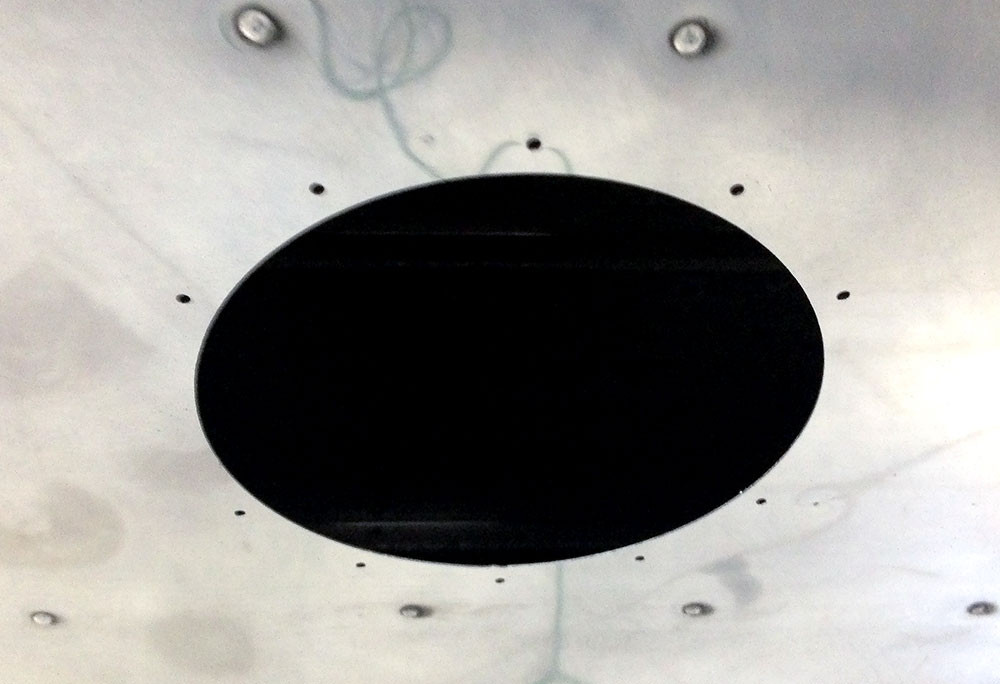
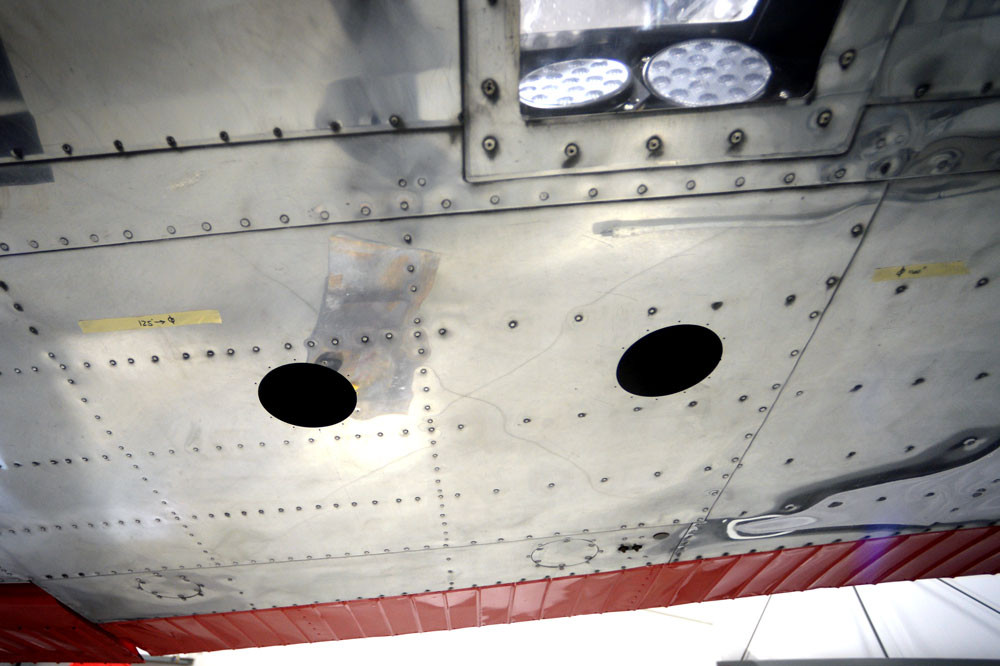
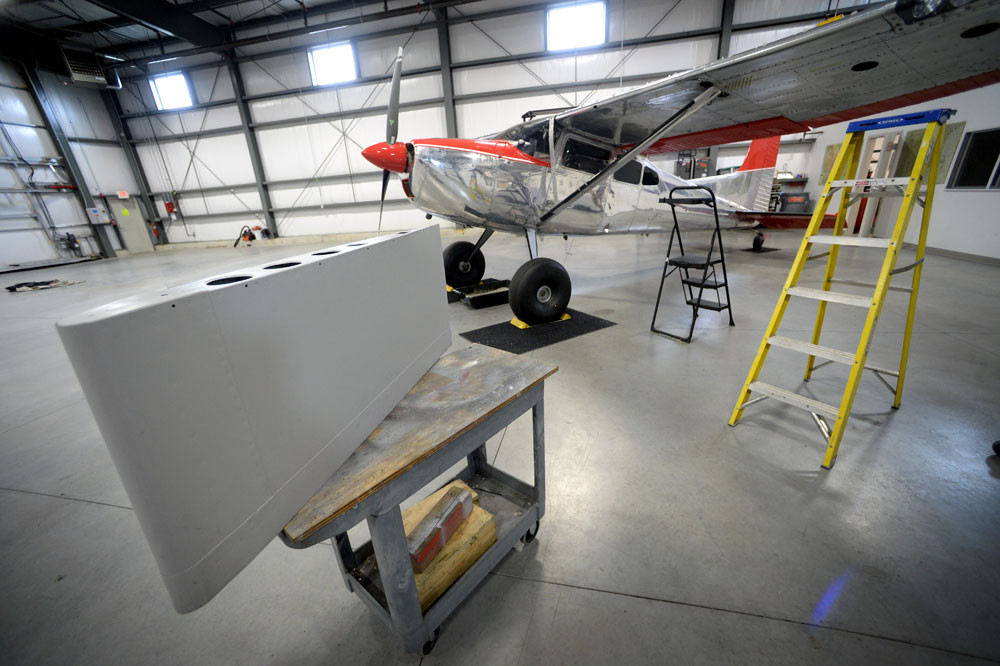
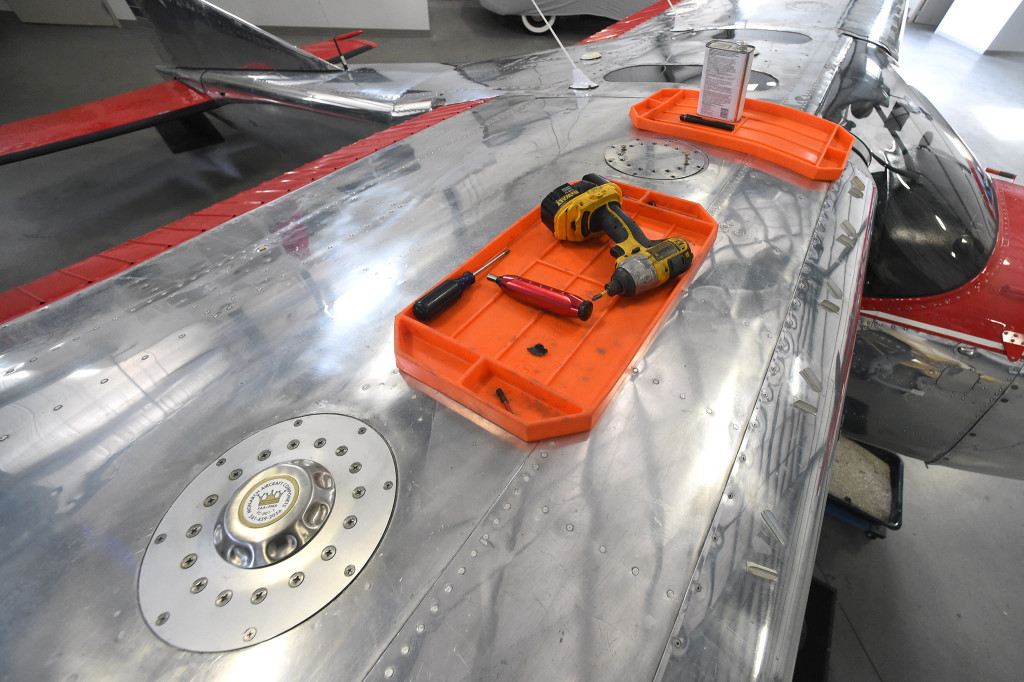
Lots of places to start, but the first step I did was to cut the access holes in the underside of the wings. The instructions say you can cut as many as needed, but really the job can be done with just two in the right spot. This is not a how-to, so confirm your own measurements, but the holes are roughly inboard of Sta 136 and 154, 2nd bay aft of the forward spar.
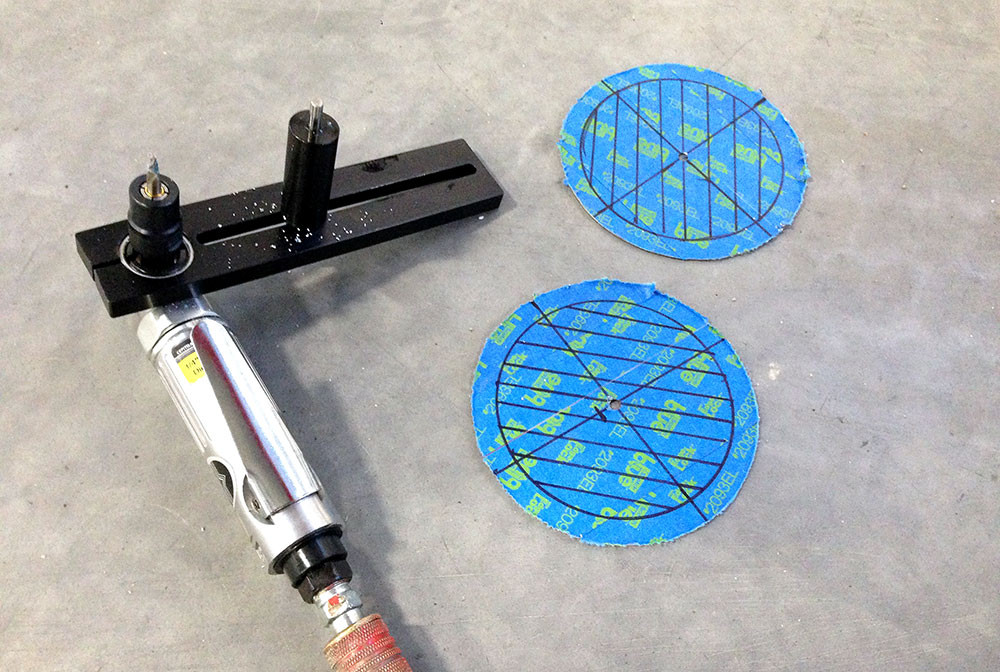
To cut the holes, I used the ARC360 from Spruce which is totally awesome. Super easy to use, fast, and perfect holes. No muss, no fuss.
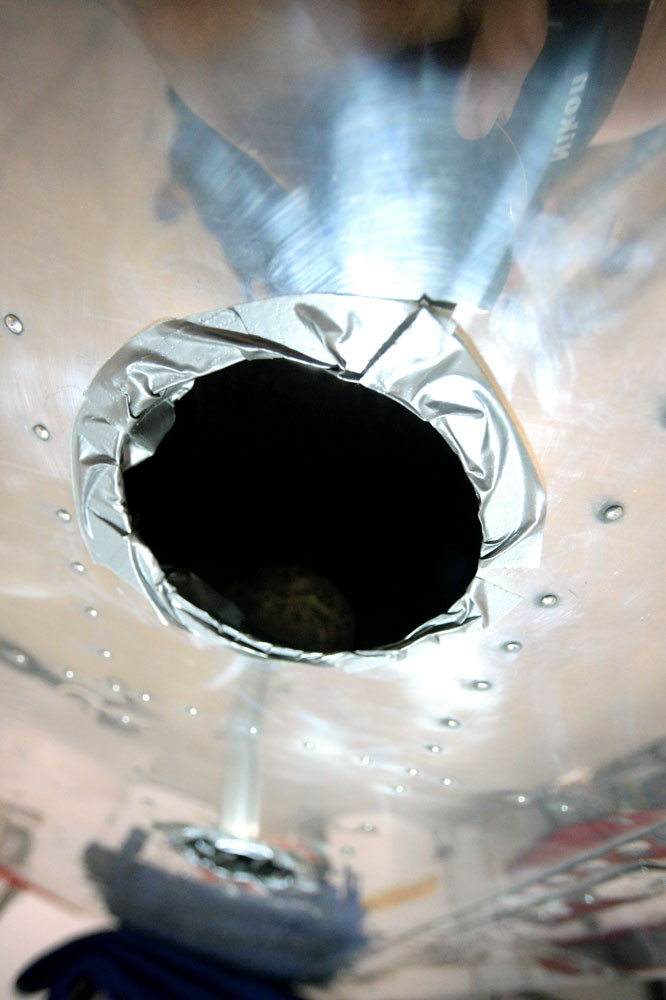
 You may want to rivet the backing plates for the inspection covers at this stage, but don’t squeeze em yet as you will want the holes as large as possible to get your arms in there… and for that, make sure you wrap some tape around the edges of the holes to save your forearms from getting all cut up.
Orig published over on BCP.org March 2015… This article is for entertainment only and is NOT an approved or instructional material. Consult the proper installation documents for reference.
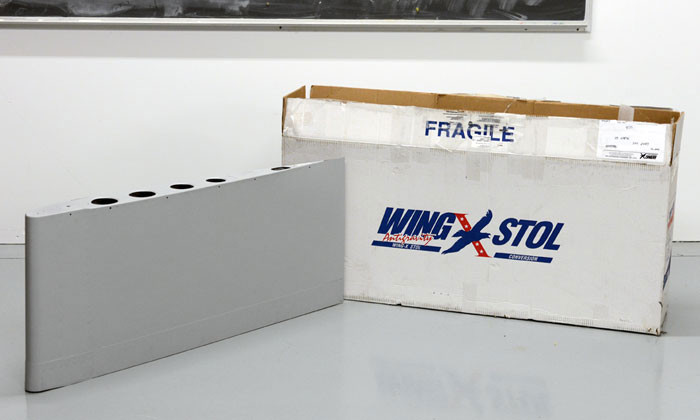
Alright… The Wing-X.
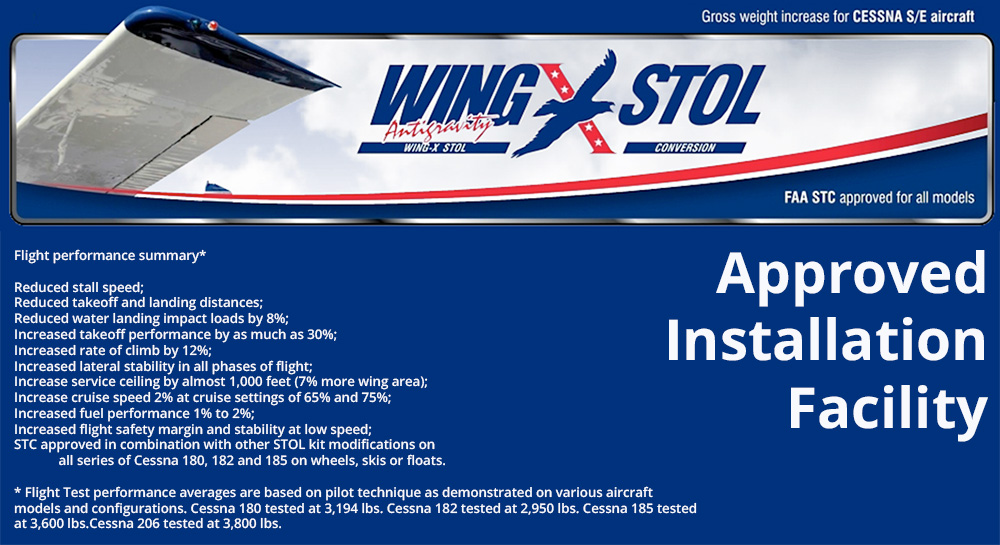
First thing to talk about is just WTF is this all about. Most 100 series Cessna owners knows about it, but exactly what is involved can be a bit of a mystery as there isn’t much install info on the web. One thing is for sure… it’s damn expensive. At $5k for the kit alone, its no joke. A shop that has done em before is in for 40-45 hrs while a first timer may be in as much as 60.
The WingX website claims the additional 12 sq feet will give a 25% reduction in ground roll (on wheels,) a 12-15% increase in climb performance, 1000′ increase in service ceiling, and a GW increase.
All sound good, so lets do it right?
Bummer is for me, I already put the big stab and Kenmore GW increase on, so nothing there… Increased T/O roll sounds nice though… An easy take off in the wagon is 250-300′, but any decrease is welcomed. A really good crisp cold day with light fuel is about 1700’/min so another 200’/min might be real nice indeed…
For the most part, the general consensus seems to be that for floats, the kit is for sure a winner. For wheels, it gets a bit more convoluted. I’ve tried to do the research, and unfortunately the “been-there-done-thats” that I trust generally say not to install it. I’m not sure if this is because they say it its tough in the x-wind, a bitch to get to stop floating/flying, or just damn near impossible to get inside a regular hanger, but because I own the kit, AND its super easy to take off once the install is done, I’m gonna put the damn thing on and make up my own mind.
You can order it for the stock wing, or as in my case, for the Sportsman. I did test fit the kit while I was doing the Sportsman install and the fit is pretty snug. Paul from WingX and Willie Stene work very closely and have worked out all of the bugs, so I expect no issues due to mod conflicts.
Here goes….
First understand the kit breaks down into three basic steps. 1) The stainless strap, 2) the packer, and 3) the tips. If applicable to your A/C
The stainless strap is used if your A/C does not have the later beefier angle bracket at and around Sta 100 and if you want or are operating above a certain GW. This strap is centered at Sta 100 (just under the strut) and is stuffed under the leading edge skin trailing edge. The bitch here is you will have to unload the strut by lifting the wing and then move it down about 12″. It also sucks ass to drill the stainless… But not impossible if patient. Go slow, and have some extra bits handy. The packer is fitted using #6 universal head cherries so make sure you have the proper pneumatic puller.

The packer is made up of two bits of alum straps that are riveted up under the forward spar cap centered around Sta 136. These are aluminum and much easier to drill, but require some modifications to the ribs to get them to fit.
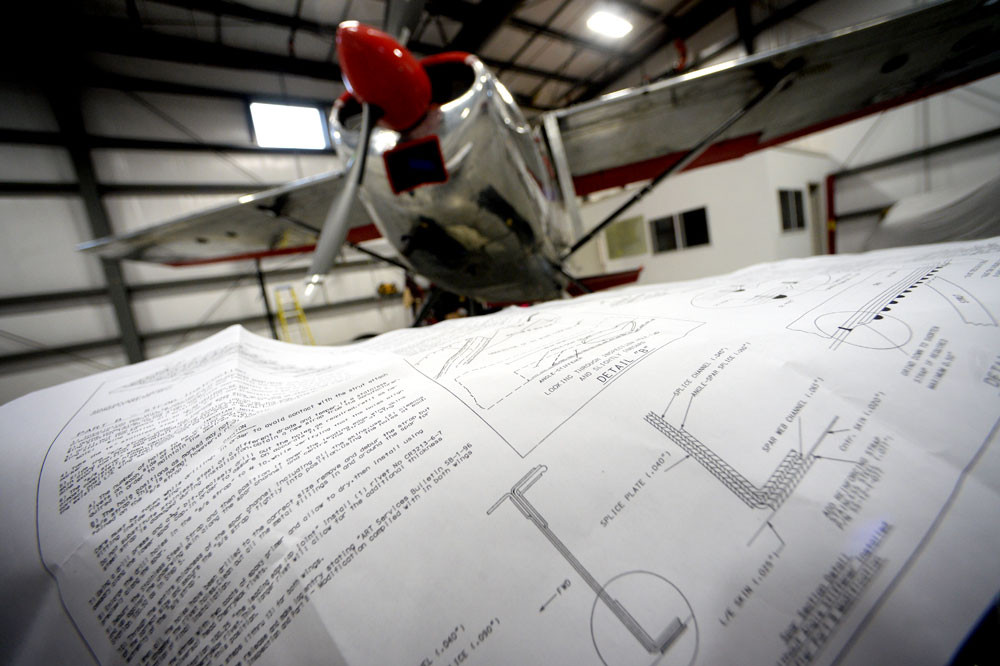
You will need to cut at least two new inspection ports in two bays to gain access to buck the rivets. The Wing-X drawings are God awful, don’t follow standard A/C convention, and have a bunch of confusing illustrations (e.g. large views of the left wing with exploded views of the right.) Might take an experienced sheet metal worker a couple of head scratches and some time to sort it all out, but in the end, it ain’t rocket science. Actually being smart might be a detriment as I’ve seen the less experienced A&P just push thru this install w/out asking the important questions. Their installations aren’t pretty, but they go quickly.
Regardless, I will say that Paul C at WingX is FANTASTIC and will be there (even on the weekend) for support. Top notch customer service IMO. Although confusing, he provides a good and complete kit.
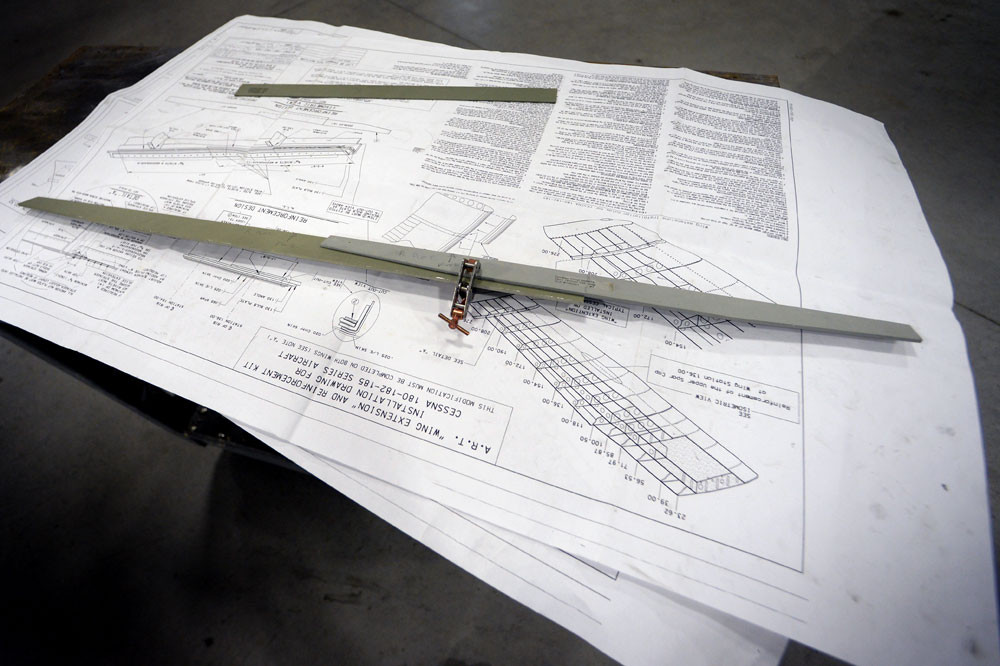
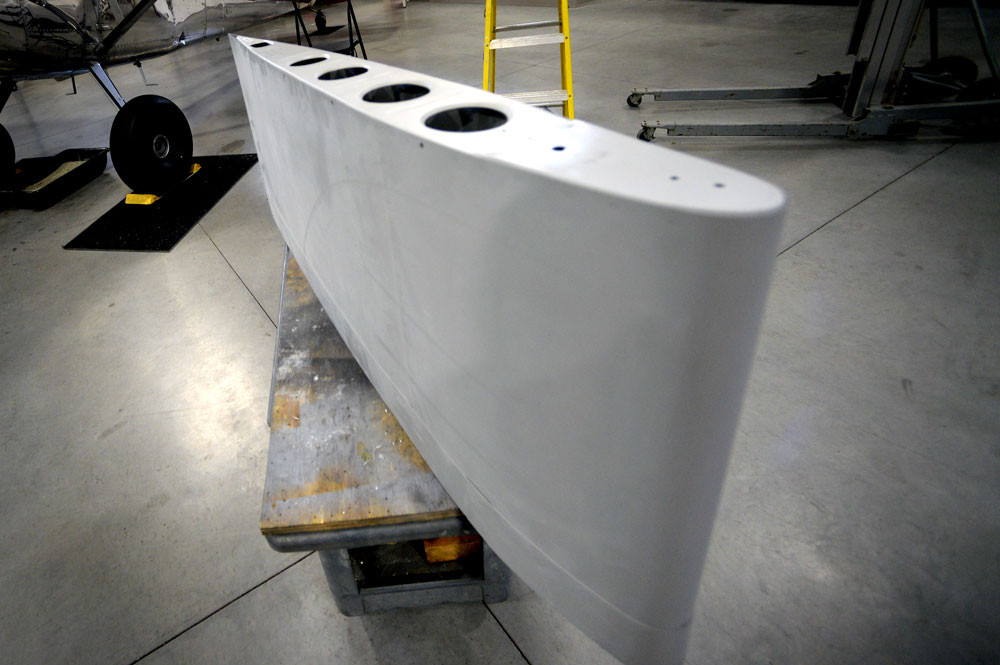
Last of the three components are the wing extensions. These come primed and will eventually just screw on like wing tips. Patience here is important as it is fairly critical to get the geometry perfect.
More tomorrow…
Post was orig published over on BCP.org Feb 2, 2015...
Well we have been slammed with snow here in New England… Just got our hanger plowed out yesterday in time for another 12″ of the stuff today…
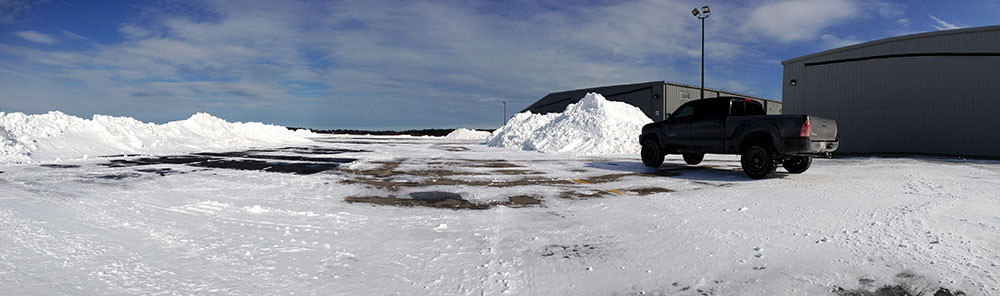
Anyway… The non-flying WX is good for projects, so I thought I would start in on the Wing-X install. I’ll try to do a detailed install report, so stay tuned!
If you haven’t heard, probably the least loved task to do on a Cessna Skywagon is replacing bladders. Fortunately for me, I was happily tapped by fate to take this dive after springing a leak.
Since I started on the resto of the Wagon, I knew that I was going to have to face this at some point, but have been pushing and pushing it off until finally my number was up.
My 66 has extended tanks, which is both a blessing and a curse. Curse because the tank is bigger. Blessing because there are two ports to allow just a bit better access.
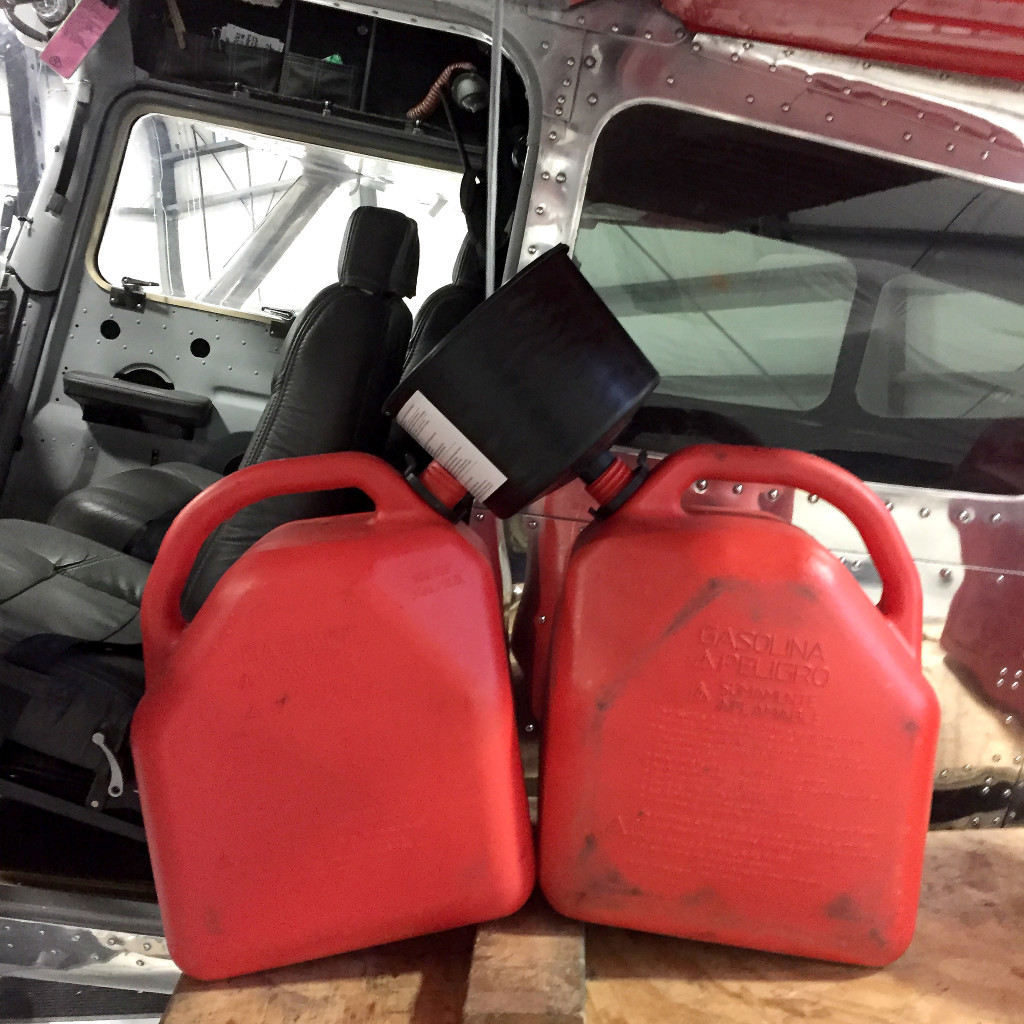
First step is pull the bung and drain all the fuel. (This is a great time to order new sump drain valves and stainless steel safety wire screws)
Next, pull the ports and caps. Also a good idea to order new stainless fasteners here as well. On my airplane, the large machine screws are MS24694C48, the small ones are MS24693C293, and the stainless safety wire screws for the drain are AN500AD8-7.
Be very careful removing the screws as chances are they are in there good and solid. Get some penetrating oil on and let them soak overnight. Use the CORRECT screwdriver, and take your time.
If your unlucky enough to round out the well, don’t fret as you can use a Dremel and cutoff wheel to carefully make a slot in the head for a regular screwdriver. Takes practice, but doable without getting into the surrounding alum. (Just make sure there are no vapors kicking around!)

With the caps out, a good idea is to line the edges of the cavity with duct tape to protect both the tank AND your arms. You will thank me later…
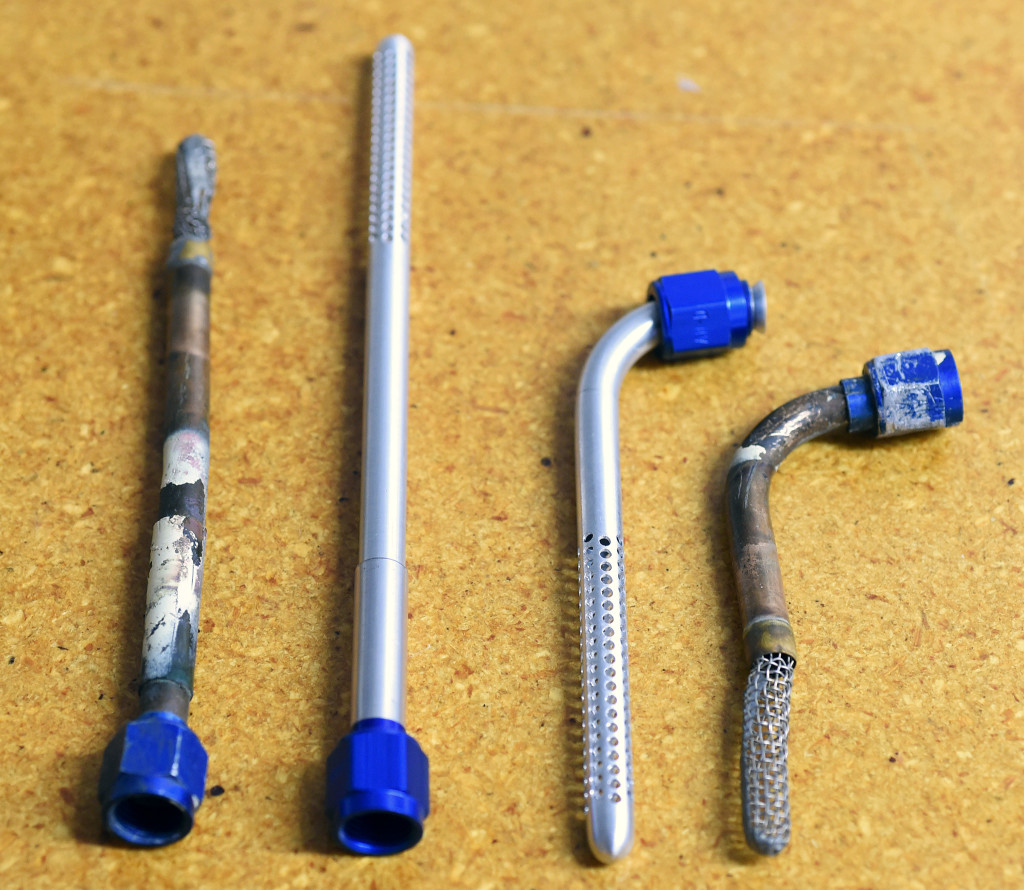
With the caps out, take your time and remove all fittings. This will be fuel outlet screens (forward and aft in later models) crossover vent, fuel sump, fuel sending unit, and outboard vent.
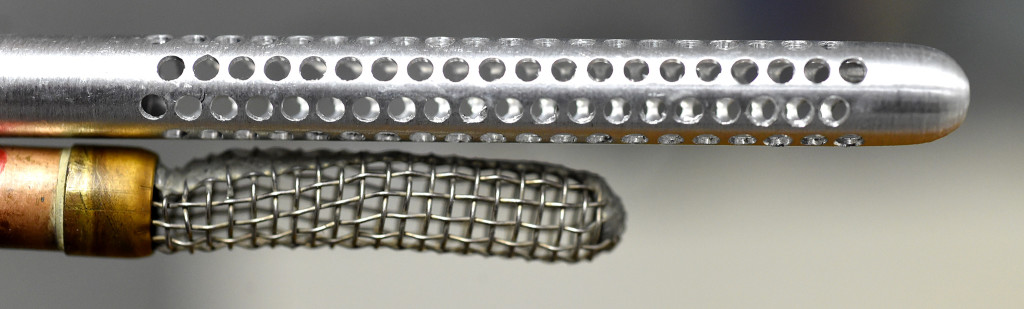
The fuel outlets are the trickiest because they are delicate. Once out, it’s a good time to give em a real good inspection. Although not always possible, I am a big fan of replacing parts with new. The problem with these screens is (like everything) Cessna wants an ungodly chunk of change… Have a late mode bird and you have now doubled that ass raping cuz you need two.
The good news is that Burl’s Aircraft in AK has a fantastic solution. Their STC’d spun aluminum screens are not only cheaper, but they provide a much better flow rate. Worth checking out!
Anyway… reach in the cavity and roll the bladder into a nice tight sausage, and then CAREFULLY work it out the port. This part sucks for sure, but enjoy it cuz getting her back in will make this part feel like cotton candy and prancing unicorns.
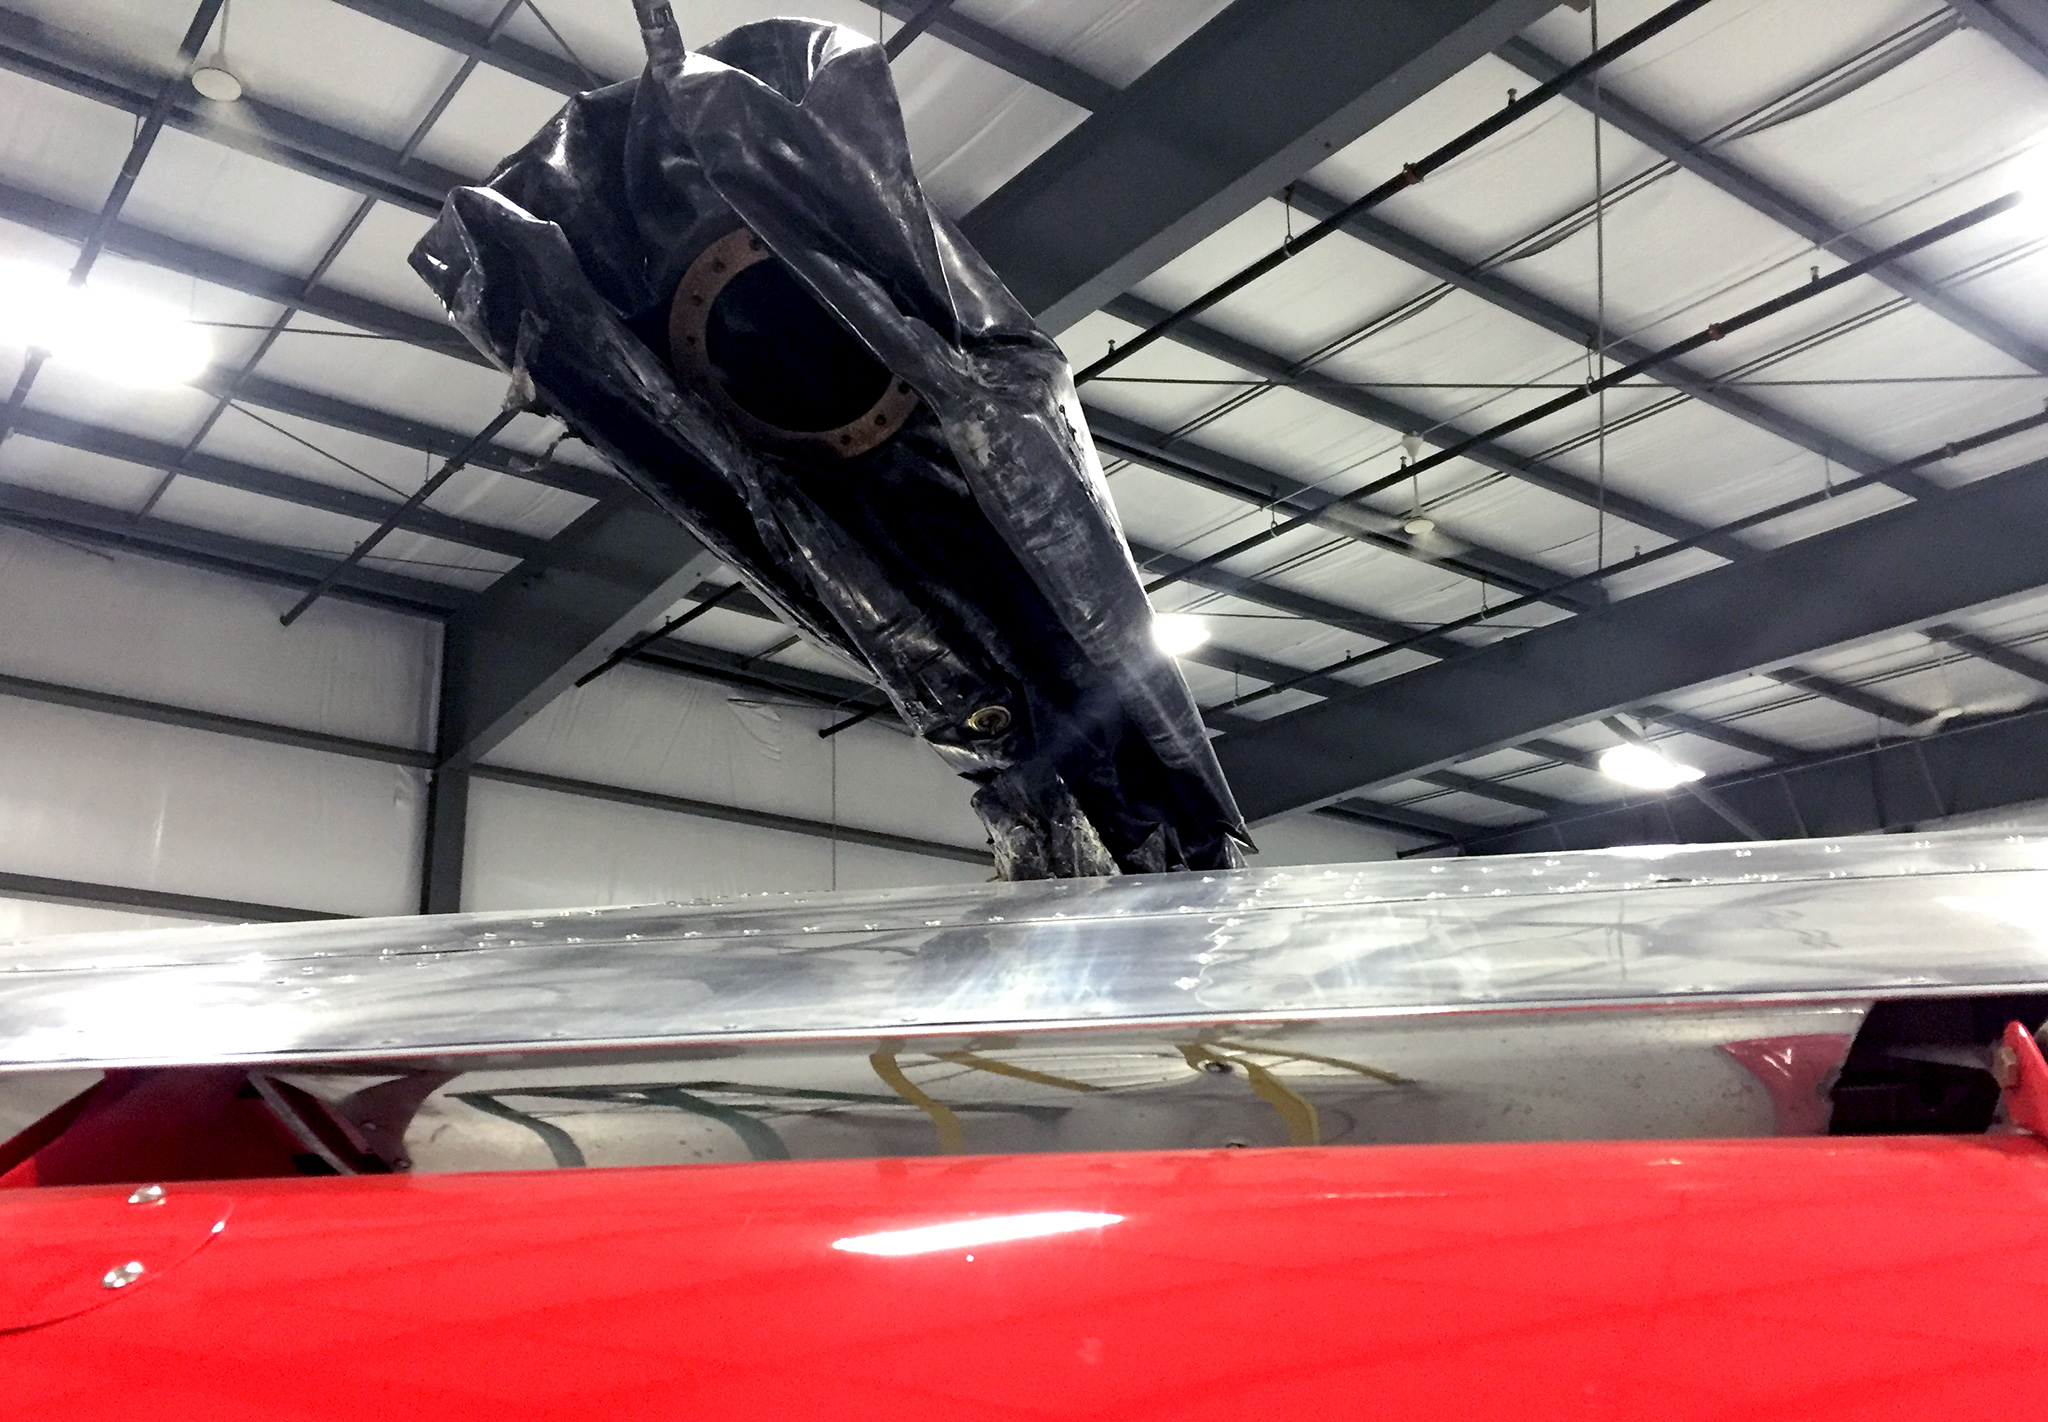
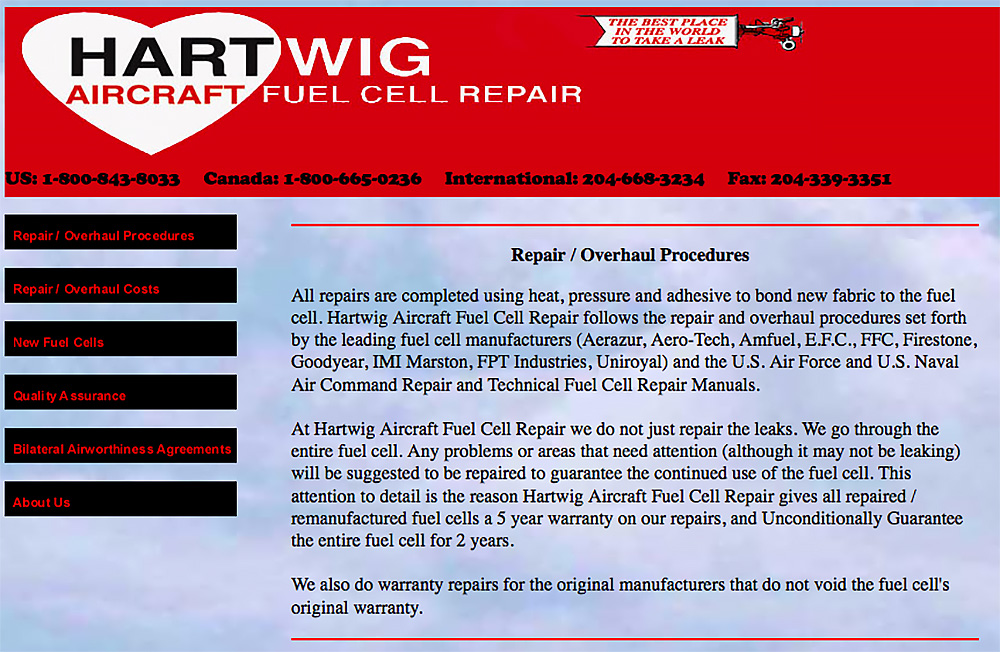
With the tank out, get her in a box and ship her out. There are two big places to send out the bladder. Although their website is cerca 1990, I have had great luck with the service from Heartwig. Eric is a good dude and worth a phone call.
If you weren’t having fun yet, strap it on…
Lots of AP’s lazy-out here because when it comes down to it (you know who you are,) it’s really tough to send the customer a bill for all the time it actually takes to clean and prep a tank bay. But if you want it done right, make sure you take your time and get it clean enough to eat off. (Took me 9 hrs of labor to remove tape & clean.)
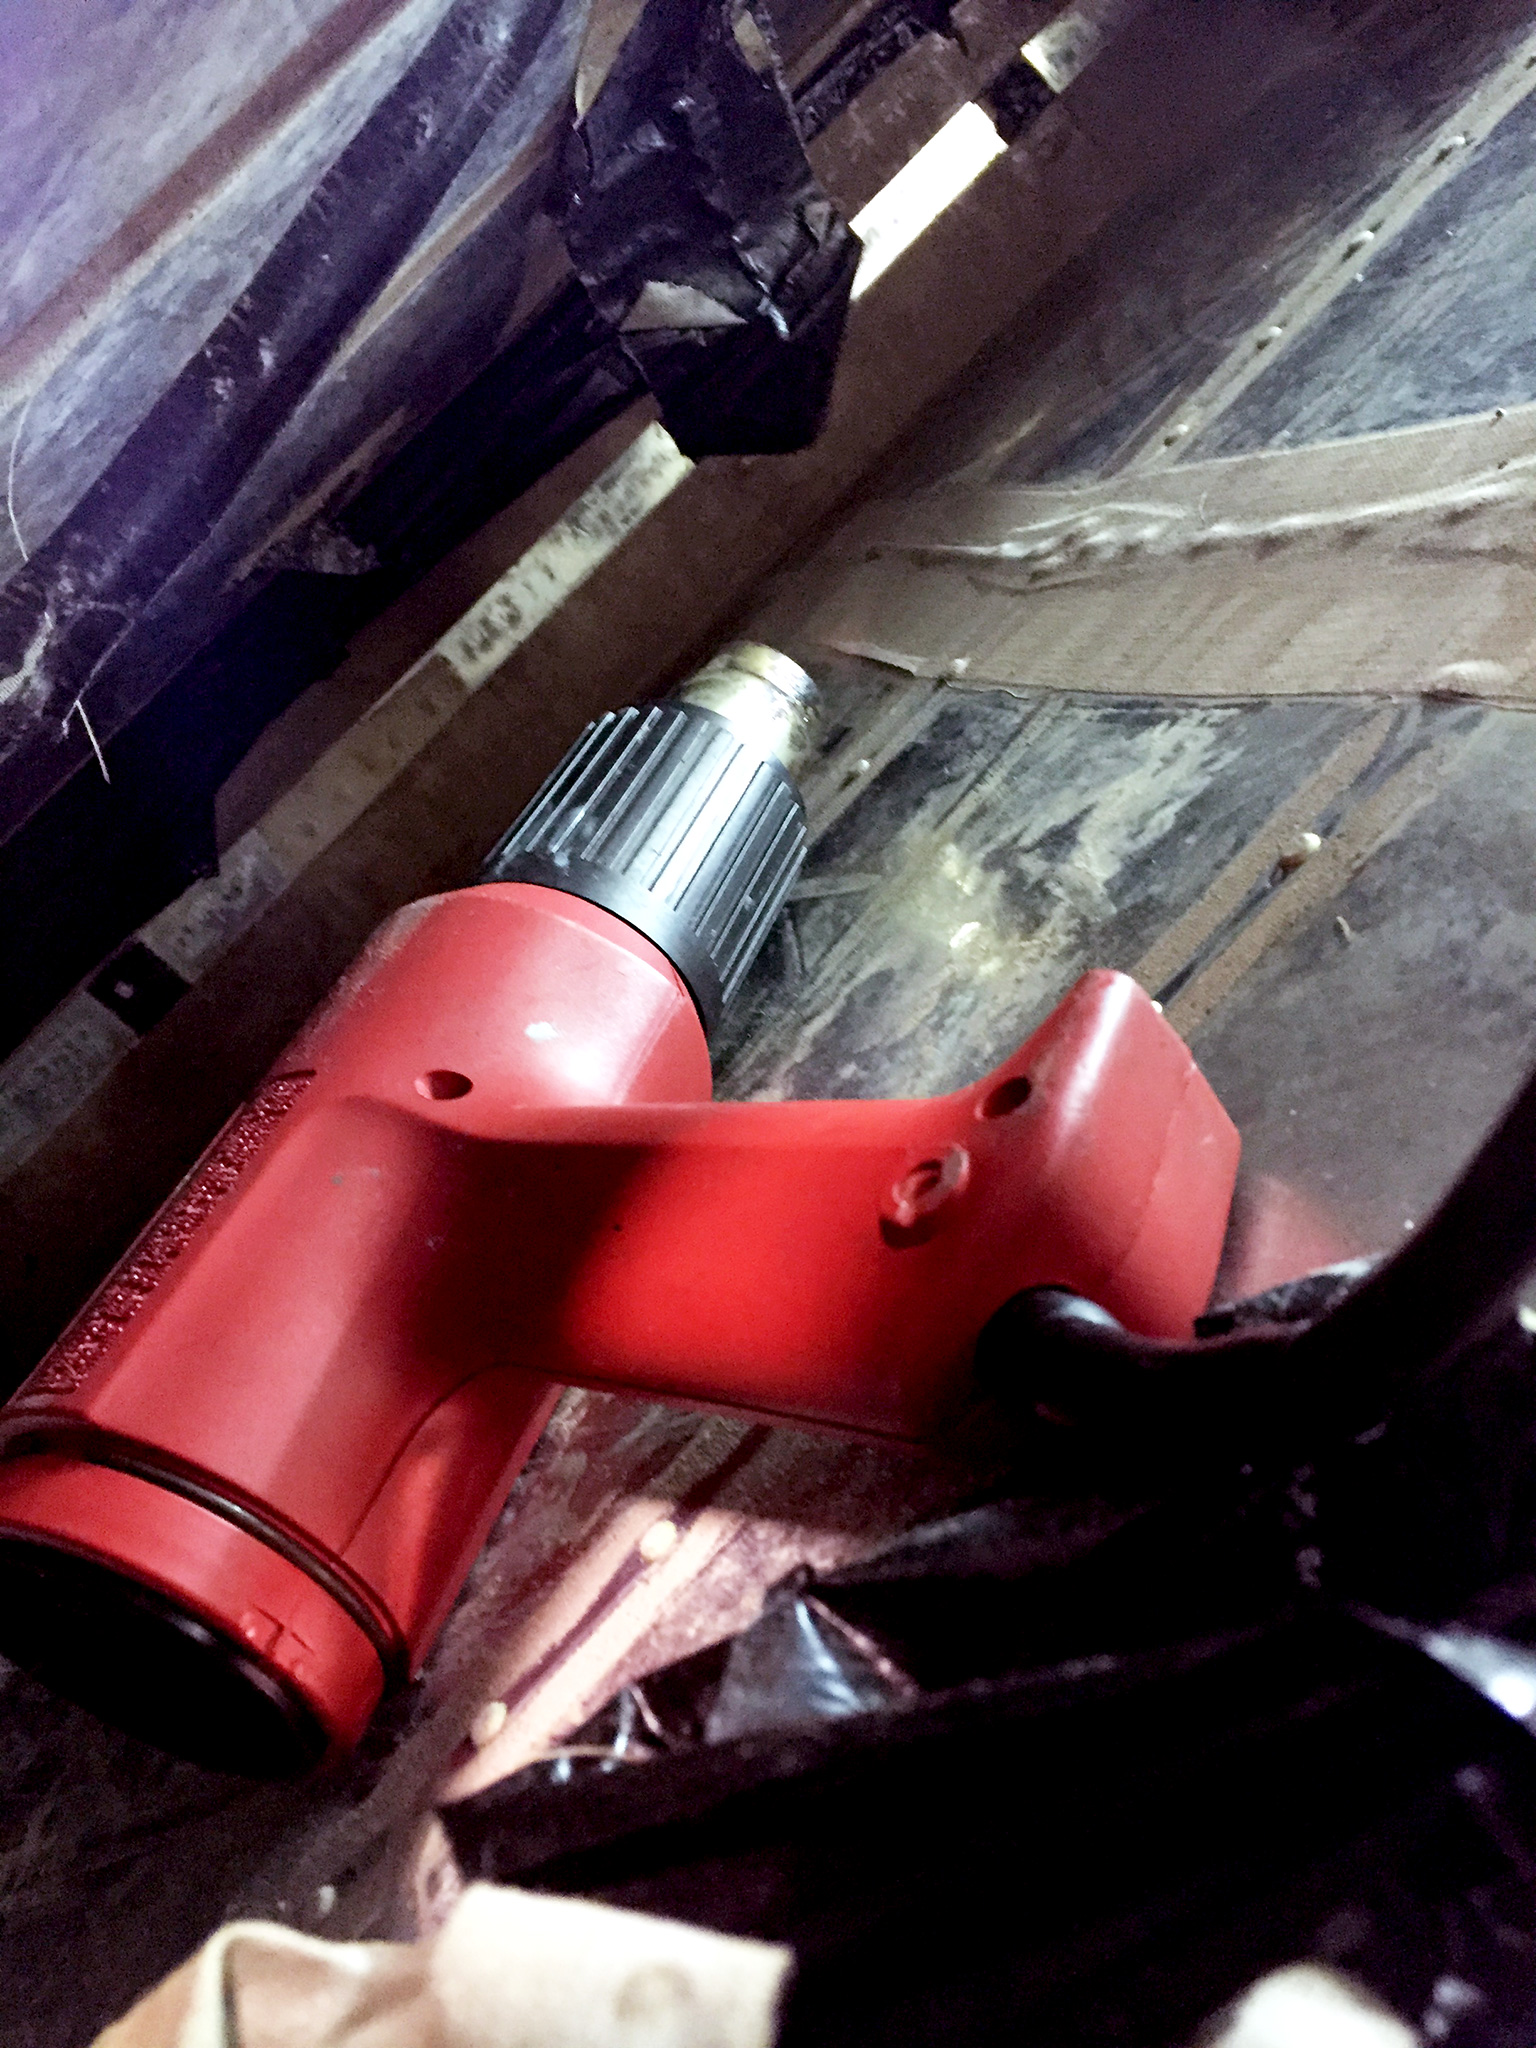
Start by pulling the old tape that you can grab. Heating it up with a heat gun makes this a bit easier and if your lucky, you will be able to get most out without falling into small strips.
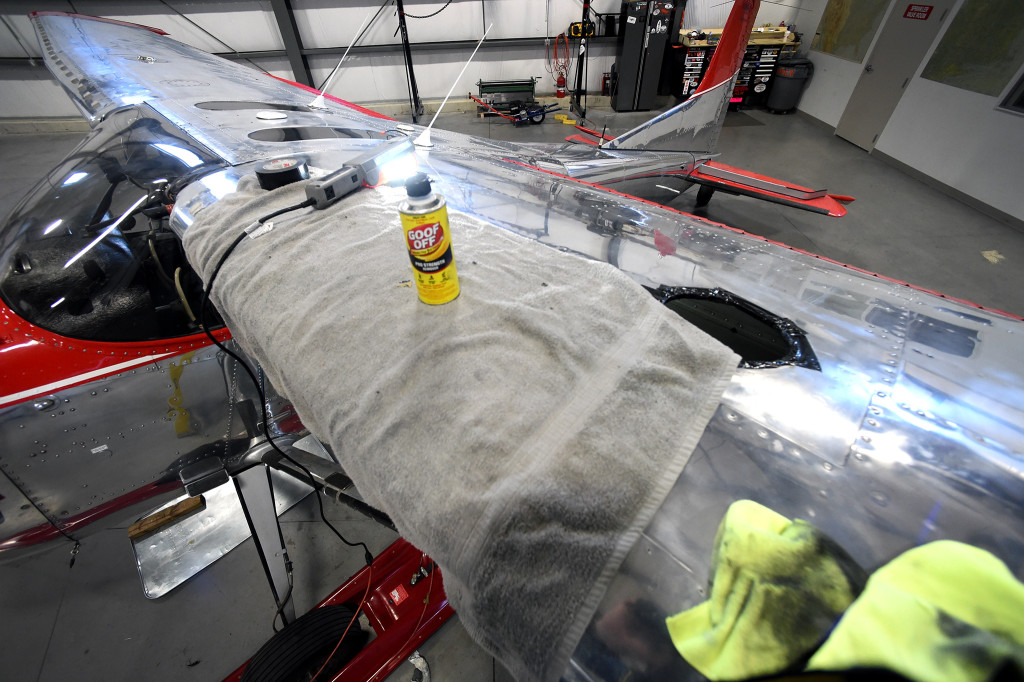
Once the tape is off, you will be left with the dried glue. I find that the best solvent to get this stuff off is called “Goof Off.” Stuff works fantastic, but a real killer… so make sure you have good gloves and a solid respirator.
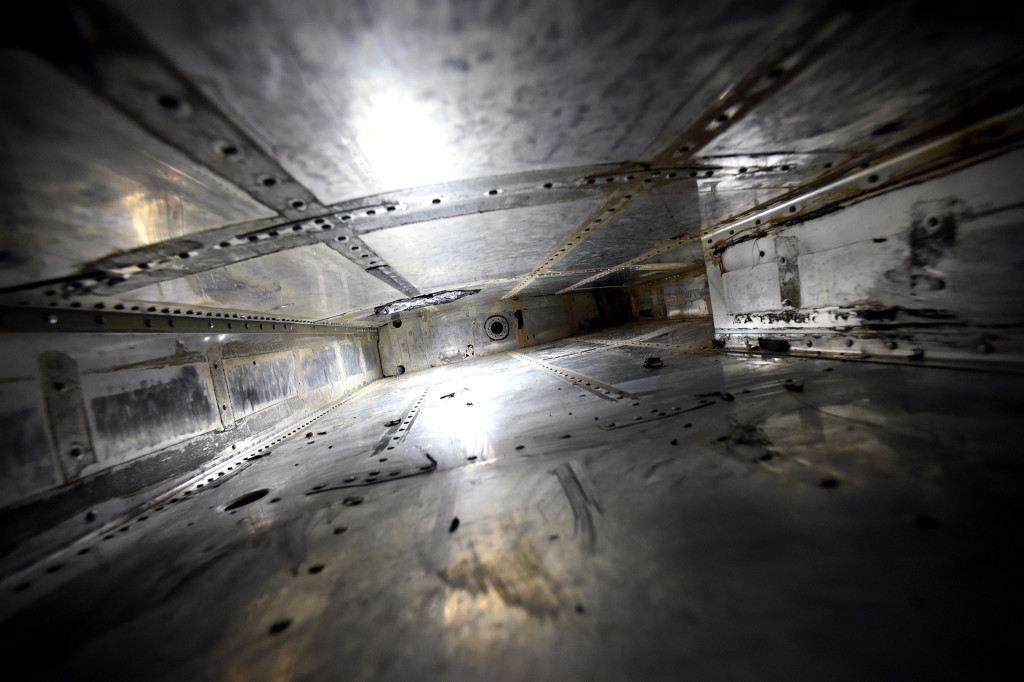
Now that you have cleaned the bay, you can start laying in the new tape. The point of the tape is to protect the bladder from chafing on corners and rivet heads. Some think that you can just use Duct tape, but this is not the case. Tell Eric at Heartwig you need a roll, and he will provide you with one on return of the bladder.
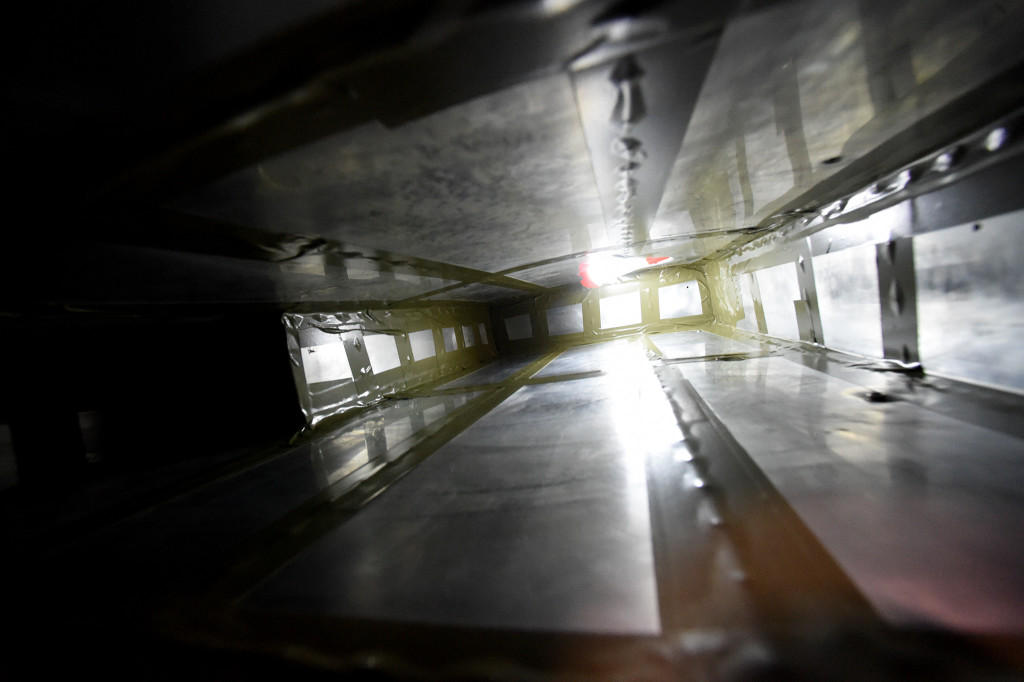
Laying the new tape in perfectly is next to impossible, so don’t get too bent if it isn’t 100% pretty. Just take your time, and do your best. If you did a kick ass job with the prep, the tape will hold solid for another decade and the next guy wont shake his head at you when he gets back in here.
Sometimes they are too far gone, but with some luck, Heartwig will be able to repair the bladders. They will come nice and shiny and oiled. If you can, put the bladder in a heated room overnight to get it nice and playable. You will also want to crank the heat in the hanger.
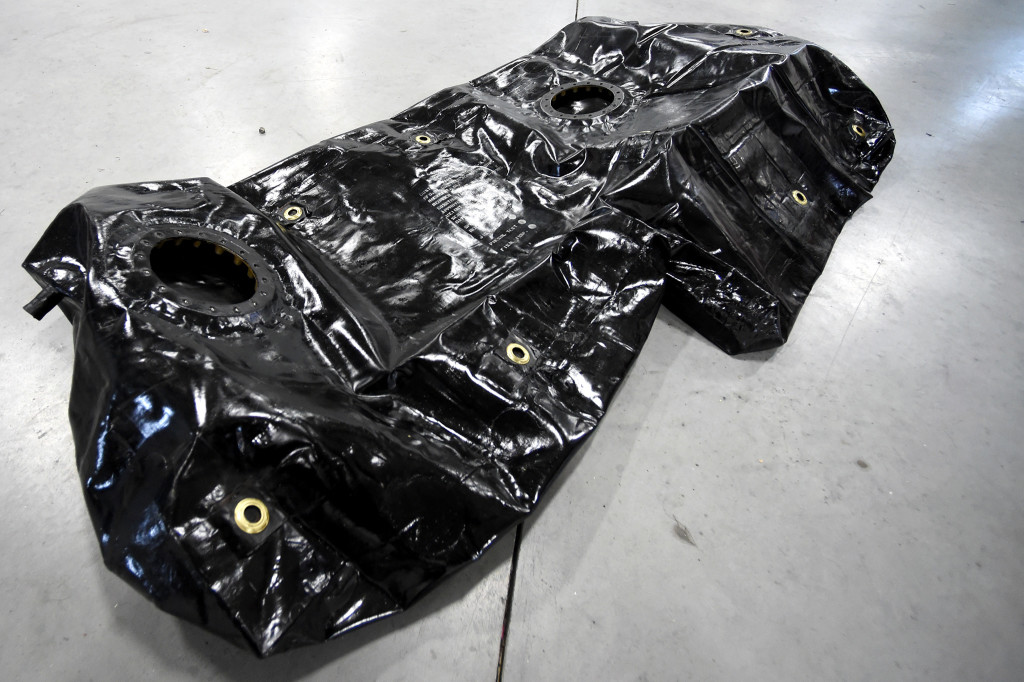
Lay out the bladder, roll it up into a sausage again, and start sliding it in.
Once in, lay it flat and start asking Job for patience. First, connect the snaps (bottom of the tank) to their position in the corners. Once you have these, patiently work the top fittings, getting the furthest ones first. Ain’t gonna candy coat it… this really blows.
Truth be told, this isn’t the hardest thing to do, but there is no doubt that this is the most trying task one can undertake. All I can say is know it can be done. You don’t need to take the damn wing off, remove any ribs or skins… Just take your time, don’t get frustrated, and motor thru. Oh… and if you have short arms your F’d.
With the bladder in and all the snaps fitted, go ahead and reconnect all the plumbing, caps, and sending units. Make sure you use NEW gaskets! If you are really progressive, you might think about installing new McFarlane fuel sending units here, but I guess I should remember how easy it is for me to spend your money on the interweb.
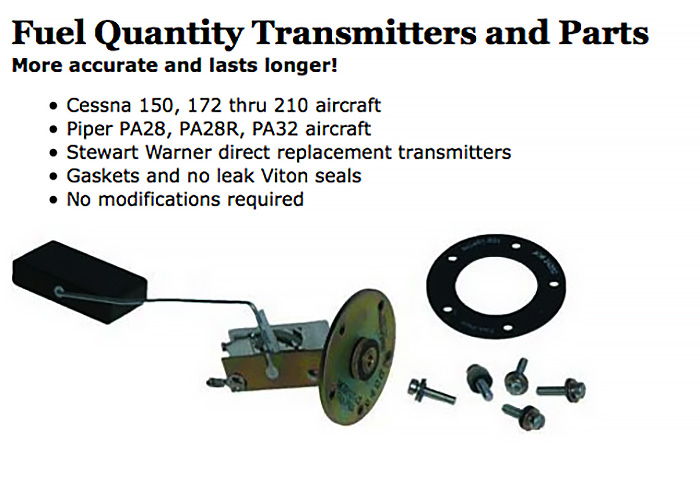
If you don’t have a good torq wrench, make sure you pick one up. It’s always critical, but here, an overzealous wrist can cause a leak pretty fast… And that blows.
At any rate, that’s a quickie on Wagon bladders. Good luck!
Really want to be flying, but I sprung a leak in one of the Wagon’s bladders last week. I pulled it and its off to Hartwig for a refirb.
Not much to do while I wait…

Put this video together to show the AeroLEDs landing and taxi light performance as well as the UMA Electroluminescent strips.
Outside: Aircraft has four SUNSPOT 36HX units. Two in RMD wingtips and two in the stock landing/taxi position. DPDT switch is set for wig-wag in flight, and steady-on for final. AeroLEDS NSPs in the wing tips, and Sunbeacon on belly and V Stab.
Inside: UMA instrument bezels, 1.5″w under the glareshield and 0.5″w under the subpanel to light the floor, flap and trim box. Color is White/Blue. There is also a red LED in the overhead that floods the cabin when on.
[vimeo 115908588 w=700]
Some great chewy air! DA this AM was -4600.
Flew over to Sherman Field where I was taunted by the cool kids for not having my skis worked out yet.
Might try to get em on before the snow all goes away.
For those that are interested in the MT, here is a quick clip from this weekend. Nothing too mind bending as I had my Dad and didn’t want to get him nervous with the stall warning all blaring on T/O. At any rate, it was me, my Dad, full fuel (444lbs) at 2635 GW. Pretty good at just over 500′.
Got some more flying in this weekend and a better chance to get a feel for the MT… (solid 10hrs )
Was working it pretty hard and I had one T/O in the 150′ range… so I think I’m sold.
Got a bit nostalgic for the day I brought her home and shot this 1000′ T/O roll. Such a different airplane.
[vimeo 54345134 w=700]
WX finally broke and I got a chance to fly her today with the MT.
Was a really nice day, sea level, wind 280 at 8 (rwy 240) DA was -800. I was pretty light with 27 gal of fuel, 2170 gross at T/O.
Very first impression? Hard to say… For sure I wasn’t tossed back into the seat with some neck snapping acceleration. Really the biggest thing I noticed right away was the whacky sounding strange high whooshy noise. On the first take off I had to pull my headset off to make sure nothing was going to fall off. Later on I did a 170 mph buzz job on my friends field and he said it was much much quieter.
That said, I think I’m going to like the prop. I only was able to do a couple of laps around the patch, but although I didn’t feel the A/C accelerate any faster, the data didn’t lie and I was getting some pretty short T/O numbers compared to before.
Of course it wasn’t scientific by any means and just by eye, but with 2 notches of flaps, I was easily lifting her off in the sub 200 range with my best at around 175 ft. I’ll try a camera on the strut to get a more precise measure, but with some more confidence, I think I can do a bit better. Climb out was also a bit better. I wasn’t pushing it, but at 85mph/2550 rpm, I was seeing around 1300ft/min. All pretty respectable for a 180 I would say.
So is it worth it? Yes. Worth the price? Jury is still out.


Well, she’s on… Was already to give her a test this weekend but was hobbled with snow and crap WX here in New England. Fingers crossed for tomorrow.
The primary reason I pulled the trigger on the MT was to save some weight and move the CG back, so I was obviously anxious about the data.
In the end, the MT spinner (with 2 coats of added single stage color) was actually 1 lb heavier than the stock Mac I removed. Total taken off was -59lbs, total added was +46lbs, so the net savings was a paltry 13lbs. For sure this was an expensive 13lbs, and we all know the folks who say “Just toss survival gear in the back.” True indeed, but the fact is oz’s = lbs, and although not the 20-25 suggested, 13lbs is 13lbs.
As for CG: The prop lives at -40″ of arm, so in the end, the loss of the 13 moved the empty CG aft 0.54″. Epic? Not really…
What happens to the A/C CG empty is merely interesting. The real marker is what happens when calculated as light as you would ever conceivably fly… single pilot, reserve fuel, rear seats, and perhaps even front pax seat removed. The “theory” people talk about is to set up the A/C as light as possible w/ the CG as legally forward as possible so you can stuff her full and never worry about busting aft.
In my case, with me behind the wheel and 11 gal of fuel (45 min of reserve at a conservative 15gph) the movement difference of CG between the stock prop and the MT is still only 0.50″.
To put that into perspective, (with the stock prop on,) I could have gotten the same effect by tossing 12 lbs in the extended baggage. The argument for the proverbial “bug-out-bag.”
The net/net…. I removed 13lbs on the nose to avoid 12 lbs in the extended baggage. A ton of cash for an otherwise easy fix, but then again, that would have meant an additional 25lbs, and 25lbs is 25lbs.
Hopefully I’ll get her up in the air tomorrow and have a better all around feeling for the swap. Fingers crossed for a performance inducing smile.
Stay tuned..