Here goes nuthin…
June 1, 2018
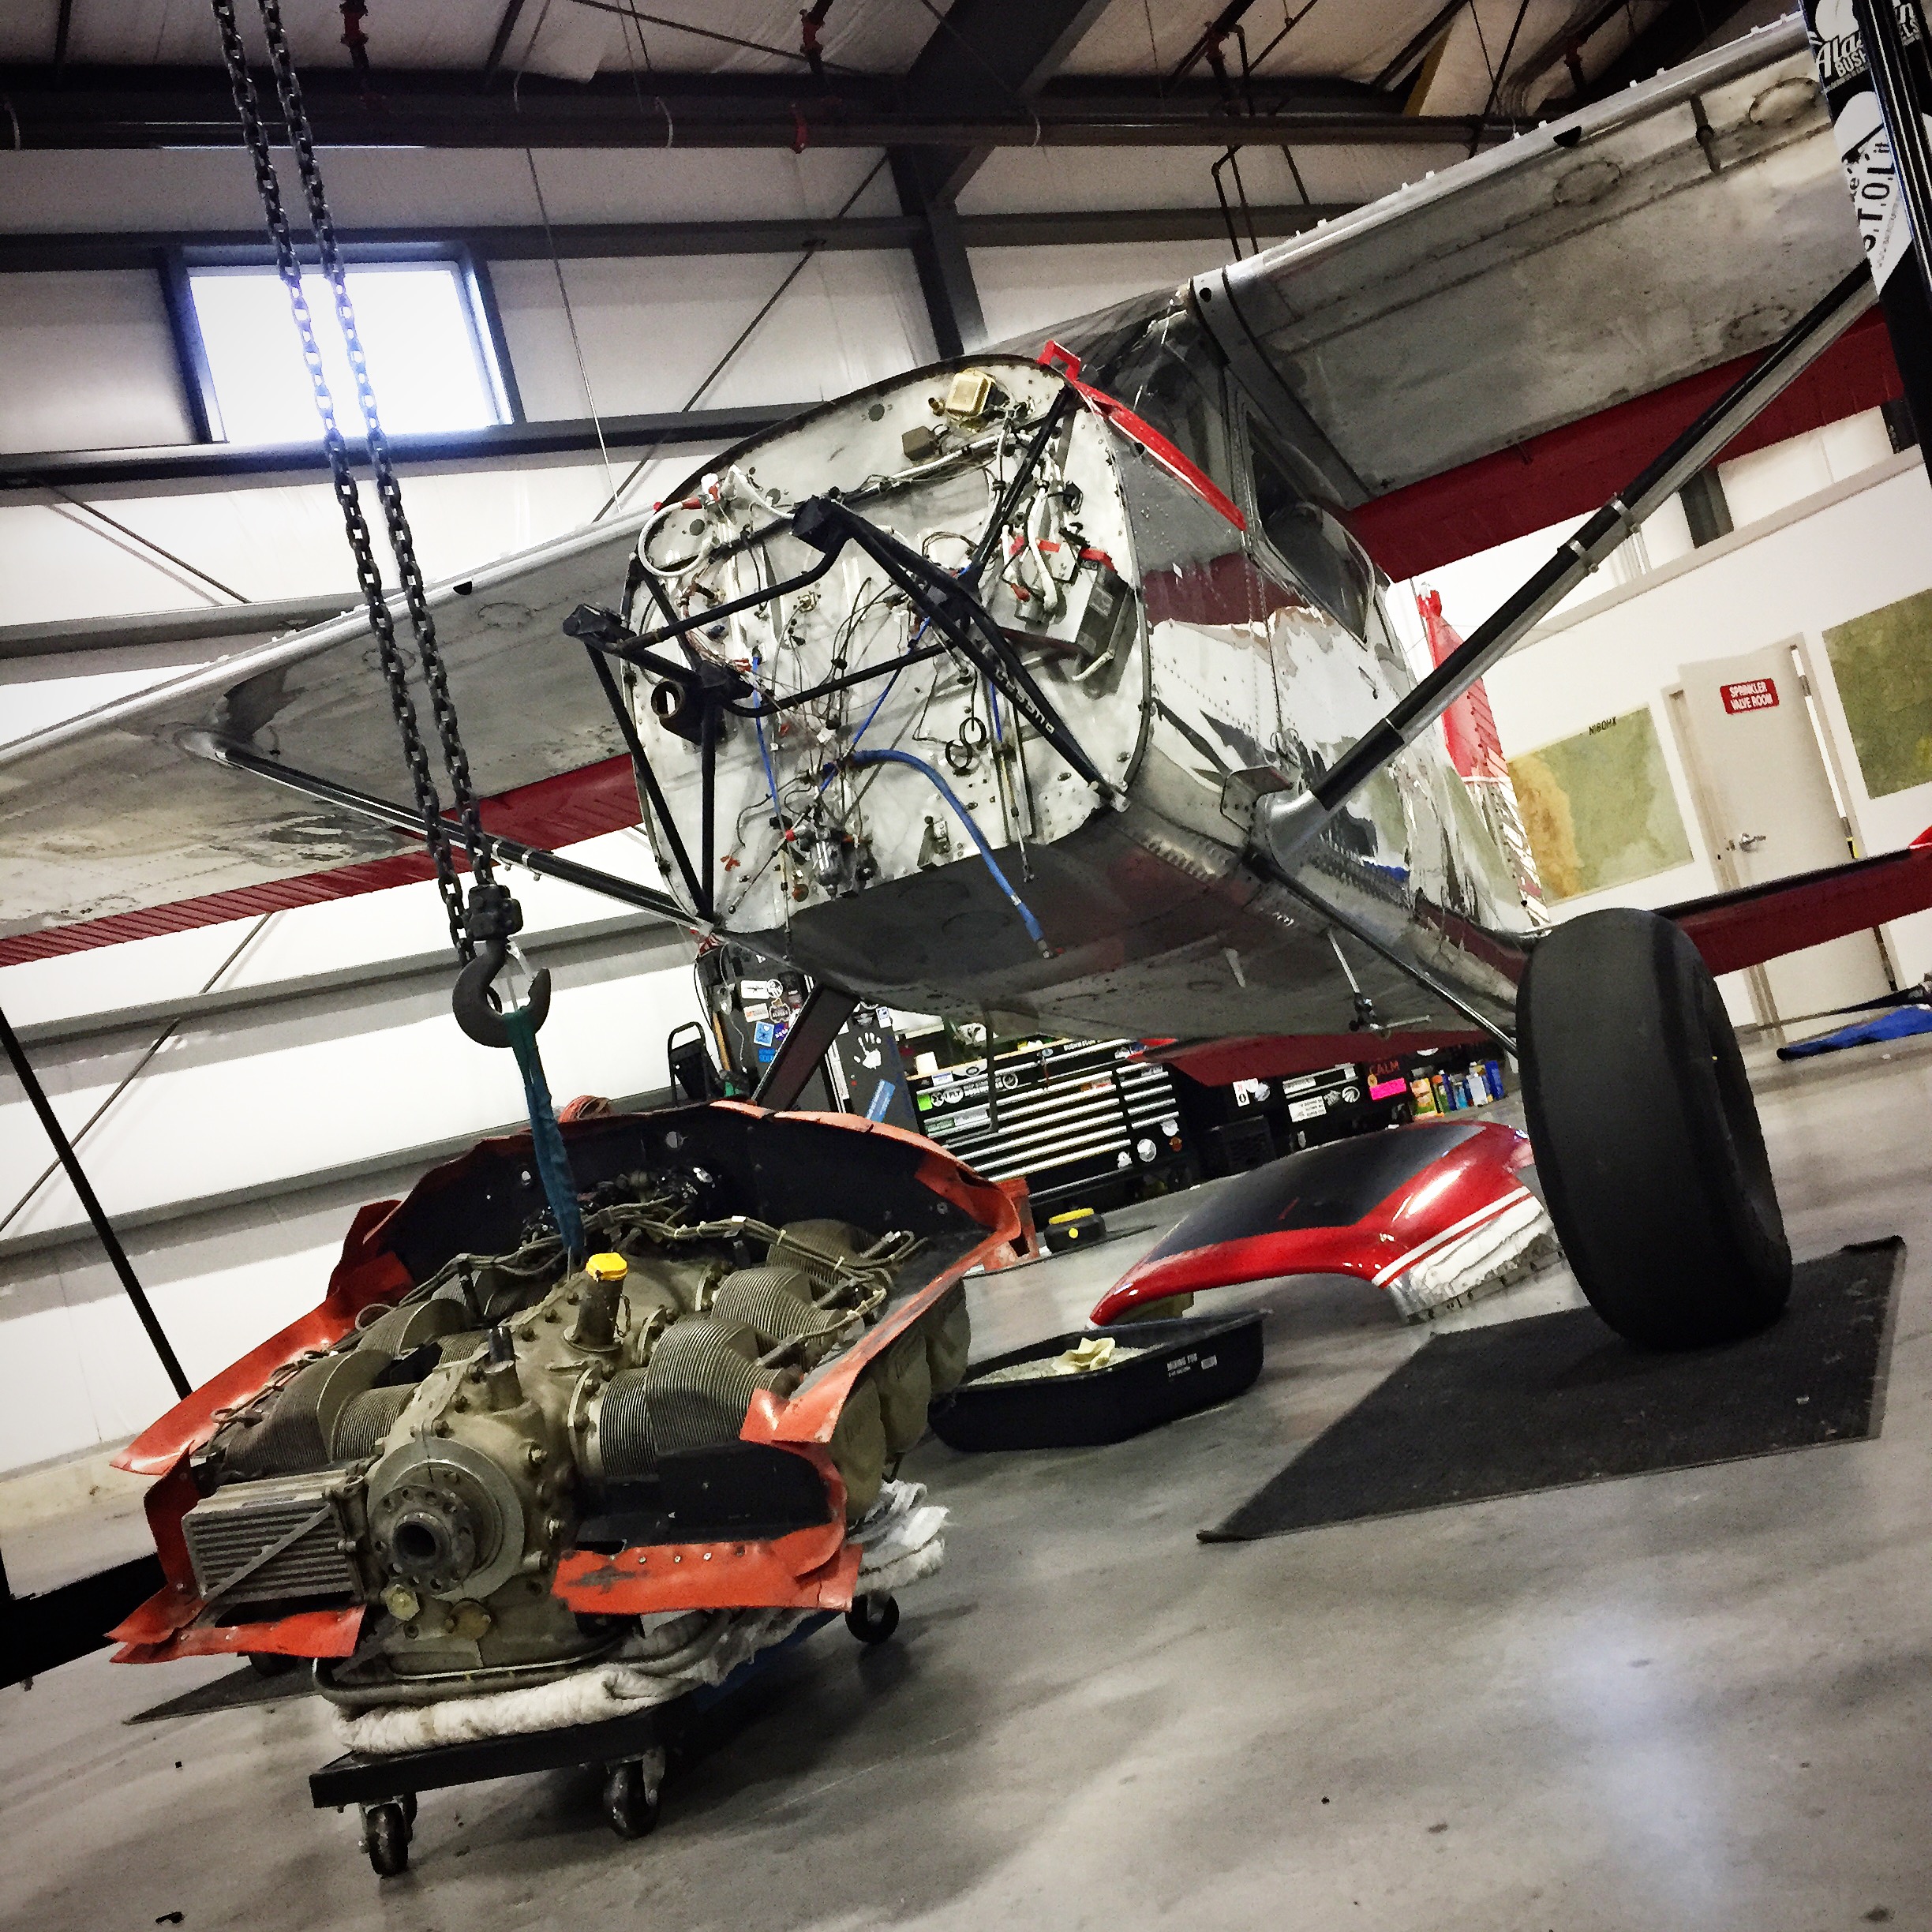
I pulled my 470 and quickly sold my 470 back in November thinking I would only be down for a month or two, but after a long spring, I finally have some time on my hands, and am going to get my new motor back in the bird! We finished the O-520 PPonk last month, and Im very excited to get it installed.
I took my time in the process, and hand painted each individual part before assembly. The net result is a real pretty engine.
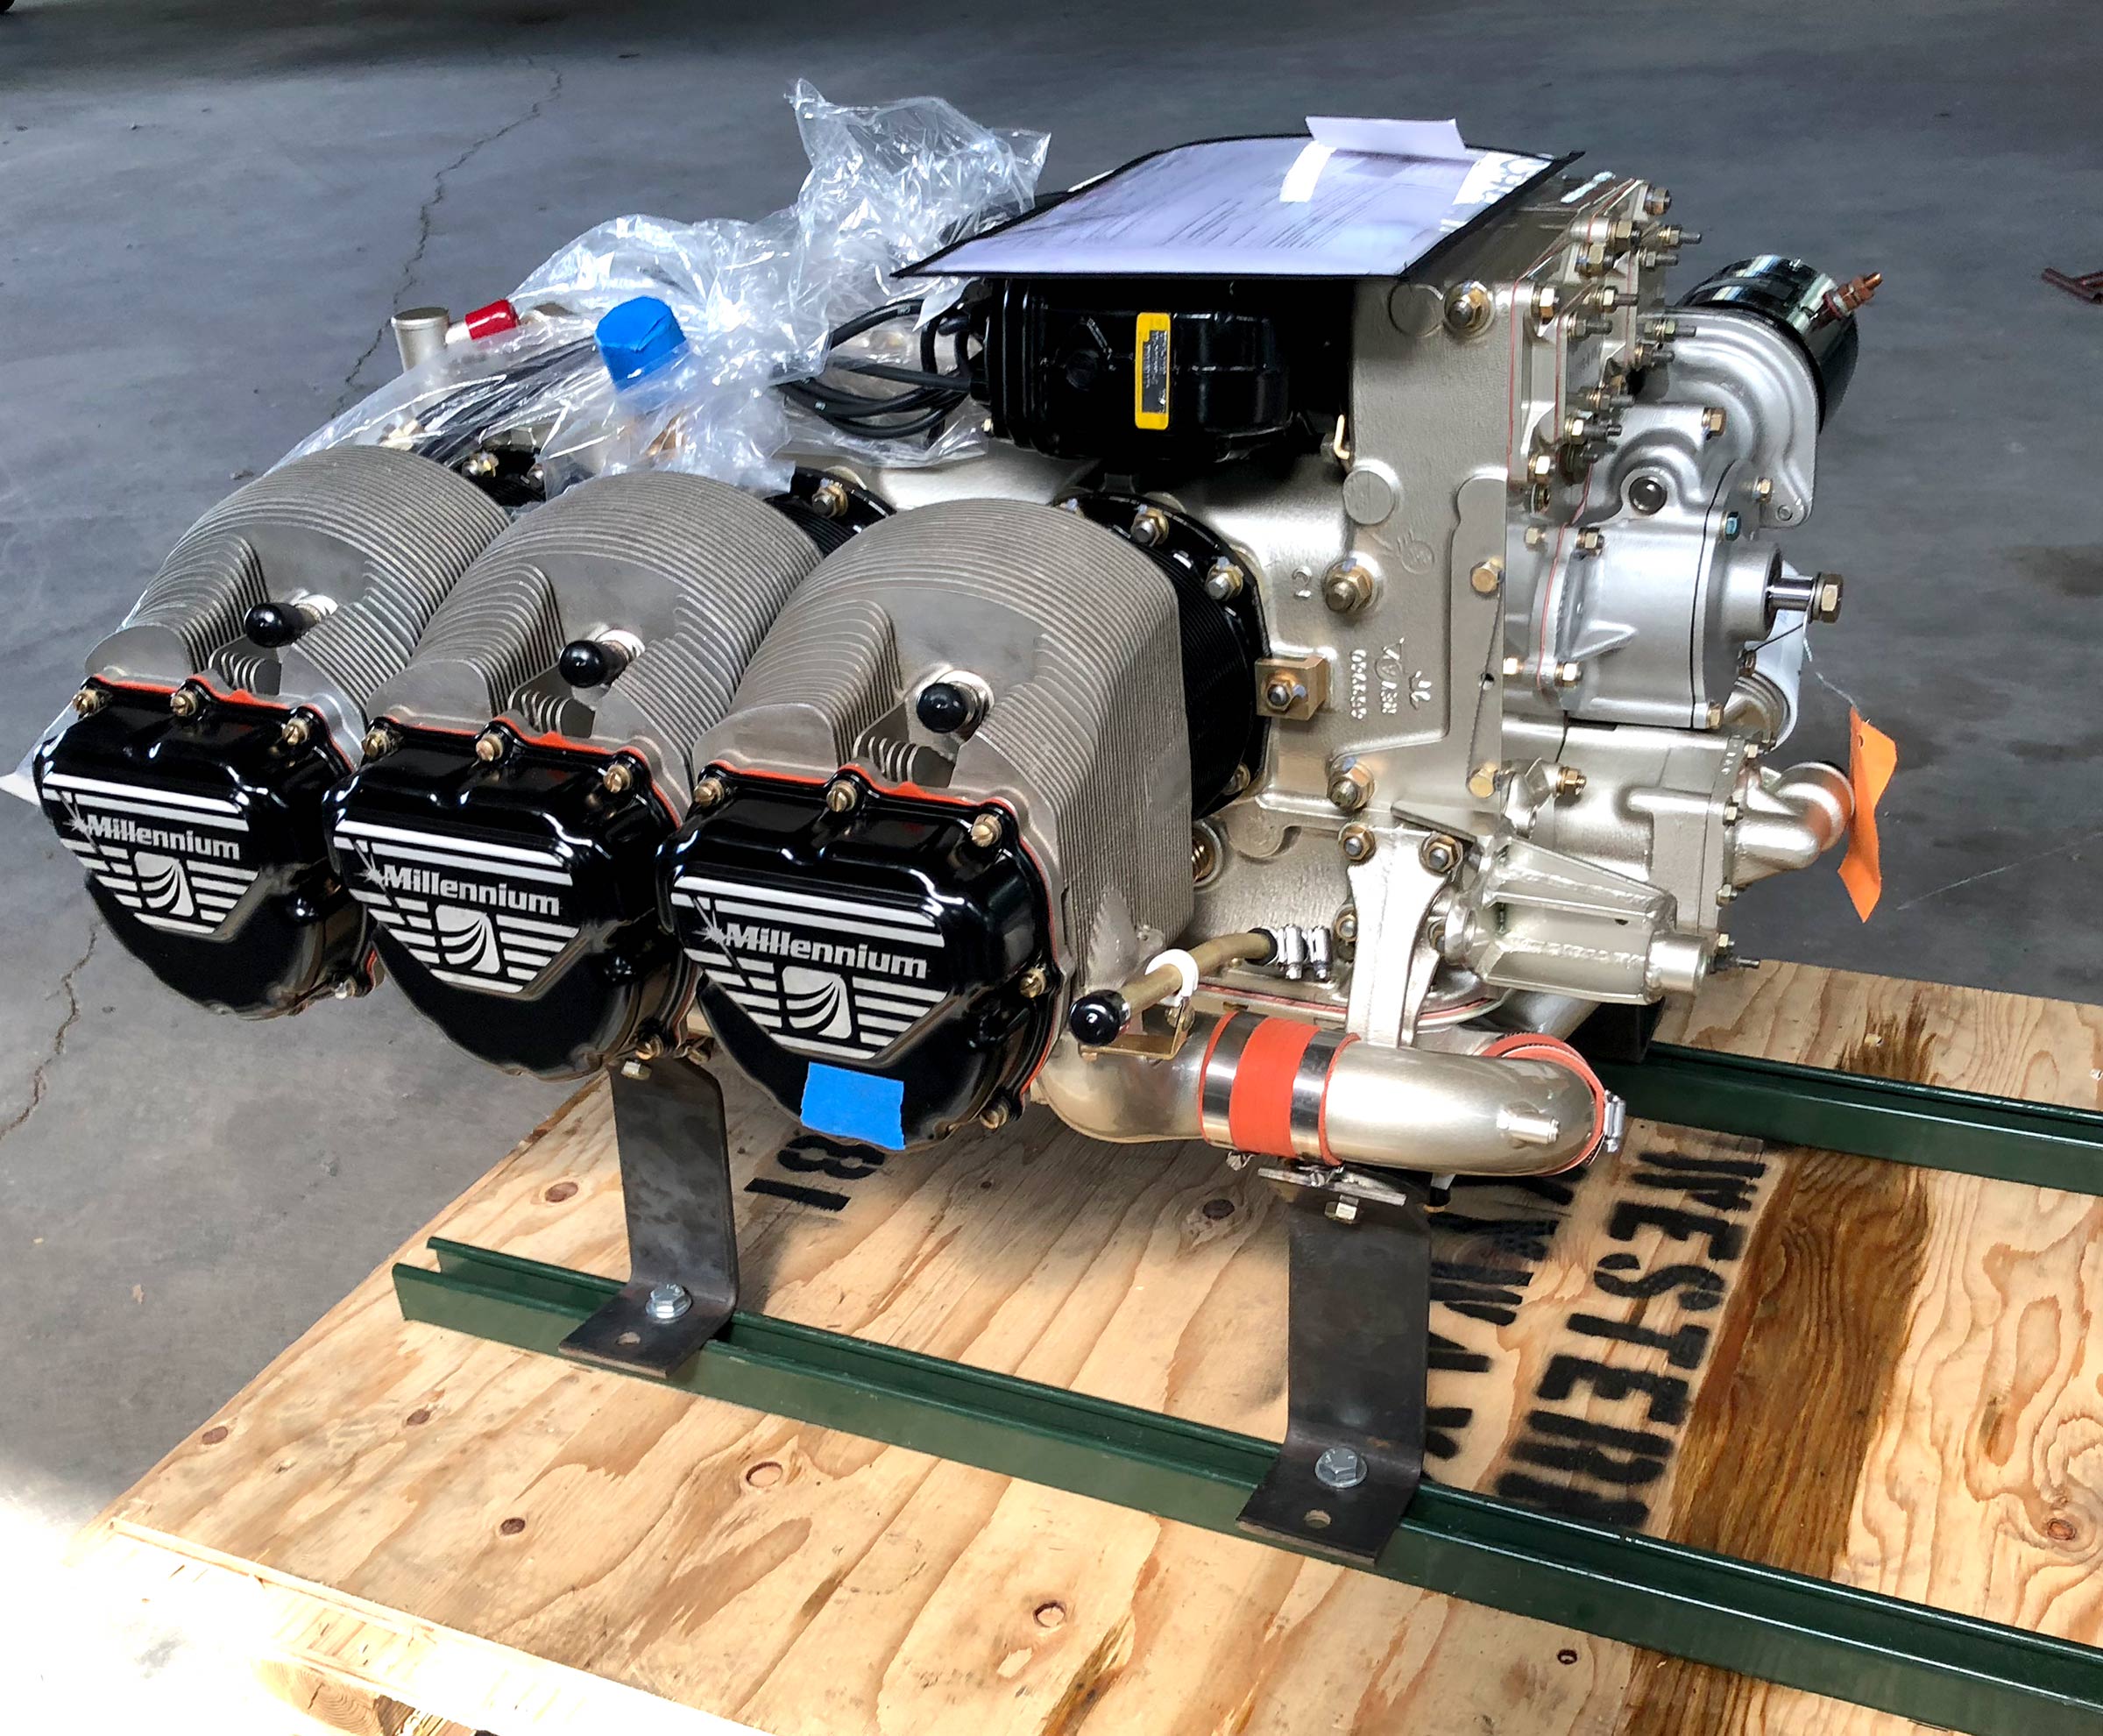
I took an IO-520F and used the PPonk STC to turn it into an O-520. If you are unfamiliar with the PPonk mod, it takes a IO-520D/F, pulls off the fuel injection, adds low compression pistons, changes the fwd crossover tube, and adds a carb. This mod will get you about 265HP. http://pponk.com/
I ended up buying six brand Millennium new cylinders, but was surprised at the consistency out of the box. In the end, we pulled them completely apart and got them perfect. With a little care and obsessive attention to detail, she dyno’d at just under 300hp. I’m hoping it’ll be screamer! I also made the decision to run high comp pistons (legally by DER approval) so she should perform at altitude as well.
I’ll be running a 3 blade MT up front, and to avoid the chance of kickback and broken starter adapter, decided to go with a Shower of Sparks ignition. This will retard the ignition during start and totally avoid a poor timing/kickback.
The plan will be to eventually pull out the non-impulse coupled mag and install the new Surefly electronic ignition. This is a really cool unit that unlike the clunky Electro-Air is totally self contained inside the mag. This combo (IMHO) will give the best of all worlds. Surefly is hoping to have certification done by Oshkosh. https://www.surefly.net/
I also decided to go with an old style starter adapter, and forgo a Skytec choosing an old skool energizer starter. Yes its a couple more pounds back on the bird, but the piece of mind with that time honored starter is well worth it.
She was pretty much broke in on the test stand, so it should be fun right out of the box. Big thanks to Tim at Unlimited Aero for the support. http://www.unlimitedaeroengines.com/
Here goes nuthin…
November 8, 2017
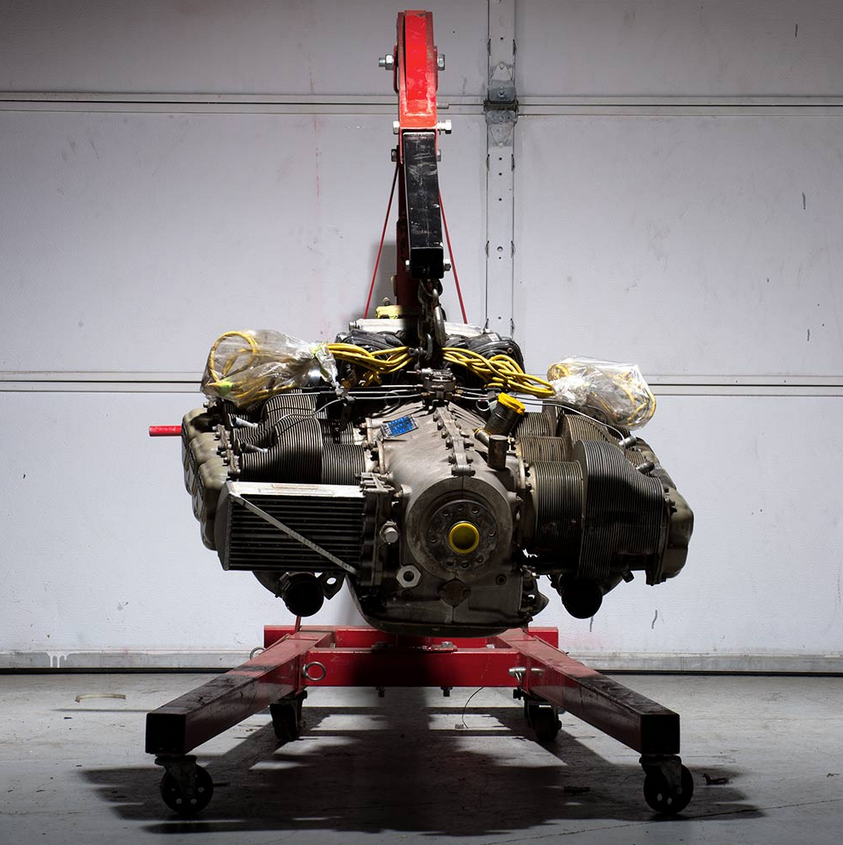
Finally have some free time so I’m diving in deep and starting in on the O-520F core that has been sitting in the corner of the shop.
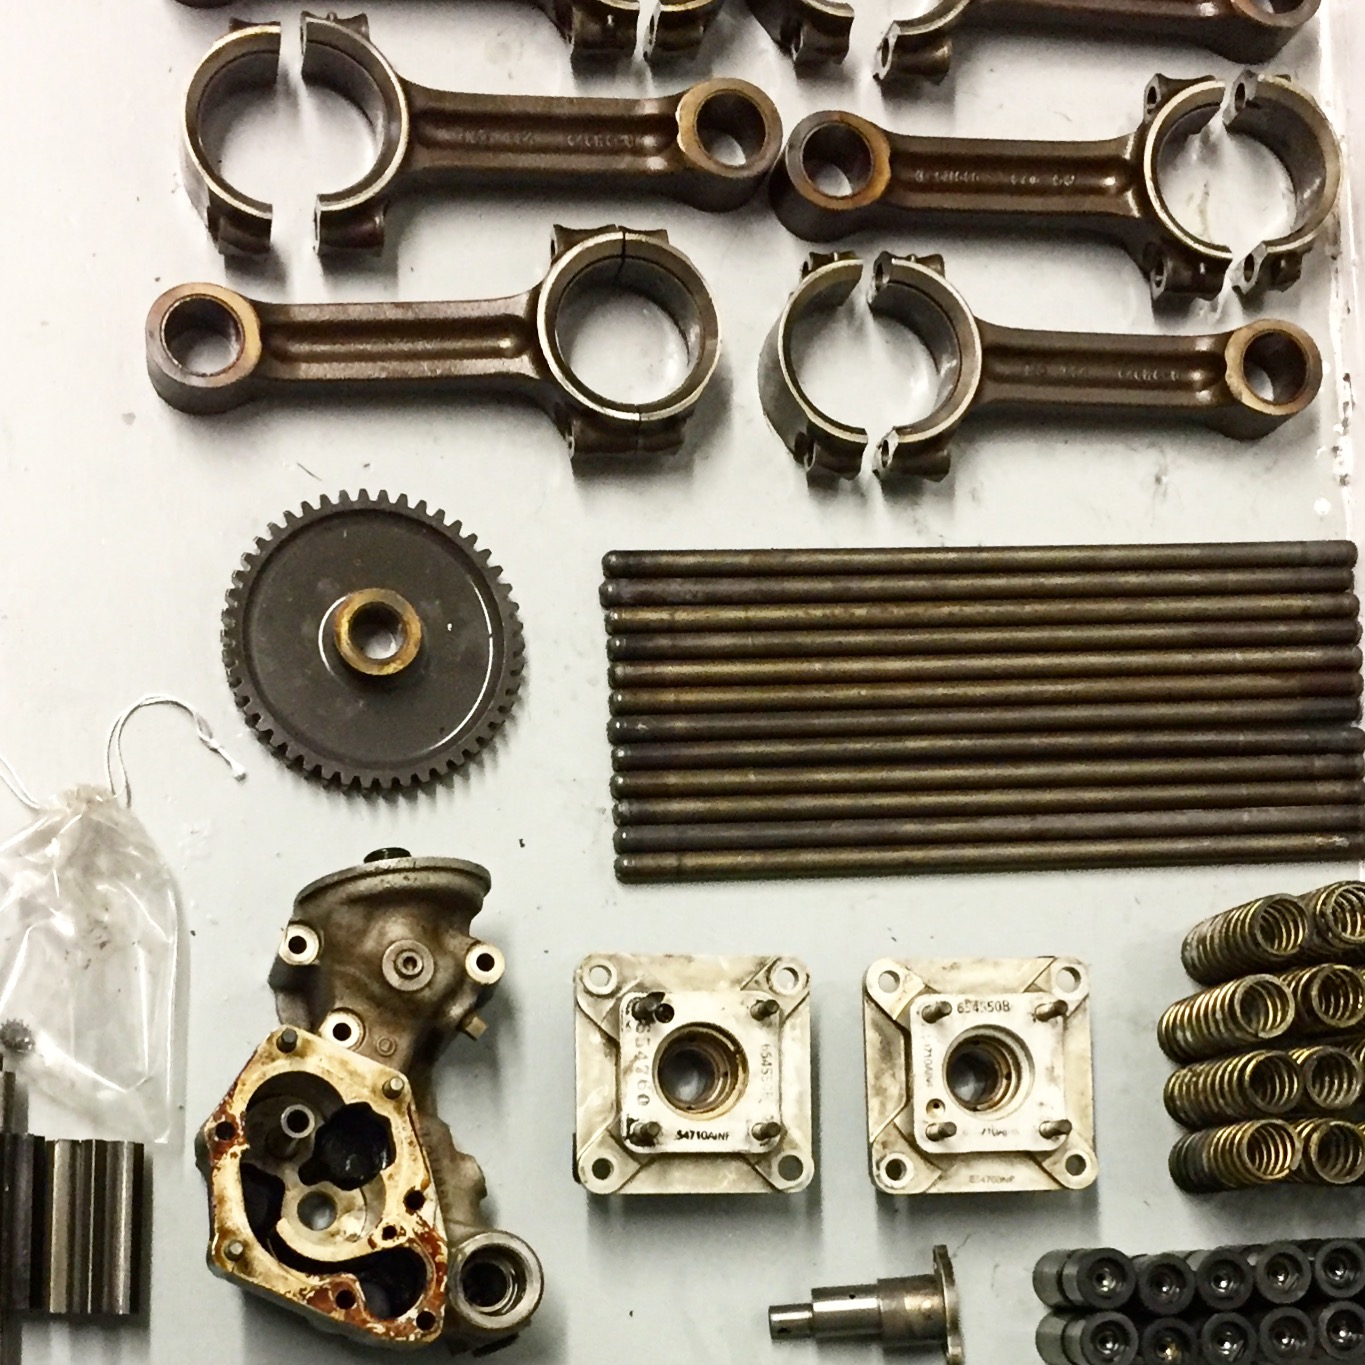
I will be using the 2000hr TBO PPonk STC with Millennium cylinders (venturi seats). Should give some nice additional HP! The engine is finally apart and the parts are going out for inspection and overhaul.
PPonk Kit…
December 31, 2013
The addition of the famous PPonk MLG kit often is fertile food for debate.
To Ponk or not to Ponk, that is the question. There are plenty of arguments against, and plenty for… Generally speaking, those against claim that if a failure happens and your Ponk’d, it tends to become catastrophic ripping the entire gearbox out. If this happens, the aircraft is usually a total loss as several of the components damaged are no longer source-able. This is a photo of (what was a beautiful 180) from just such a crash.

The counter argument says that if you are to bung it up with enough energy to rip out the entire Ponk’d gear box, that the aircraft is going to get totaled regardless. It’s a fun game of what ifs and maybes, but in the end, who really knows.
Personally, I went ahead and installed the kit… which leads me to this post. Just what is a PPonk kit?

PPonk is Knopp spelled backwards. Steve Knopp (who has been around for a long time) has been a really great resource for me and a big help. The kit is a very well thought out kit, with simple easy to use instructions. Steve will tell you that they install both sides in 3-4hrs, but for someone who has never done it, it might be the better part of a leisurely day.

Steve sells his “special” stubby drill bit, which although not impossible to find/make, for less than $10 price, its worth just buying from him.
Here is the basic install in a nutshell (again, this description is just for fun and in no way is meant to represent the proper PPonk installation instructions!!!) Get the aircraft off its sneakers. (Having a friend with a hoist in his hanger comes in real handy at this point.)

Remove the MLG or “Jesus Bolt.”


(this is a good time to totally remove the gear for inspection, and if you are so inclined, a fresh coat of Imron) Set the Ponk bracket on top of the MLG and install the new provided AN bolt with making sure to use the old nut.
Using a 90 degree drill, provided drill bushing and provided bits, drill thru the gearbox. Remove the Ponk bracket and chase the holes with the larger bit. Debur and alodine.

Locate proper landmarks on floor inboard of inspection port and rivet line. Using a pilot and then step up drill, open a new access hole.

This new hole is now used to feed bolts thru gearbox and then thru Ponk bracket. Note: Bolt heads go inboard to outboard. This step is a PAIN IN THE ASS. Bring a mirror, lighted mechanical picker, magnet and plenty of God damn patience! If your AP/IA is inherently lazy, do not let them drill a second hole in the floor. I assure you that ALL the bolts can be installed via this little 7/8 hole, it just takes a bit of time.
Reinstall the bracket with new AN bolt and, washer and locknut. Torque your bolts down, cap the new access hole with the bung provided, and drop her down back on her sneaks. Easy pezy lemon squeezy…
Now if your real slick, there are a couple of forward thinking steps you can do before you drill them holes. For instance, this can also be a good time to fix any wing level issues. In my case, the aircraft had a 3/4 dip to one side. To deal with this issue, I machined some shims on the Bridgeport to stack under the low side. There is some math involved, but this is a good step for the anal OCD’ers. I cut several 0.20 and 0.10 shims to make sure I got it right. Took several tries, but she sits dead nuts on now.

Another thing to think about here is possible downstream gear upgrades. We all know that folks upgrade their MLG. Whatever we have, there is always one step up. I dont think my wallet could handle it, but before the gearbox was drilled, I spent some time on the phone with Tom Anderson of the Landing Gear Works. http://www.thelandinggearworks.com/
Turns out that his Titanium gear are a bit thicker than the stock Cessna 180/185 gear so if you ever want to upgrade to Tom’s “golden gear,” you should make provisions before you drill. Now Steve will tell you that he designed his brackets to have room for machining (90 thousandths,) but just in case, we decided that we would go ahead and shim the Ponk bracket up the exact height of the Titanium gear so that if I ever got real crazy, I would have the ability to install them.

Anyway… Its a bit of a ramble, but I hope this is info is useful to you guys.