VG’s Finished…
April 21, 2014Finished the VGs and got em on the wings…


Then pulled her out to get a look in the fresh air… Been a while since she’s seen the sun.


Finished the VGs and got em on the wings…
Then pulled her out to get a look in the fresh air… Been a while since she’s seen the sun.

Some more good progress today… Had some friends lend a hand and we got to polishing the tops of the wings. Hit em pretty hard with Nuvite F9 as they were/are pretty rough. Polishing ain’t no joke… After the F9 pass, we still have to hit it with “C,” and then finally “S.” She’s never gonna be a 1 foot beauty, but at ten feet she sure is starting to look nice. (dreading the underside)


Also got the AeroLED Sunbeacon runnin up on the top of the vert stab along with a LED bulb in the tailcone. Its nice as it syncs with the NSPs on the tips. The vStab fairing for the light was courtesy of Willie and Stene Aviation.
This weekend I was able to get back on the Sportsman install, cutting and fitting the right wing. Everything is now cut and cleco’d with #10s. I should be able to get the detail work done tomorrow/Tuesday. I’m about half way there with the install. Sure is a bitch trying to make it perfect…


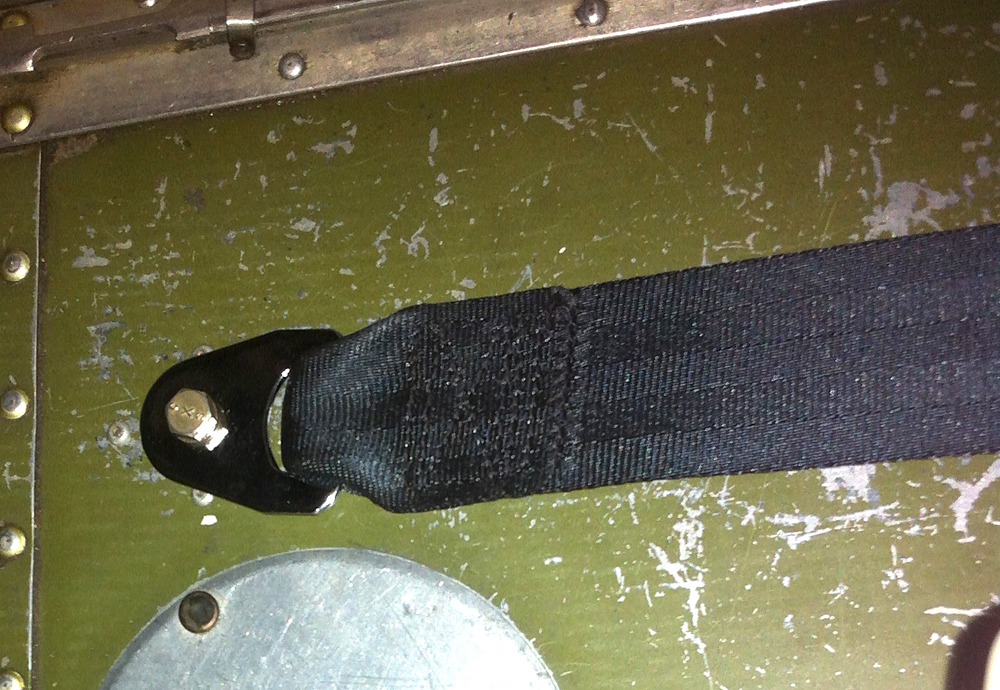
Kind a cool so I thought I’d pass it along. Just got my cargo net/cabin divider from Mountain Wave Aviation. Its super cool. Fits right behind the pilot seat and attaches on the rear carry thru and the seat rails. Fit and finish is great. Very well made.

Next step on the Sportsman install was to box out and WX proof the section between the nose blocks around the cabin air vents. This is done by cutting the provided foam to fit between the blocks on the left and right side of each vent, and sticking them into place with the provided RTV. Once installed, you cover the foam with RTV to make the cavity water tight.
Once this is done, mark the center of each vent as well as the stall reed on the top of the wing (far enough aft as not to get covered by the new cuff.)


Some more progress on the Sportsman today…
First step was to get a coat of zinc chromate on the skin where the blocks will be affixed. Next, test fit each block using the specific station templates and tape into place. Once fitment is ensured, mark each location, scuff, apply adhesive, and float each block into their final resting place. Register each block again with the template, then tape into place and wait for drying.
The holes in the leading edge were from the old OWL cuff that was removed. These will be buried under the new cuff as it is much larger. In looking at the second to last pic, you can see just how much more leading edge is added with the Sportsman over the stock wing. Crazy…
So far so good!


Originally the Sportsman cuff was purchased for the C170, but once it was decided what was really needed was a C180, the cuff was put to the side until there was a Skywagon to install it on… Fortunately the two aircraft have basically the same wing (the cuff is the same,) and after two years of waiting, its finally time to get the cuff installed.
The old Owl cuff has been nixed, and the Sportsman install has begun. First step, cutting the templates out. Spray glue the paper on the Masonite cover (of the shipping box) and then cut em out with a jigsaw.


The addition of the famous PPonk MLG kit often is fertile food for debate.
To Ponk or not to Ponk, that is the question. There are plenty of arguments against, and plenty for… Generally speaking, those against claim that if a failure happens and your Ponk’d, it tends to become catastrophic ripping the entire gearbox out. If this happens, the aircraft is usually a total loss as several of the components damaged are no longer source-able. This is a photo of (what was a beautiful 180) from just such a crash.

The counter argument says that if you are to bung it up with enough energy to rip out the entire Ponk’d gear box, that the aircraft is going to get totaled regardless. It’s a fun game of what ifs and maybes, but in the end, who really knows.
Personally, I went ahead and installed the kit… which leads me to this post. Just what is a PPonk kit?

PPonk is Knopp spelled backwards. Steve Knopp (who has been around for a long time) has been a really great resource for me and a big help. The kit is a very well thought out kit, with simple easy to use instructions. Steve will tell you that they install both sides in 3-4hrs, but for someone who has never done it, it might be the better part of a leisurely day.

Steve sells his “special” stubby drill bit, which although not impossible to find/make, for less than $10 price, its worth just buying from him.
Here is the basic install in a nutshell (again, this description is just for fun and in no way is meant to represent the proper PPonk installation instructions!!!) Get the aircraft off its sneakers. (Having a friend with a hoist in his hanger comes in real handy at this point.)

Remove the MLG or “Jesus Bolt.”


(this is a good time to totally remove the gear for inspection, and if you are so inclined, a fresh coat of Imron) Set the Ponk bracket on top of the MLG and install the new provided AN bolt with making sure to use the old nut.
Using a 90 degree drill, provided drill bushing and provided bits, drill thru the gearbox. Remove the Ponk bracket and chase the holes with the larger bit. Debur and alodine.

Locate proper landmarks on floor inboard of inspection port and rivet line. Using a pilot and then step up drill, open a new access hole.

This new hole is now used to feed bolts thru gearbox and then thru Ponk bracket. Note: Bolt heads go inboard to outboard. This step is a PAIN IN THE ASS. Bring a mirror, lighted mechanical picker, magnet and plenty of God damn patience! If your AP/IA is inherently lazy, do not let them drill a second hole in the floor. I assure you that ALL the bolts can be installed via this little 7/8 hole, it just takes a bit of time.
Reinstall the bracket with new AN bolt and, washer and locknut. Torque your bolts down, cap the new access hole with the bung provided, and drop her down back on her sneaks. Easy pezy lemon squeezy…
Now if your real slick, there are a couple of forward thinking steps you can do before you drill them holes. For instance, this can also be a good time to fix any wing level issues. In my case, the aircraft had a 3/4 dip to one side. To deal with this issue, I machined some shims on the Bridgeport to stack under the low side. There is some math involved, but this is a good step for the anal OCD’ers. I cut several 0.20 and 0.10 shims to make sure I got it right. Took several tries, but she sits dead nuts on now.

Another thing to think about here is possible downstream gear upgrades. We all know that folks upgrade their MLG. Whatever we have, there is always one step up. I dont think my wallet could handle it, but before the gearbox was drilled, I spent some time on the phone with Tom Anderson of the Landing Gear Works. http://www.thelandinggearworks.com/
Turns out that his Titanium gear are a bit thicker than the stock Cessna 180/185 gear so if you ever want to upgrade to Tom’s “golden gear,” you should make provisions before you drill. Now Steve will tell you that he designed his brackets to have room for machining (90 thousandths,) but just in case, we decided that we would go ahead and shim the Ponk bracket up the exact height of the Titanium gear so that if I ever got real crazy, I would have the ability to install them.

Anyway… Its a bit of a ramble, but I hope this is info is useful to you guys.

As mentioned, its pretty simple. (Of course this post is just for fun, truncates the full instructions, and is in no way meant to instruct one on the installation of Micro VGs. Please follow their directions)
First find the landmarks in the drawing, in my case, 3″ from the trailing edge of the horiz stab.


Use masking tape to lay down a reference line with the thread provided.


Find another landmark and lay out the VG templates. Once the sticker is on, use the provided Scotch Bright to prep the surface for adhesion.


The VGs are adhered with a two part Loctite system. First, spray the activator on the surface (small aerosol can,) then place one drop (only one drop) on the bottom of the VG.


Spread the adhesive across the bottom of the VG press it on the flat surface and hold for a couple of seconds. Once they have set up, do a cursory clean of the excess material, and remove the green template.

Once the templates have set and you have waited a bit, clean the remaining Loctite for a nice install.

Got the door lock mechanism re-assembled and installed along with the door seals. Also did the Door Stewards (love these) and finished installing all the placards. Also have had some time for detail work like a nice surround for the baggage door chain. Hopefully before the new year!


Aside from the pain of sourcing and buying a 185 vertical stab, the Kenmore Air Gross Weight increase was really easy to install. During my research, all I could find out about the install was that you just needed to “install a doubler.” Where did it go? How did it work?
Well… here it is. Its a simple doubler that goes in the center of the horizontal stab between the leading edge. You remove a nutplate, cleco the doubler, drill out the holes, buck it in place, then reinstall the nutplate. Pretty simple operation lets you go (legally) from 2800 (in my case) to 3190lbs.


Now off to paint!

Well the panel is in and finished. Totally pumped. Actually most of the big projects inside are done, and I’m ready to fire her up which feels good… but I guess I didn’t want to fee that good cuz I went ahead and pulled the horiz/vertical stabs.
The theme of this past year has been “while I’m here…” and since it made sense to do it now, I drove up to Canada to Skywagon City and grabbed a C185 vertical stab from Peter. They are getting harder and harder to find so I figured I had better get it done now. Peter only had one “3” bolt (earlier stab to fit my 66 H model) so I couldn’t be choosy. He did have a couple of rudders to choose from, but when we laid them out on the shop floor, I grabbed the one that went with the stab. They both are in pretty decent shape, so I’m happy. Part of the deal was to swap out my stab/rudder as a core. It was sort of sad to leave the orig stab up there, but I’m sure it will be put to good use down the line.
I haven’t weighed her yet, but I’m hopping sub-1700. With the new 3190 GW, I should have over 1500lbs of useful.
The Kenmore Air STC is super easy to install and with a 400 lb increase in GW, who can argue? Spent the last three days stripping the stab and rudder. (cant believe I am back to stripping)
Anyway, she’s still moving forward…


Its called “Aerofloor DOT” purchased from AIP Source.
Super thin and light weight. Comes in different colors. I went with grey. Sells by the yard and is 54″ wide which is plenty (Skywagon cabin is about 38″ wide at the floor.) I ordered 4 yards which will be enough.
Here are images of the load surface, back, and its thickness.


 It is always amazing when you actually weigh every item that is inside an airplane. It’s so easy to just say, who cares. Just put it in… The fact is when you count every item, you can really see how easy it is to load up the airplane with all sorts of extra none-sense.
I am being very conscious of weight on this project. It’s not that I want to be a nutty extremest and throw the baby out with the bath water, but I want to have an understanding of how every choice affects the bottom line. If it makes sense, weight addition is ok, but if its unnecessary, than it doesn’t belong.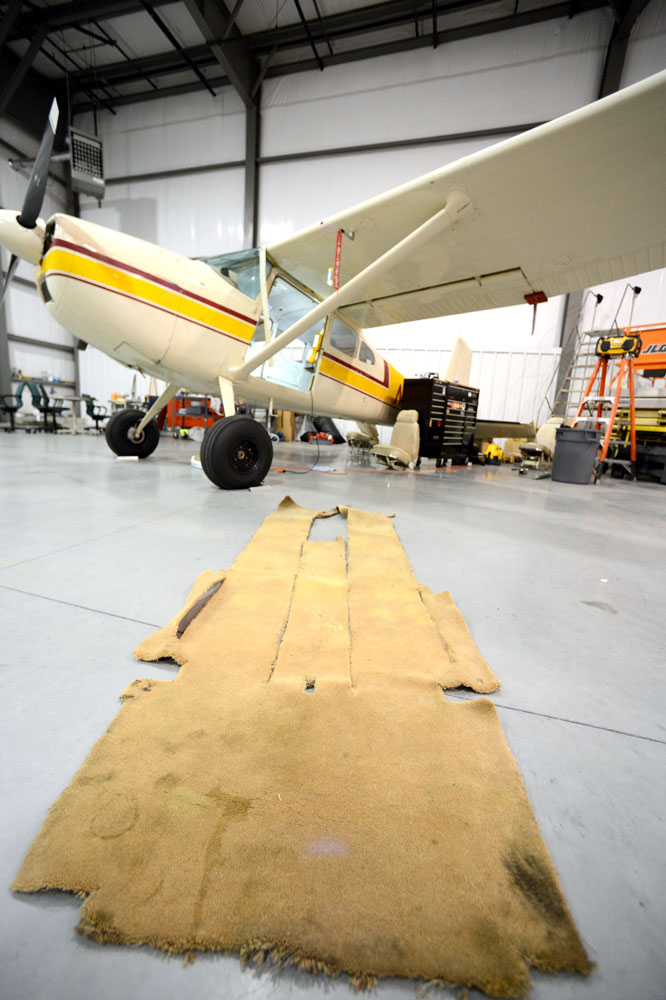
The carpet that was removed from the Skywagon was a residential nylon carpet. Besides being illegal and having no burn data, the damn stuff was super heavy weighing in at 10 lbs.
So the question is: What to replace it with??? If you spend any time perusing the boards, you will read all sorts of opinions. This is too heavy, that is too light… This one makes it too loud, and that one wont provide enough protection. Blah blah blah… The funny thing is that most of these opinions are from people who just choose one option. They never do any testing, or have any other experience other than what is in their airplane.
I guess I fall right there with the rest, and only know what I know. But I do know this… I have been flying the Skywagon without any carpet on the floor. In fact, I have been flying without any interior at all, and I can report that for me, at the temps I am flying, it is totally cool. It’s not to cold, and it’s not to loud. This is pretty liberating as I can do as little or as much as I want.

For the C170, I found a really cool product from AIP Source called Aerofloor DOT. You order it per yard, and comes with the important burn data. The floor I installed in the C170 weighed in at a paltry 3 lbs. Of course this product was super thin and provided NO padding for protection, but with the kind of flying I was doing, it didn’t matter.
AIP Source tends to work with larger orders, and I believe supplies Cessna with the new floor in their new airplanes, but still sells to us little guys. When I ordered for the C170, I found them to be cordial and very helpful. Their website has good photos of the colors and patterns, so its easy to make a decision. All that I had to do was discuss weight.
For the Skywagon, I have a bit more leeway with respect to weight, so the jury is out with which floor I am going to install… The Lonseal is thicker and provides more padding (and sound deadening) but is a bit more than twice as heavy.
I’ll be mulling it over this next week before I place my order, but chances are I will go with the same as the C170 and order the Aerofloor DOT. Keep it real light!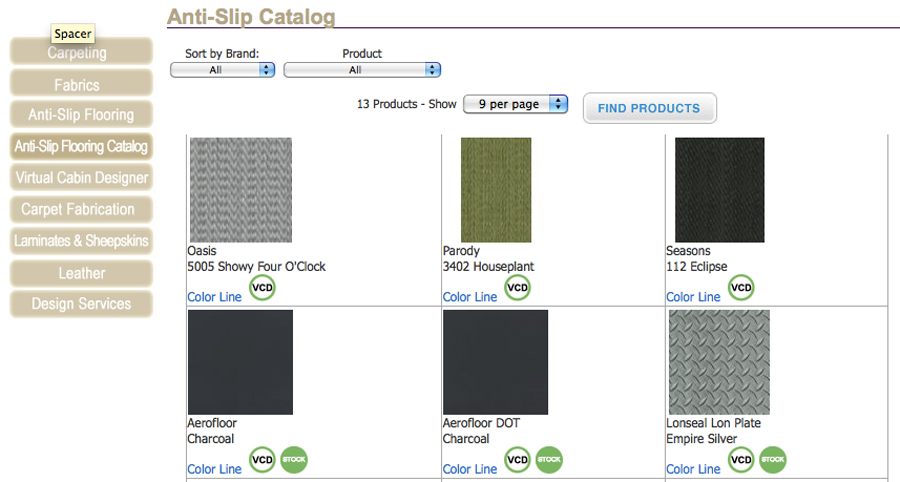
I got a couple eMails regarding the stainless steel brake lines we used on the Skywagon when the new Clevelands were installed.
These were sourced from Sacramento Sky Ranch. Their website is pretty darn aweful, but they are a good vendor and do good work.
For what its worth… If you are going to upgrade your airplane with Clevelands, the cheapest vendor to go to is Alaskan Bushwheel. They beat Spruce by two or three hundred dollars. (Thanks Wup!)
P/N: Cessna 170 is 199-46, and Skywagon is 199-62.
I wrote a blog post the other day about the height off the deck of my prop when in flight attitude. The measurement was interesting with respect to how much clearance you have for a “tail up taxi.”
I also created a thread on the BCP board and the C170 board. It was interesting to see the different thread migration, but on the C170 board, there was a visceral response.
There was a lot of, “I would never,” and “this and that are stupid…” and “I don’t go outside because I’m afraid of traffic…” I guess what was disappointing was seeing the narrow mindedness of some opinions clouding point that I was trying to make. To me, as a low time tail wheel pilot, and an even LOWER back country pilot, this was interesting data. Data that would be good for all of us to keep in the backs of our heads.
When I was learning to fly tail, I did a number of high speed taxi exercises from one end of the numbers to the other. In fact I still do it. Keeps me sharp. When I started landing in the grass and was bouncing the hell all over the place, I would often cringe thinking that the wheel landing was going to bugger the prop. My instructor kept saying, “don’t worry…plenty of room.”
As the hook sunk deeper and I started aspiring to operate in the really rough, my questions again came to the surface… How much clearance did I had between bushes, bumps, berms etc… How tall was too tall?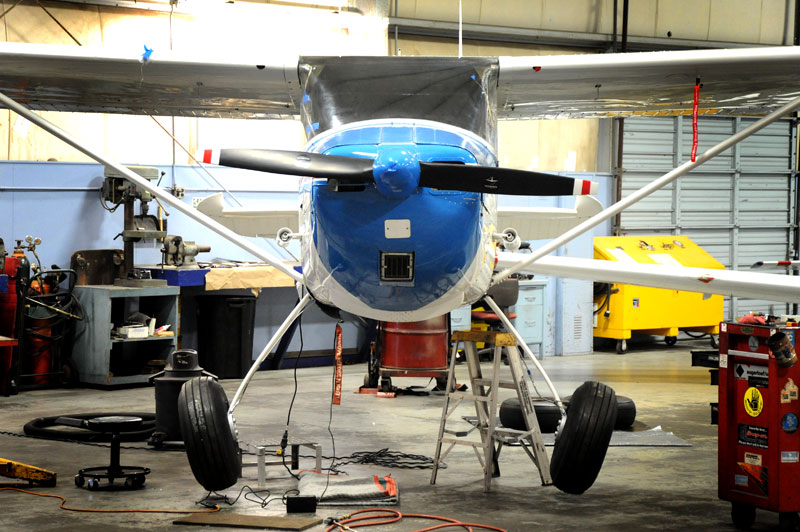
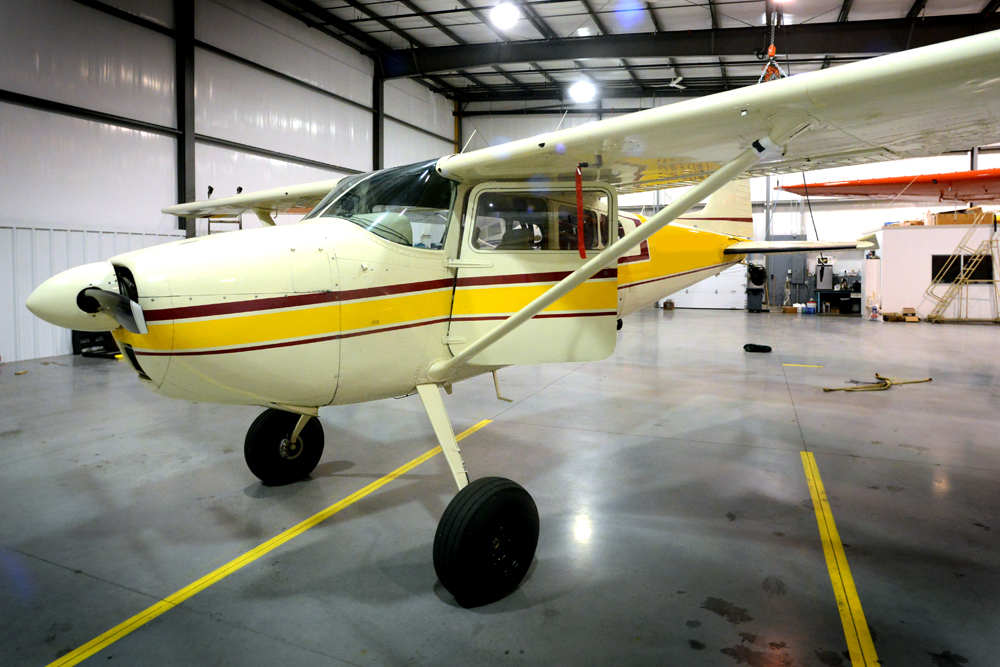
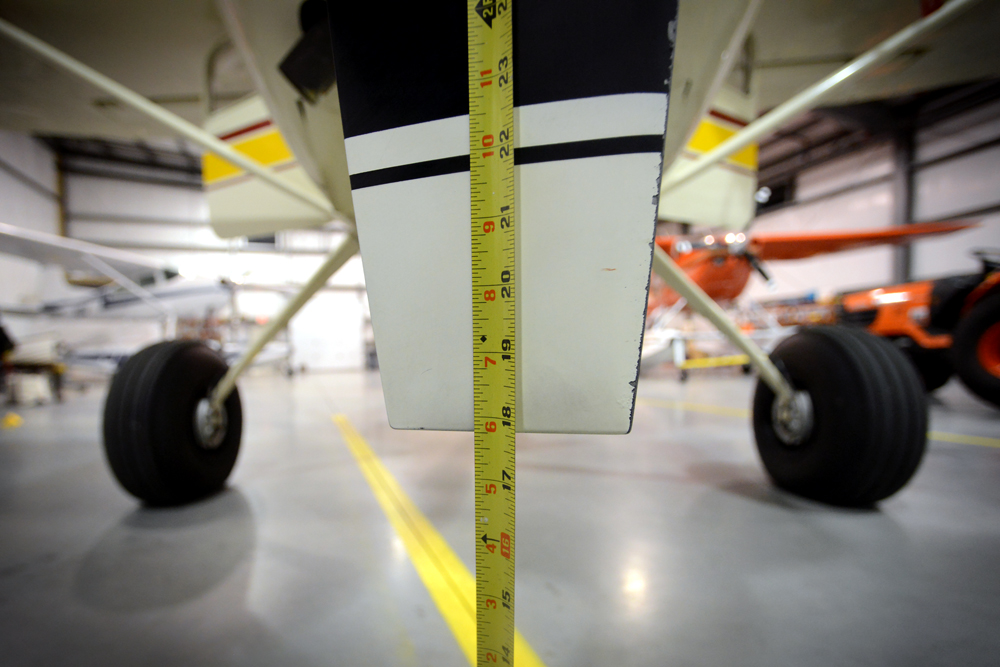
With the C170 project, I gained quite a bit of height adding the larger tires and C180 gear. When I transferred the tires over to the Skywagon, I grabbed a before and after measurement, and in going from 6.00×6 to the 8.5x10s, I gained 5 inches over stock at the axles, with a total 3 point deck to prop clearance of 30″. But what about the wheel landing? How much clearance then?
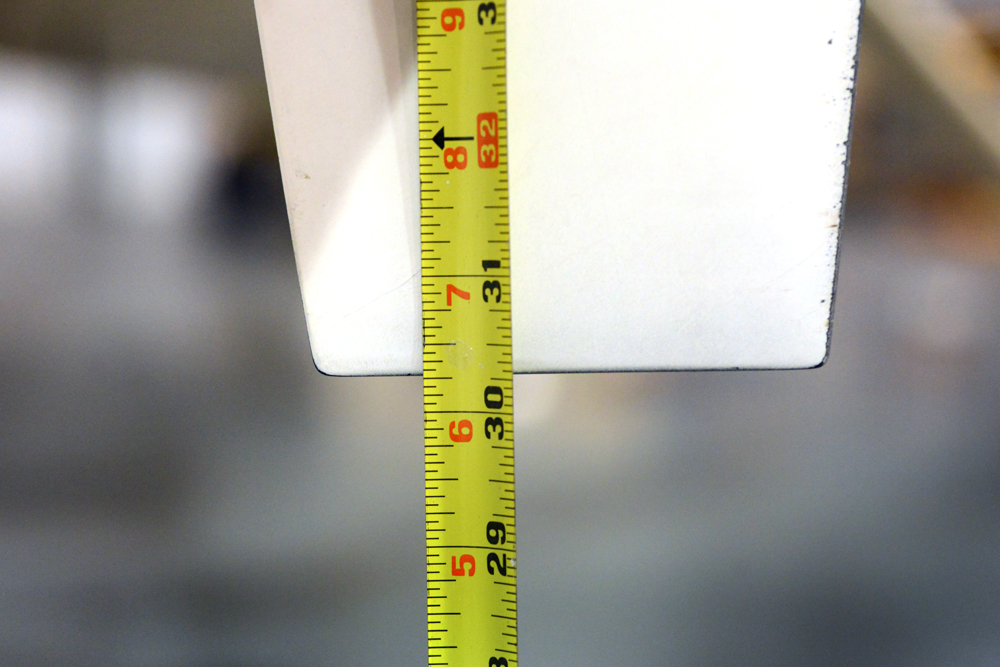
A weight and balance on a tail dragger is a perfect time to grab this measurement. As it’s already in flight attitude, all you have to do is run the tape. In my case, leveled out as if in a perfect wheel landing, I had 18″ from deck to prop tip.
Now I know that taxiing around with the tail up could, by some, be seen as courting disaster. There are several vids on the web with guys digging holes in the tarmac with their props after showing off, but for every one of those, there are ten of a TW pilot looping his airplane simply trying to land. Net net… Flying is dangerous. But that wasn’t the point of my post. The point of the post was to open one’s mind to the outside parameters of the “safe zone.”
Getting as much data about your machine and your flying helps you become a better pilot. Thinking outside the box, at least in principle, helps us become better. And better, makes us safer, and thereby allowing us to have more fun.
And if you taxi every once and a while with your tail up and crack a bit of a smile… Well maybe that’s ok too.
For the C180 project, we will be replacing all the windows with new plexi from Great Lakes Aero. The new glass will be thicker as well as tinted.
The door windows have already been replaced with the 4″ bubbles that came off the C170, which leaves the windscreen, centers, and rears. The windscreen has been ordered in the new Cessna light grey tint, while the centers and rears are the darkest grey, as well as “extra thick” for increased noise reduction.
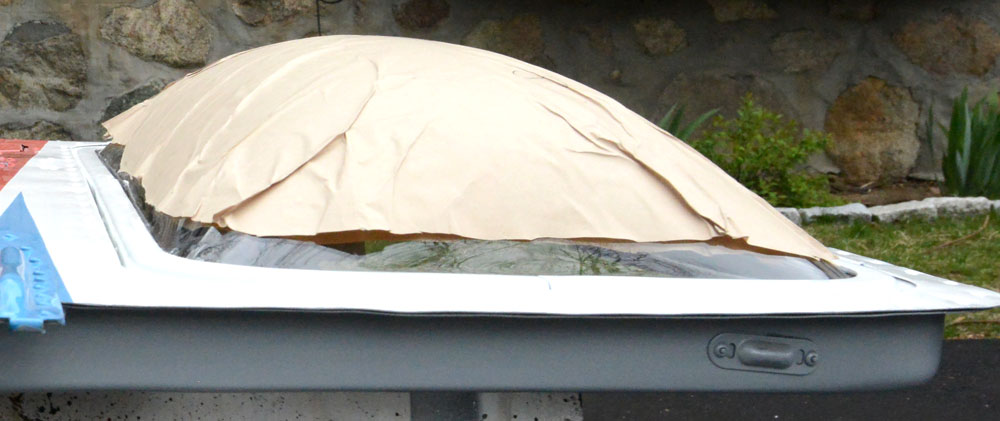

The C180 came with a fairly new windshield that’s in good shape and swapping it out is pretty glutinous, but as we will also be adding a Seaplane “V” brace from F. Atlee Dodge, it might be just too much stuff in front of your face while flying. The new one piece windshield is installed under the Great Lakes Aero STC SA471G and comes with the purchase of the windshield.
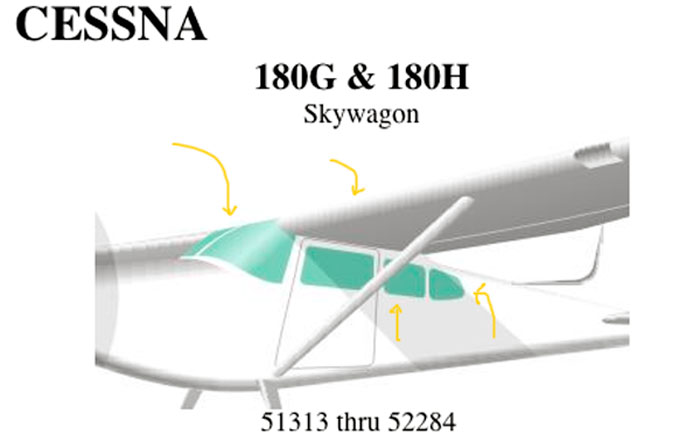
We will also be adding later model Cessna skylights to the roof. This install is done under STC SA4379NM sold by CubCrafters in WA for $150.00. (contact Vera at CC for more info.) Although the STC allows for the installation of up to five skylights, I wanted to keep the more traditional “stock” feel and keep it a bit more simple. I also didn’t want to fry my head on long summer flights.
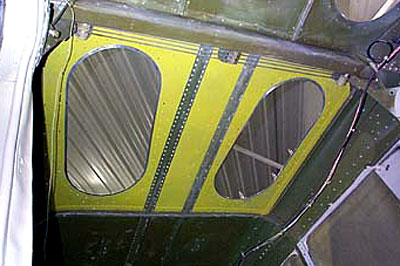
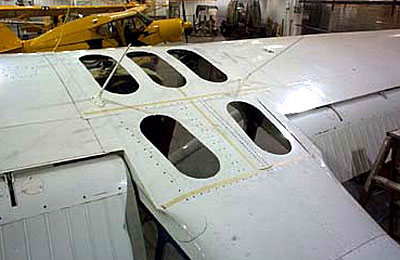
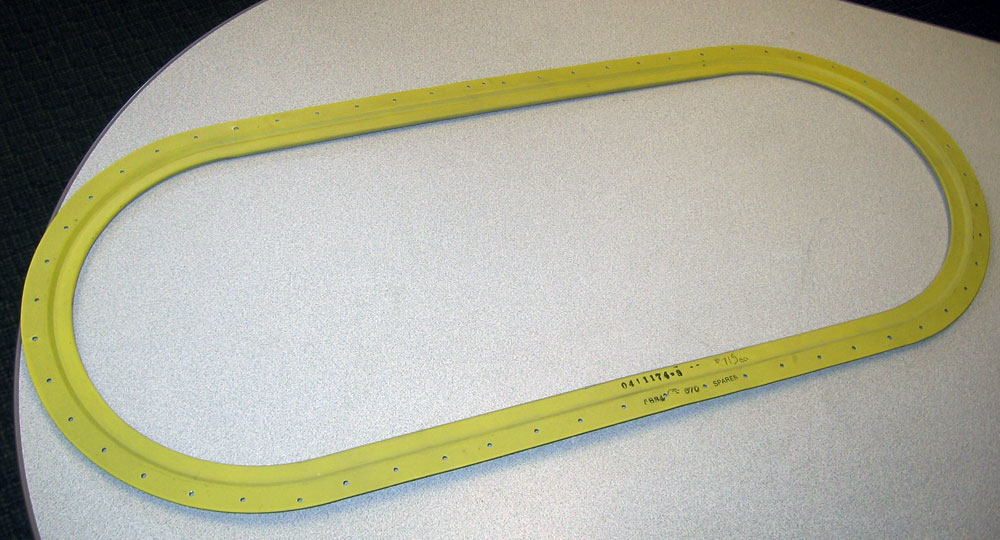
Since the interior will be torn out anyway and the panel removed, the glass install should be pretty simple. CubCrafters sells the surrounds and retainers, but we have a good relationship with Yingling and ordered them there.
FYI… if you do order the parts from CubCrafters, be advised that they have their parts numbers mixed up. The surround (part that holds the plexi to the skin is Cessna P/N 0411174-3. CC has it listed as a “Frame for Upholstery.) This is all I will need as we will not be installing a headliner, but if you are, you will also need 0700247-1 and 0700247-3.
Part Numbers for the Great Lakes plexi: Windscreen – P/N 2073W/G, Bubbles – P/N 2902-4W/G, Centers – 1012W/XT , Rears – P/N 1011W/XT, and Skylights are 1033W/XT. Skylight STC SA4379NM from CubCrafters

Finished the Cessna Seat Stop install today. Works way better than the antiquated Cessna seat lock that used to be installed in the C180. As I mentioned earlier, if you have an appropriate airplane and haven’t taken advantage of Cessna’s free deal, do it before they change their minds, run out of stock, or run out of $$$. Will cost you nuthin.
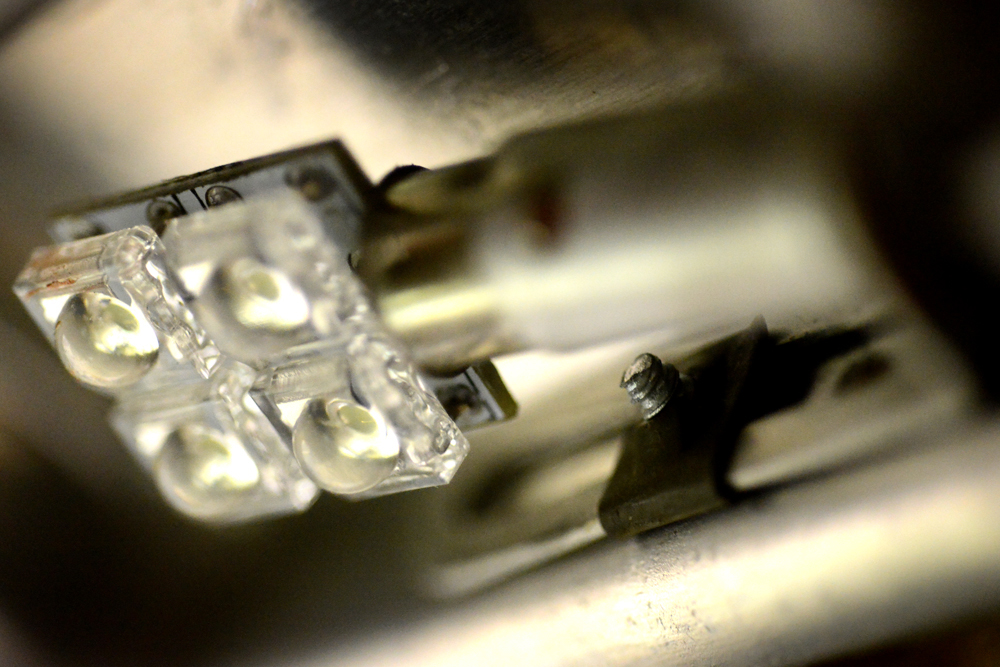
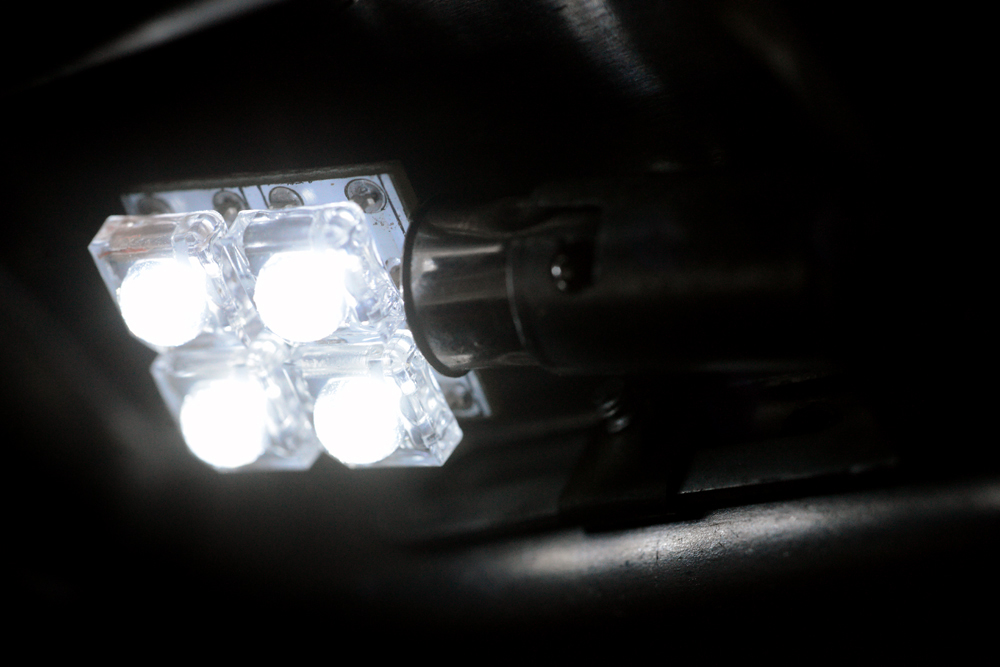
Also swapped out the overhead dome light for a cool 90 degree LED bulb. Much brighter than the OEM bulb.