Wing X Install – Part 5…
March 8, 2016
Orig published over on BCP.org March 2015… This article is for entertainment only and is NOT an approved or instructional material. Consult the proper installation documents for reference.
The install continues…
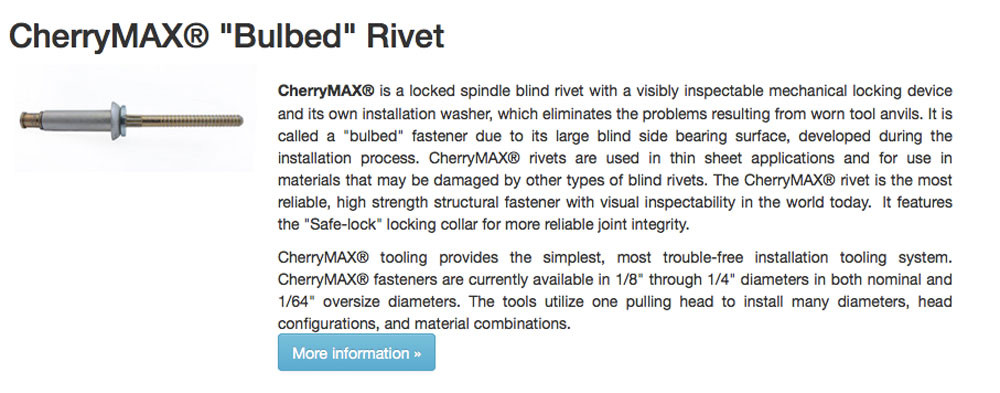
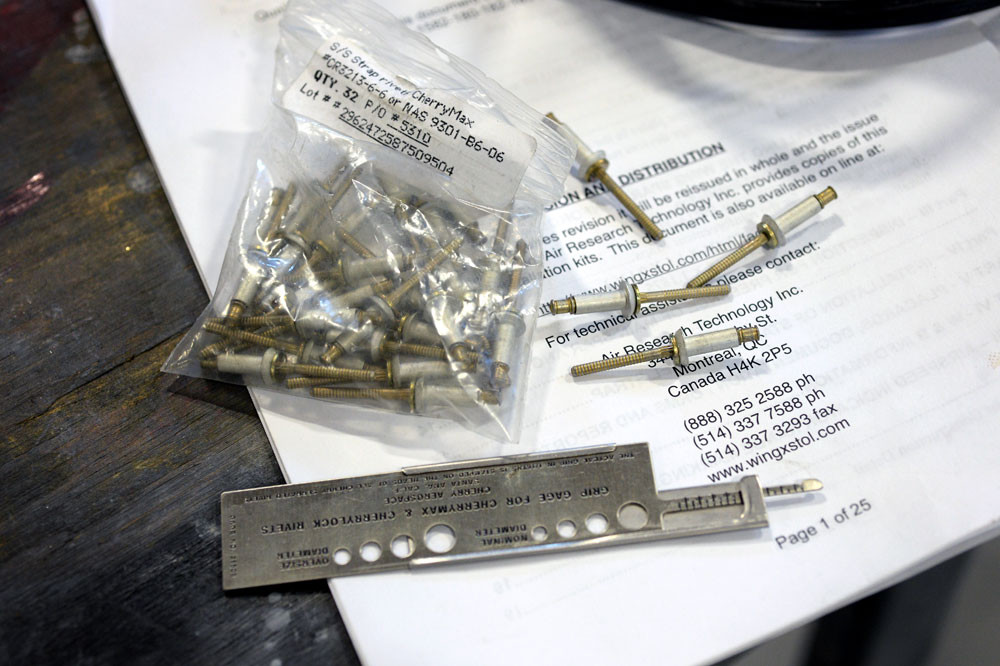
A word about pulling the rivets. Although the kit comes with everything you will need (and some extras for once) it’s always good to understand just WTF is going on. The stainless strap uses Cherry Max and not just cherry rivets. If you and (God forbid your AP) don’t know the difference, its worth learning.
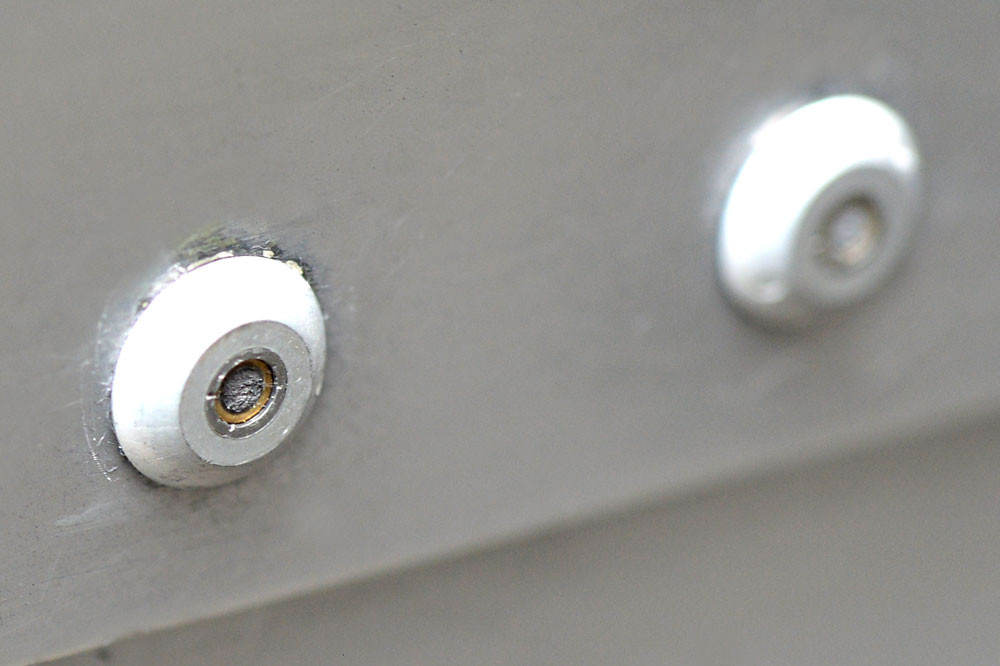
Before you move on, make sure all the rivets lock. In a nutshell, the stem gets pulled and must lock with the steel collar. If it doesn’t, the rivet will not look flush, and if its not flush, its not structurally sound.
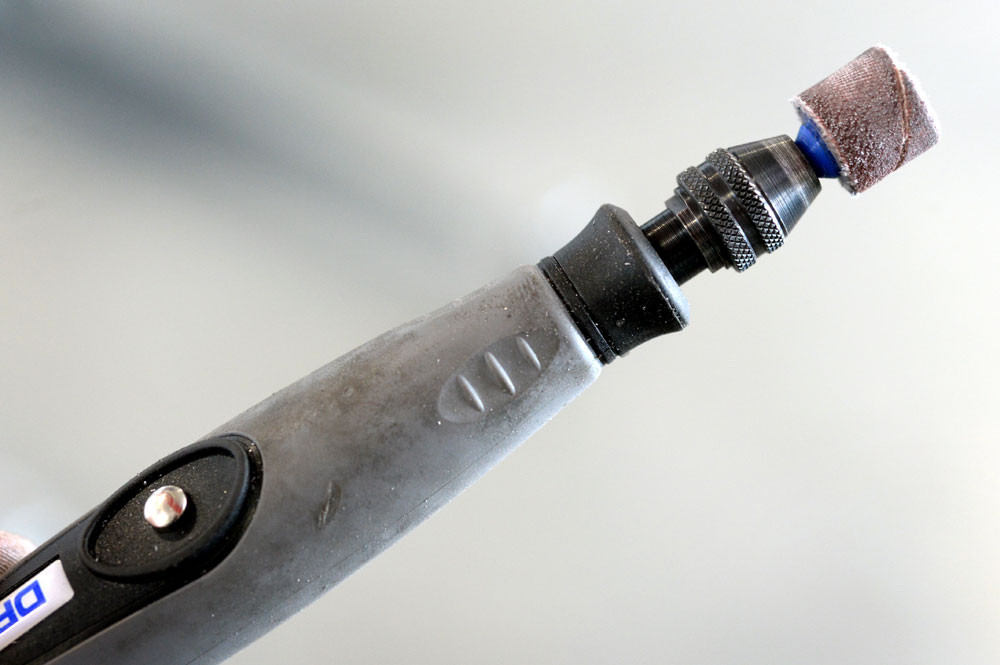
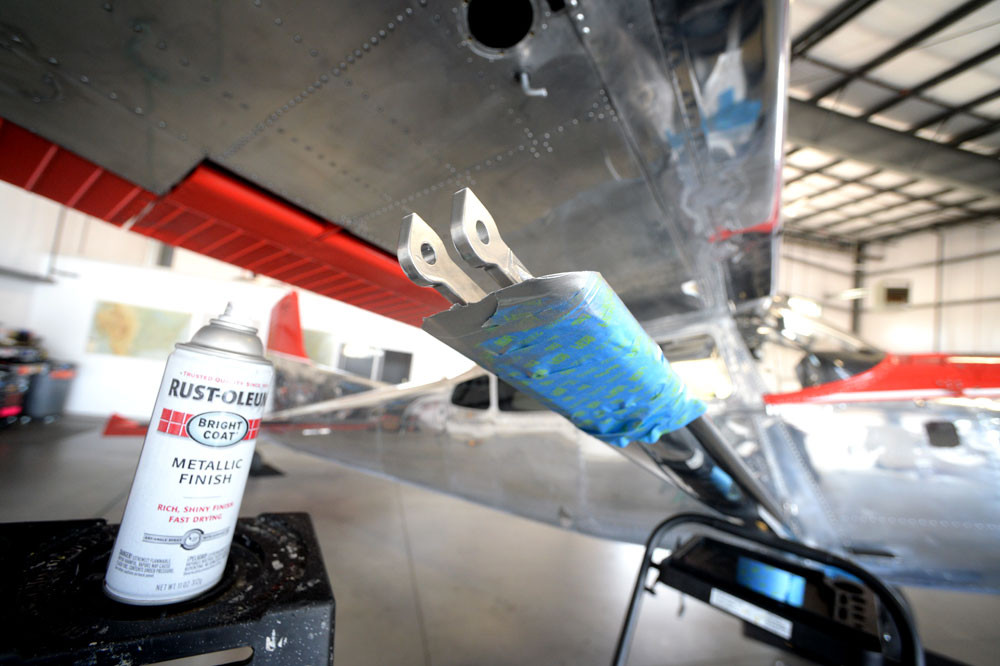
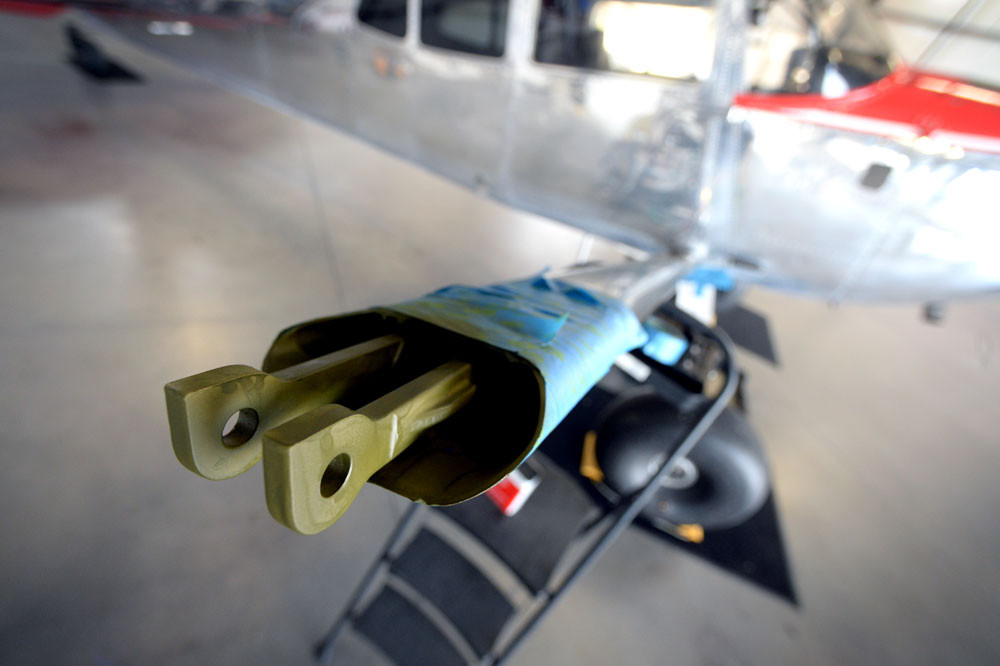
Next step is to dress up the outboard ends of the upper lift strut. Because flush rivets were removed and universal heads were installed, you will have to dish out some material on the inboard and outboard side of the strut in order for the strut to fit back where it belongs… A bit nerve wracking at first, but no biggie as you will be working distal of where the tangs rivet to the strut. Dremel works great here, first with the cutting bit, then the sanding drum.
Remember to measure sixteen times and cut once… You can always remove material, but never add it on.
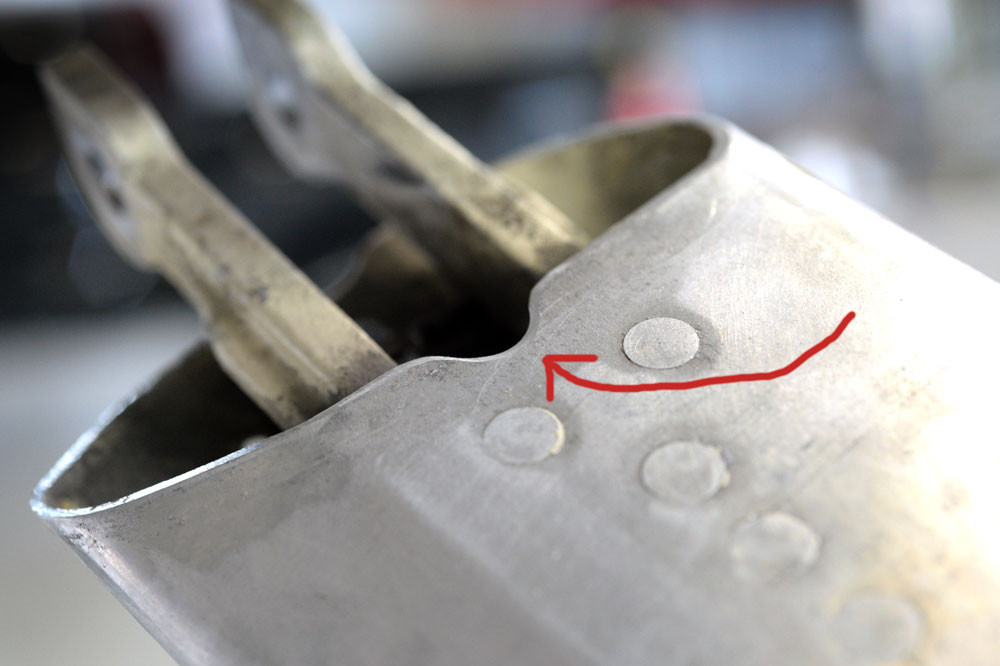
Last thing you might want to think about here before you re-install the lift strut is to rehab the tangs. I cant in good conscious re-install a part without freshening it up, so I hit it the part with some scotch bright, z-chromate, and some metal finish Rustoleum.
Wing X Install – Part 4…
March 4, 2016
Orig published over on BCP.org March 2015… This article is for entertainment only and is NOT an approved or instructional material. Consult the proper installation documents for reference.
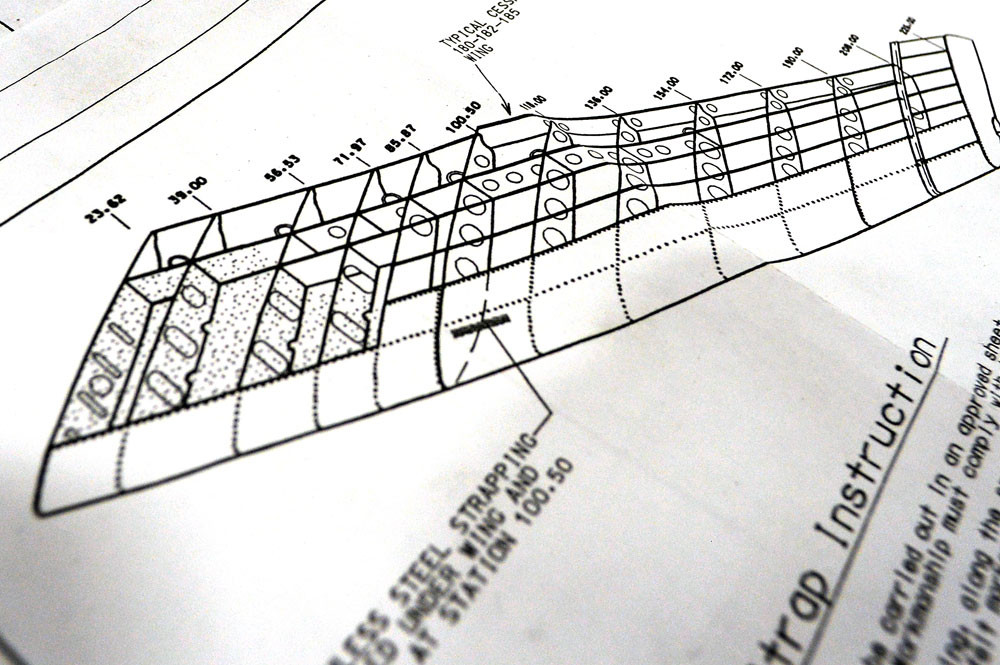
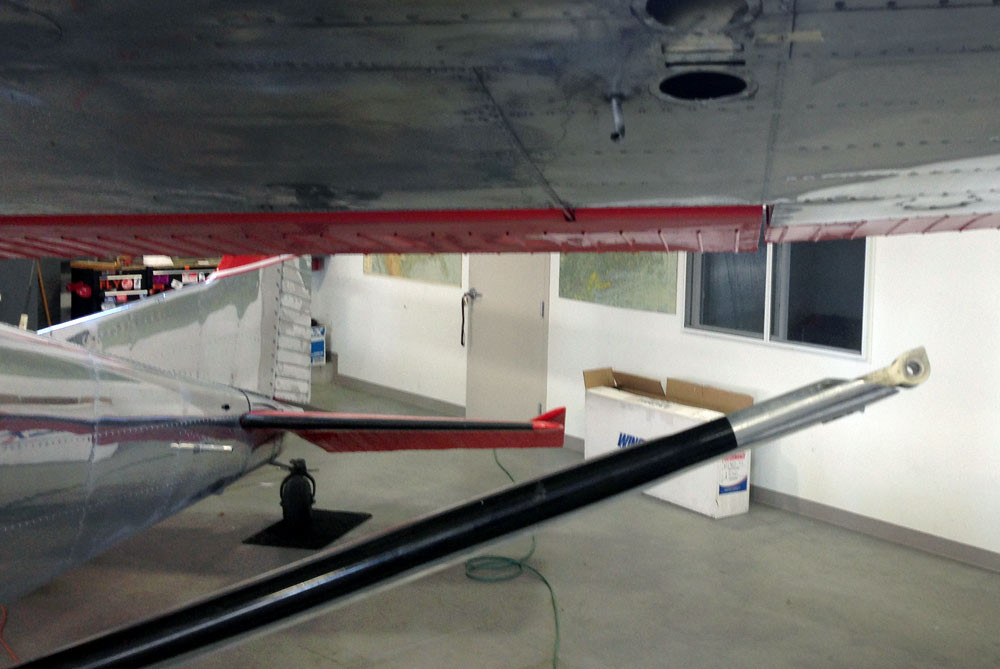
Next I focused on the stainless strap. Again, this is getting sandwiched between the skins at Sta. 100. Note: This step is only required on SOME models. You will have to check your main spar to see if it is needed.

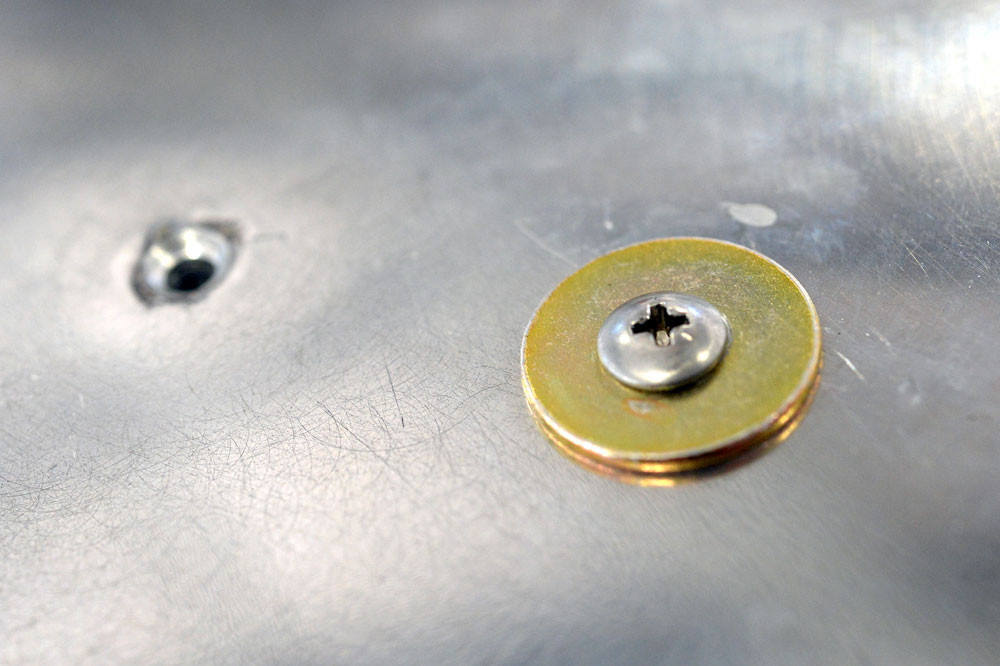
With the strut out of the way, you can now drill the heads of the flush mount rivets. You will be drilling out the 5’s and installing #6 universal head cherry max. Even though you will be eventually enlarging the holes with a #10 bit, take care not to take the easy way out and just drill out the 5’s. Snap the heads, and drive the tails out with a punch…
With the flushies out, slide the stainless strap between the skins and start spotting. Spot drill, remove, drill press, install, spot drill, remove, etc… Stainless sucks so go nice and slow and take your time.

Once the holes are all in, and everything fits, fit the strap and enlarge the holes with a #10. Remove and debur, then install for the final time….
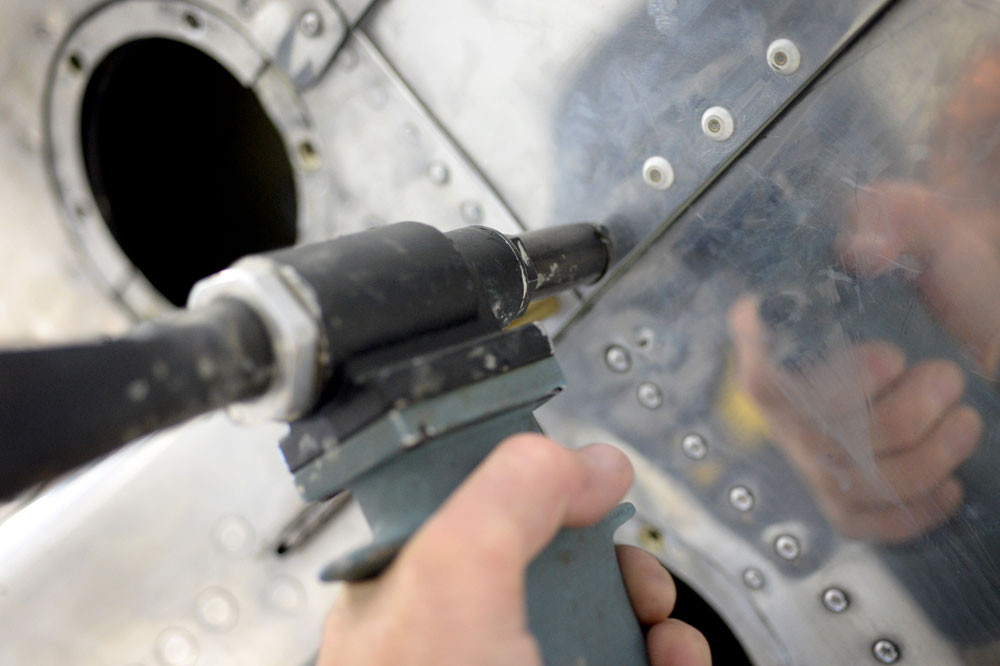
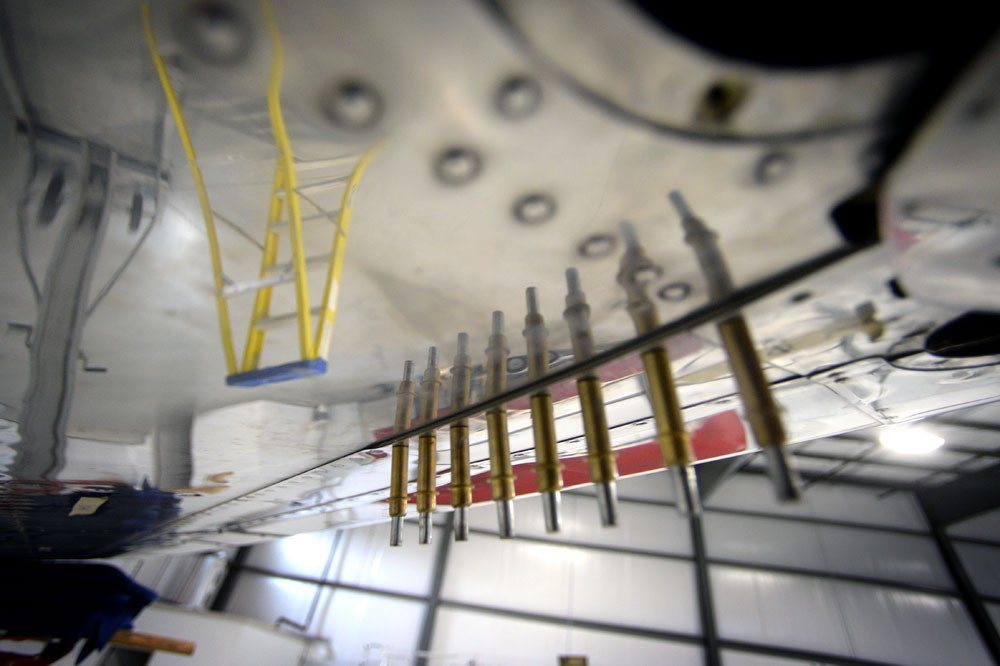
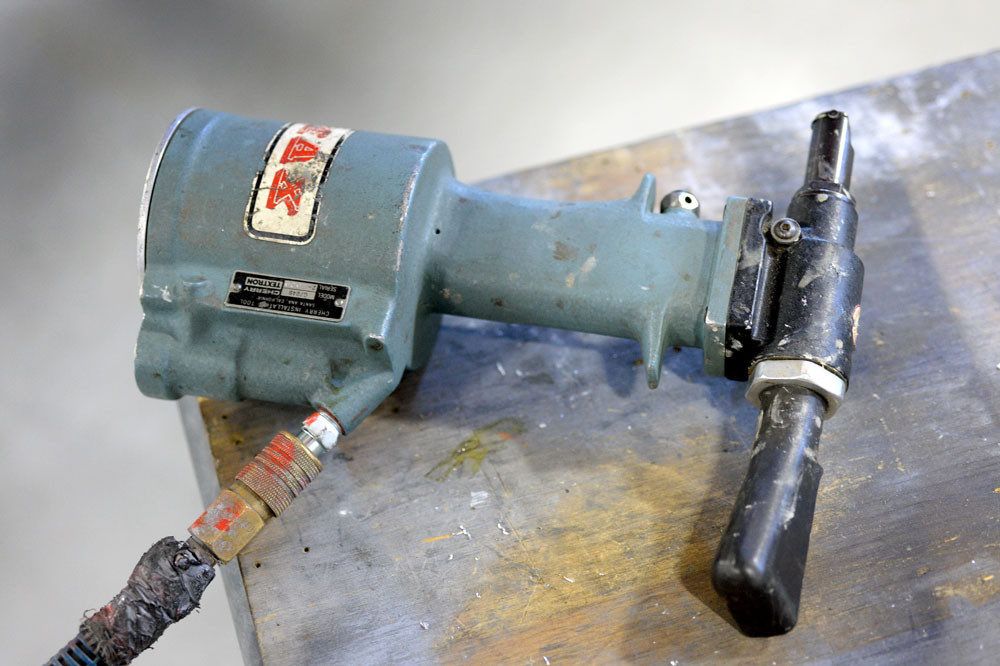
Since clecos wont really pull the sandwich tight enough, I used several #10 fasteners to snug it up real tight. Once you are all set, pull the #6 universal cherry max rivets. The 6’s are damn near impossible to pull by hand, so make sure you have a good pneumatic rivet gun handy.
One final note… The kit comes with all the fasteners and rivets you will need. That said, make sure you double check the hole with a grip gauge before you pull the cherry Max. The stainless strap will use 6-6’s for all save one. This is where the skins lap. Here WingX provides a 6-7.
Wing X Install – Part 3…
March 2, 2016
Orig published over on BCP.org March 2015… This article is for entertainment only and is NOT an approved or instructional material. Consult the proper installation documents for reference.
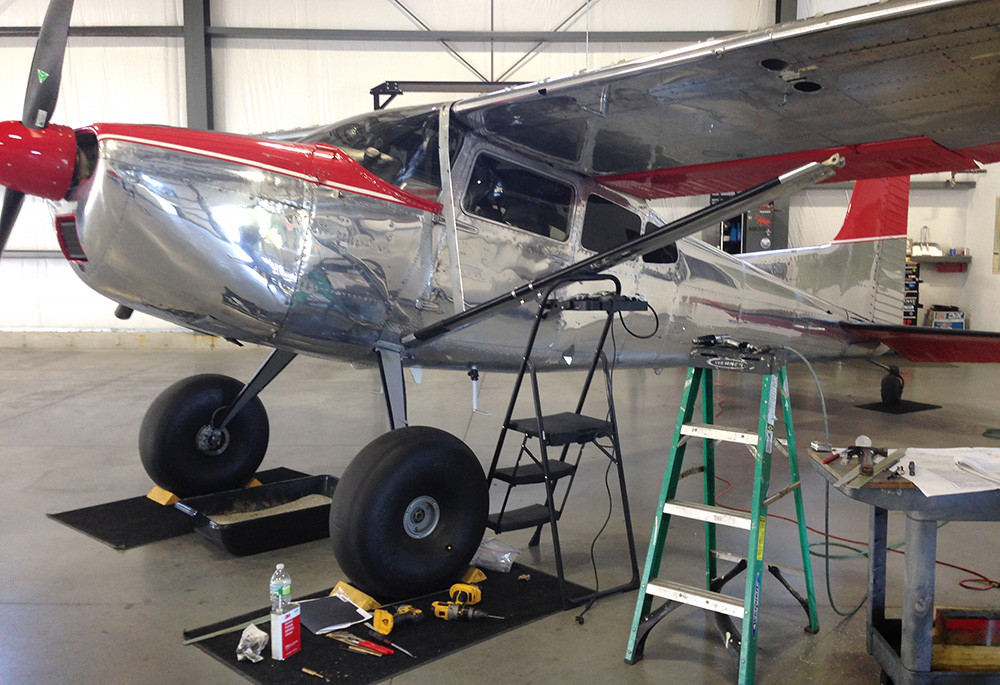
Next on the agenda is to get the strut out of the way so you can gain access to the Sta 100 lower rivets.
I use a Genie Superlift as it is perfect. Its manual crank allows for very small adjustments and its fork is just wide enough to lay a small cradle on and grab the outboard wing. It is also perfect for lifting the TW to get A/C into flight attitude for weighing, fuel calibration, or whatever… Once you have the bolt loose, releave the tension and drive out the bolt with a brass drift. It’s tough to get a hammer on the drift, so if you can’t get the bolt totally out, careful not to cheat and ease it out with a ratchet… This will gall the inside of the fork and weaken it.

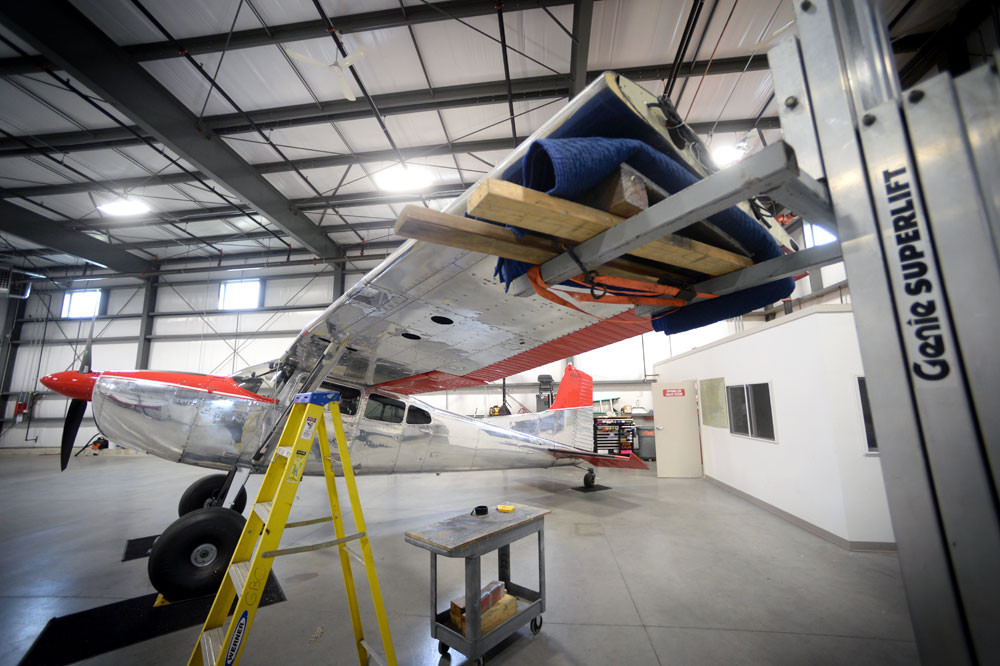
It’s a bit freaky, but crank the wing up just enough to let the strut end drop out. With the strut free, lower it just enough to gain access to the rivet line.
Wing X Install – Part 2…
March 1, 2016
Orig published over on BCP.org March 2015… This article is for entertainment only and is NOT an approved or instructional material. Consult the proper installation documents for reference.
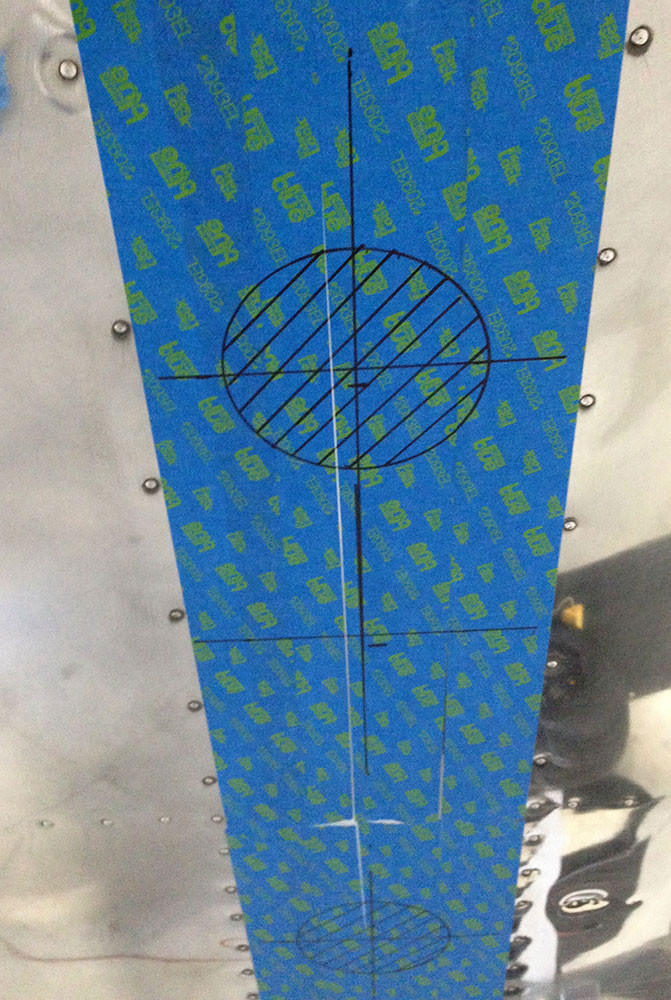
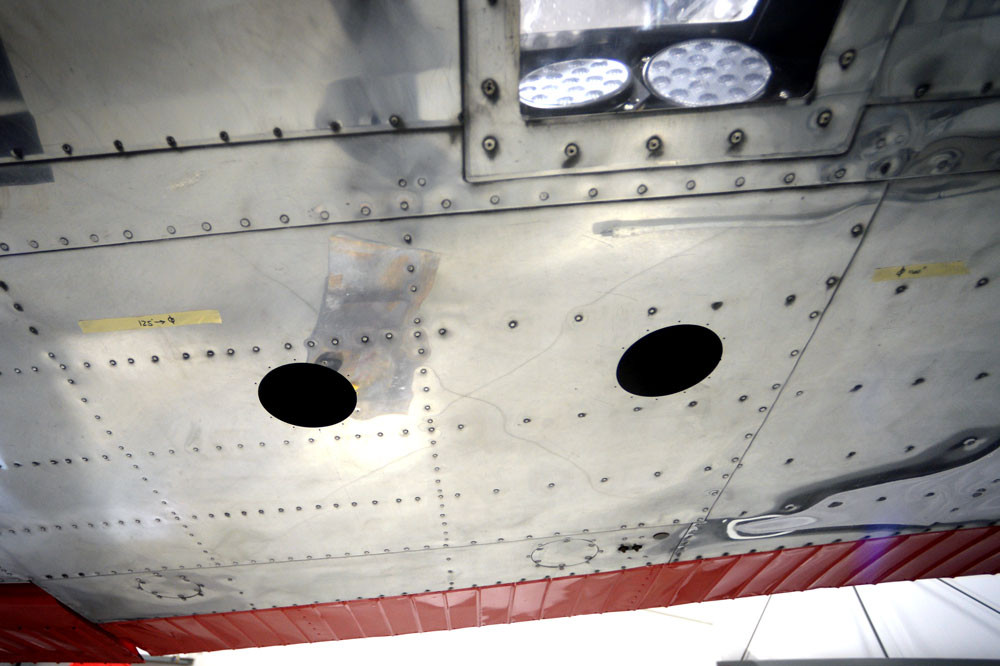
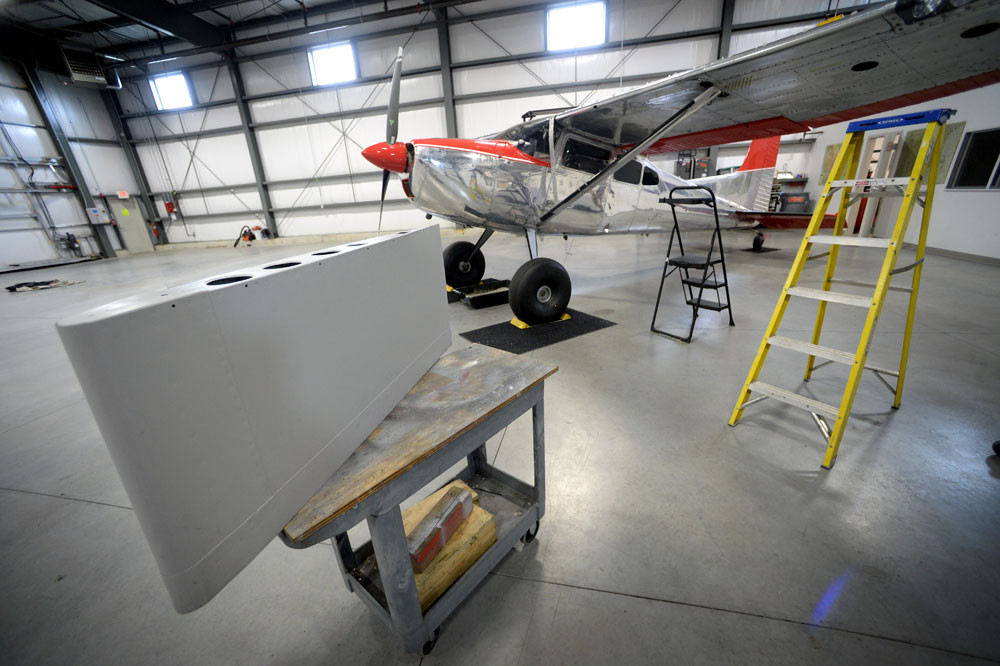
Lots of places to start, but the first step I did was to cut the access holes in the underside of the wings. The instructions say you can cut as many as needed, but really the job can be done with just two in the right spot. This is not a how-to, so confirm your own measurements, but the holes are roughly inboard of Sta 136 and 154, 2nd bay aft of the forward spar.
To cut the holes, I used the ARC360 from Spruce which is totally awesome. Super easy to use, fast, and perfect holes. No muss, no fuss.
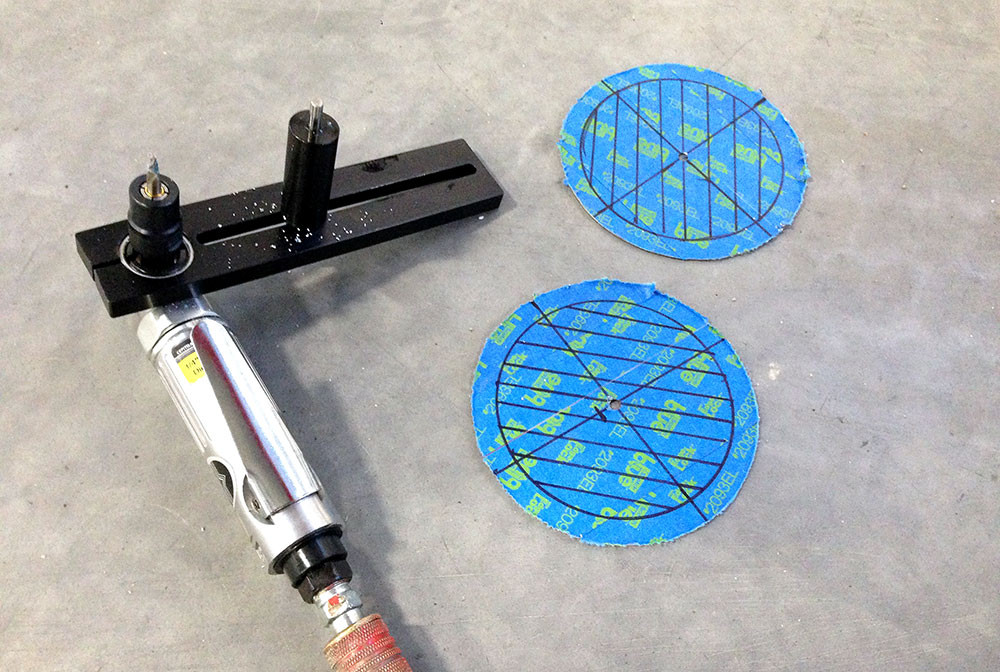
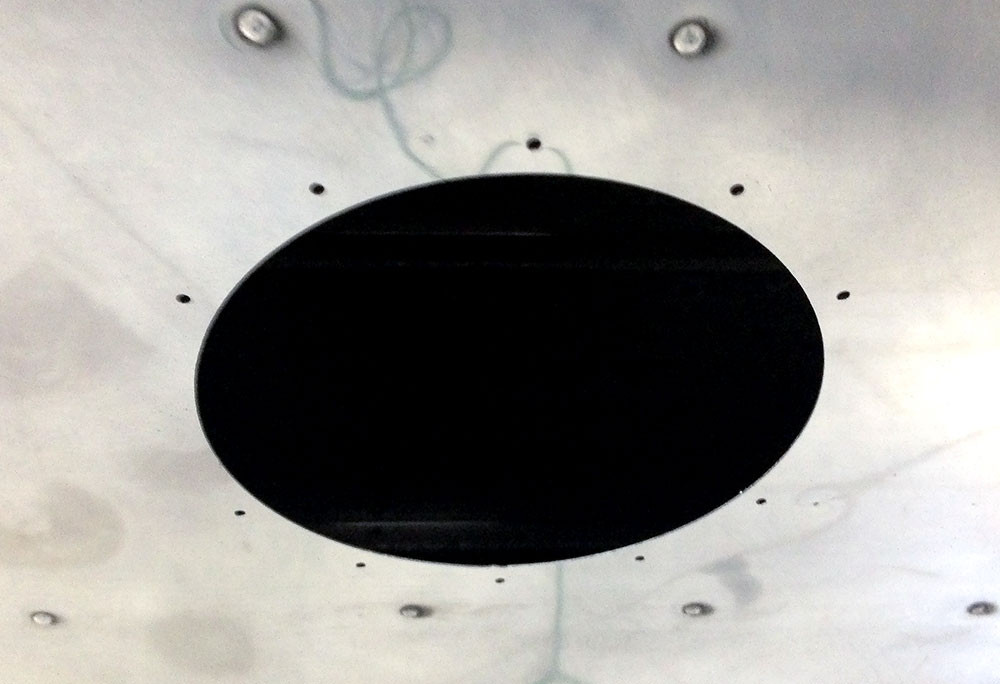
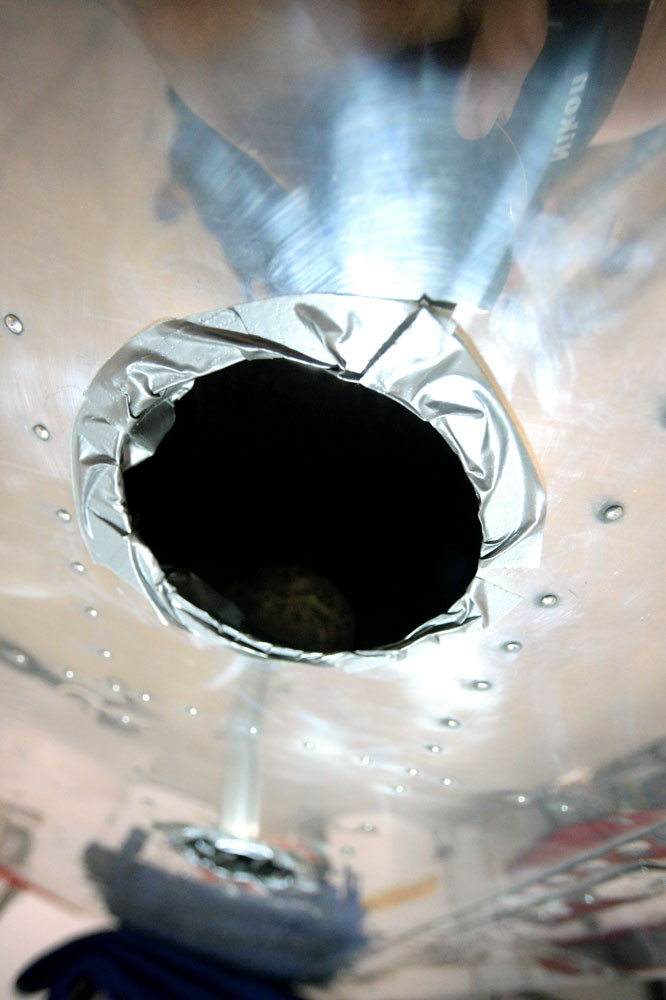
 You may want to rivet the backing plates for the inspection covers at this stage, but don’t squeeze em yet as you will want the holes as large as possible to get your arms in there… and for that, make sure you wrap some tape around the edges of the holes to save your forearms from getting all cut up.
Wing X Install – Part 1…
February 29, 2016
Orig published over on BCP.org March 2015… This article is for entertainment only and is NOT an approved or instructional material. Consult the proper installation documents for reference.
Alright… The Wing-X.
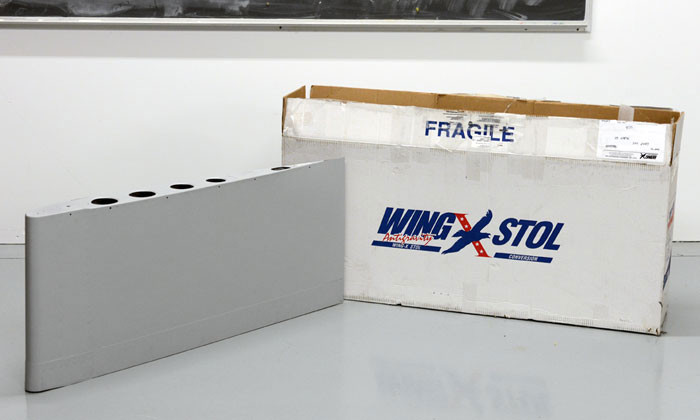
First thing to talk about is just WTF is this all about. Most 100 series Cessna owners knows about it, but exactly what is involved can be a bit of a mystery as there isn’t much install info on the web. One thing is for sure… it’s damn expensive. At $5k for the kit alone, its no joke. A shop that has done em before is in for 40-45 hrs while a first timer may be in as much as 60.
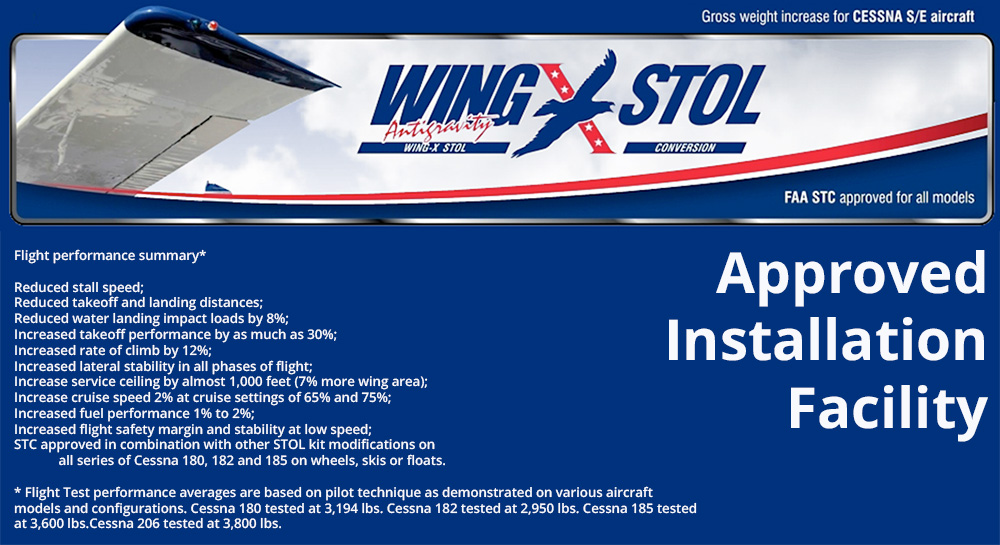
The WingX website claims the additional 12 sq feet will give a 25% reduction in ground roll (on wheels,) a 12-15% increase in climb performance, 1000′ increase in service ceiling, and a GW increase.
All sound good, so lets do it right?
Bummer is for me, I already put the big stab and Kenmore GW increase on, so nothing there… Increased T/O roll sounds nice though… An easy take off in the wagon is 250-300′, but any decrease is welcomed. A really good crisp cold day with light fuel is about 1700’/min so another 200’/min might be real nice indeed…
For the most part, the general consensus seems to be that for floats, the kit is for sure a winner. For wheels, it gets a bit more convoluted. I’ve tried to do the research, and unfortunately the “been-there-done-thats” that I trust generally say not to install it. I’m not sure if this is because they say it its tough in the x-wind, a bitch to get to stop floating/flying, or just damn near impossible to get inside a regular hanger, but because I own the kit, AND its super easy to take off once the install is done, I’m gonna put the damn thing on and make up my own mind.
You can order it for the stock wing, or as in my case, for the Sportsman. I did test fit the kit while I was doing the Sportsman install and the fit is pretty snug. Paul from WingX and Willie Stene work very closely and have worked out all of the bugs, so I expect no issues due to mod conflicts.
Here goes….
First understand the kit breaks down into three basic steps. 1) The stainless strap, 2) the packer, and 3) the tips. If applicable to your A/C
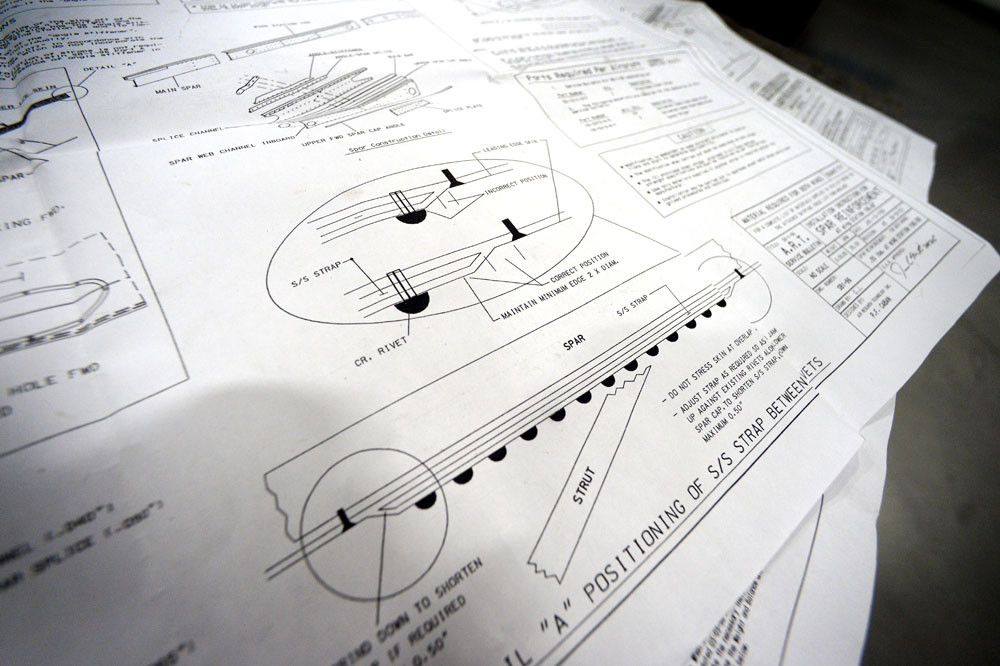
The stainless strap is used if your A/C does not have the later beefier angle bracket at and around Sta 100 and if you want or are operating above a certain GW. This strap is centered at Sta 100 (just under the strut) and is stuffed under the leading edge skin trailing edge. The bitch here is you will have to unload the strut by lifting the wing and then move it down about 12″. It also sucks ass to drill the stainless… But not impossible if patient. Go slow, and have some extra bits handy. The packer is fitted using #6 universal head cherries so make sure you have the proper pneumatic puller.

The packer is made up of two bits of alum straps that are riveted up under the forward spar cap centered around Sta 136. These are aluminum and much easier to drill, but require some modifications to the ribs to get them to fit.
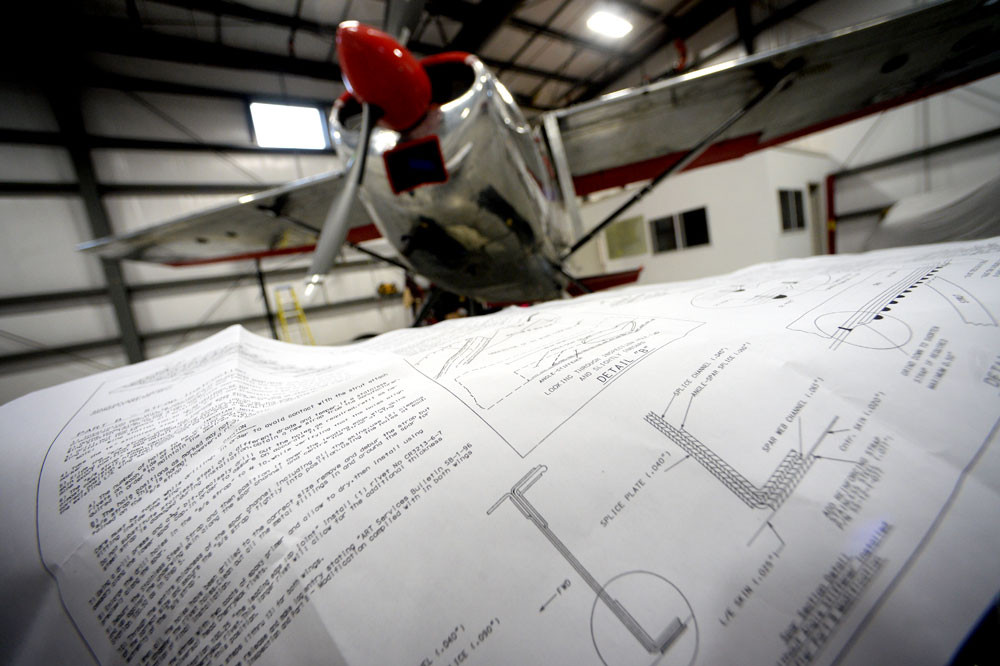
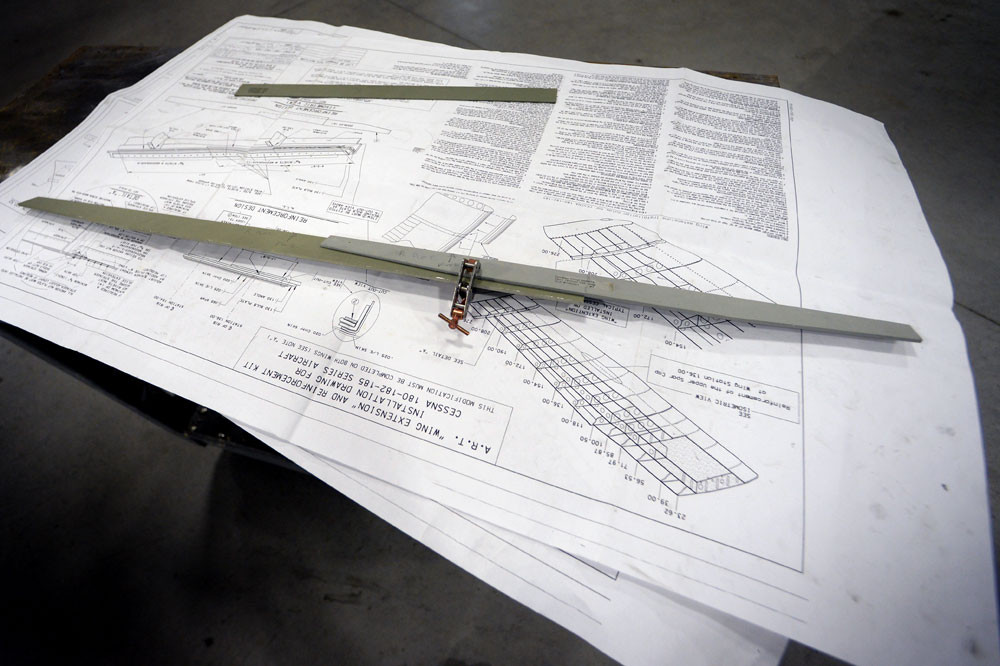
You will need to cut at least two new inspection ports in two bays to gain access to buck the rivets. The Wing-X drawings are God awful, don’t follow standard A/C convention, and have a bunch of confusing illustrations (e.g. large views of the left wing with exploded views of the right.) Might take an experienced sheet metal worker a couple of head scratches and some time to sort it all out, but in the end, it ain’t rocket science. Actually being smart might be a detriment as I’ve seen the less experienced A&P just push thru this install w/out asking the important questions. Their installations aren’t pretty, but they go quickly.
Regardless, I will say that Paul C at WingX is FANTASTIC and will be there (even on the weekend) for support. Top notch customer service IMO. Although confusing, he provides a good and complete kit.
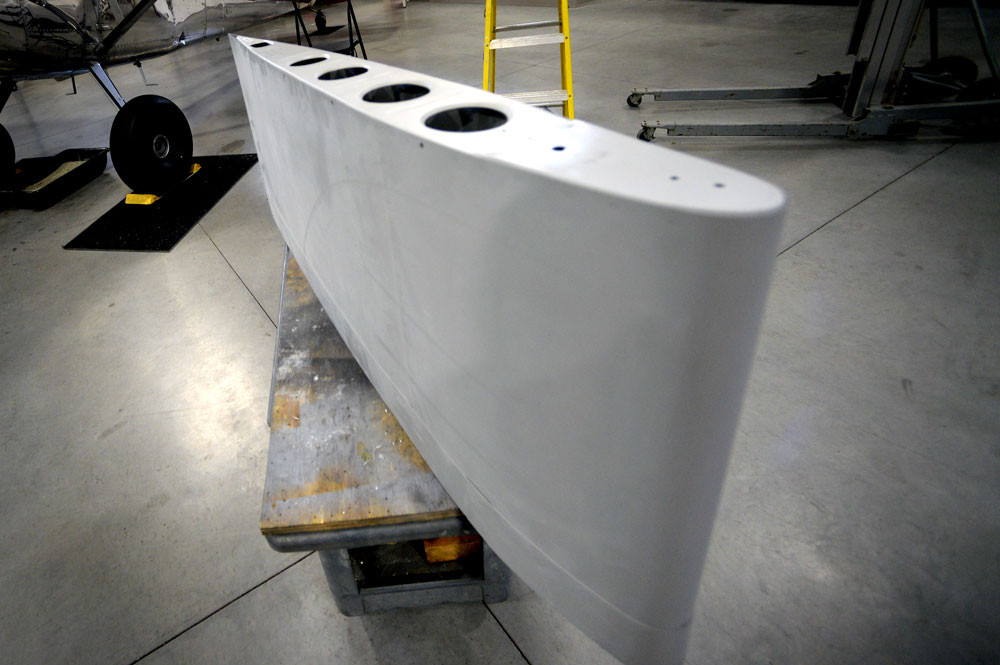
Last of the three components are the wing extensions. These come primed and will eventually just screw on like wing tips. Patience here is important as it is fairly critical to get the geometry perfect.
More tomorrow…
Wing-X Install Begins…
February 28, 2016
Post was orig published over on BCP.org Feb 2, 2015...
Well we have been slammed with snow here in New England… Just got our hanger plowed out yesterday in time for another 12″ of the stuff today…
Anyway… The non-flying WX is good for projects, so I thought I would start in on the Wing-X install. I’ll try to do a detailed install report, so stay tuned!