Mountain Wave Aviation – Great Company
May 31, 2018
(unsolicited, but in a land where there is so much friction with service) I wanted to give a quick plug for Mountain Wave Aviation and its new owner Ron.
I have been installing the Mountain Wave nets on birds (as well as on my own buggy) now for 5 years, and have to say that I continue to be impressed with Ron and his customer service, not to mention the quality of the nets.
Folks that have tried to order nets in the past are familiar with their epic lead times… Sometimes over a year. Now that Ron has taken over the company, turn times are lightning fast.
If you want to learn more about the nets, go here: http://mountainwaveaviation.com
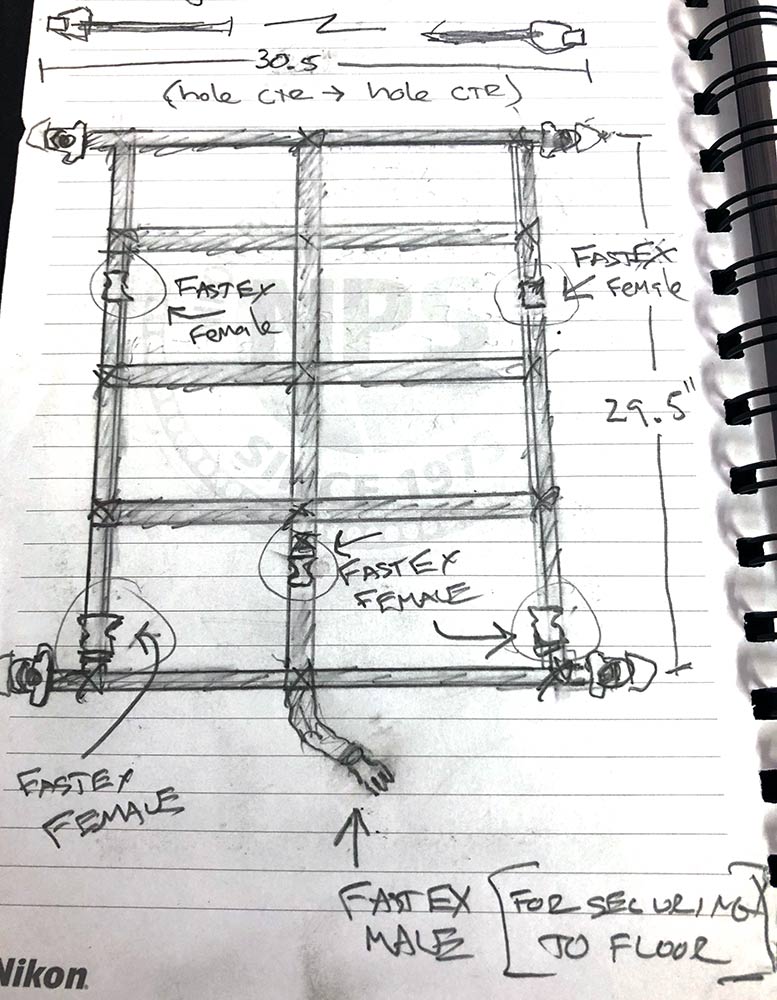
It takes a bunch of additional time and he would prefer not to do custom stuff, but I have also worked with Ron to create some of my own designs, and they have turned out awesome.
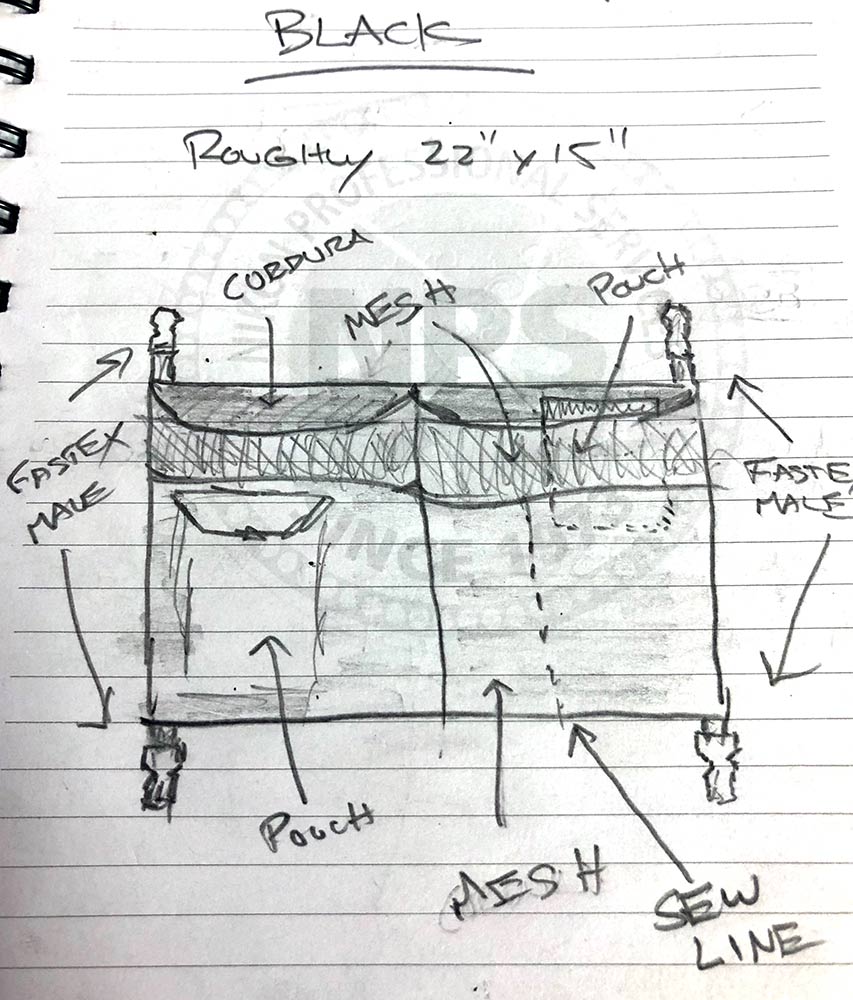
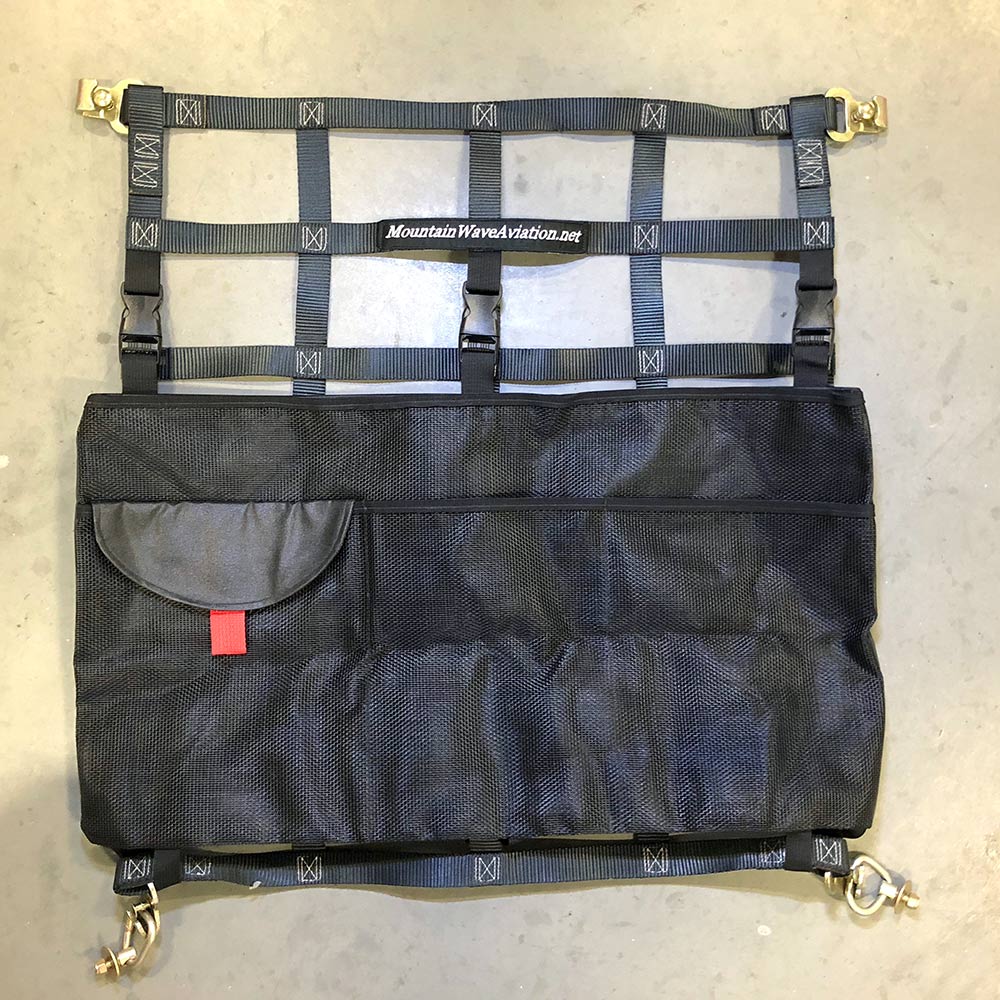
My favorite is the rear organizer pocket for the extended baggage. Here are my sketches, and then the final net he made for me. I installed one on my bird as well as a customer’s bird that I just ferried out west.
If your looking for a cool new item to install in your Cessna, check out Ron’s rear carry thru or extended baggage net. Well worth it!
Pockets & Leather…
April 24, 2014

One of the downsides of the “utility” interior is lack of places to put stuff. When Ron (Aviation Creations) did my 170, I had him make some custom map pockets for the front. When he did the seats for the Skywagon there was a bit of leather left over so I designed a bunch more custom pockets for him to sew up. Like the rest of the airplane, form follows function. The pockets are based on how I like to use the airplane. I was pretty anal with the designs sending him detailed drawings. I know he cursed my name, but Ron really stepped up and made exactly what I wanted.
Today I started to install a couple of the pockets. Below is a map pocket for the half panel up front, a small door pocket to hold a flashlight and fuel tester (you can also see the armrest he covered w/ the grey leather,) and a small pocket for the baggage door. All the pockets have the same Italian double needle stitch that the are in the front and jump seats. More to come.


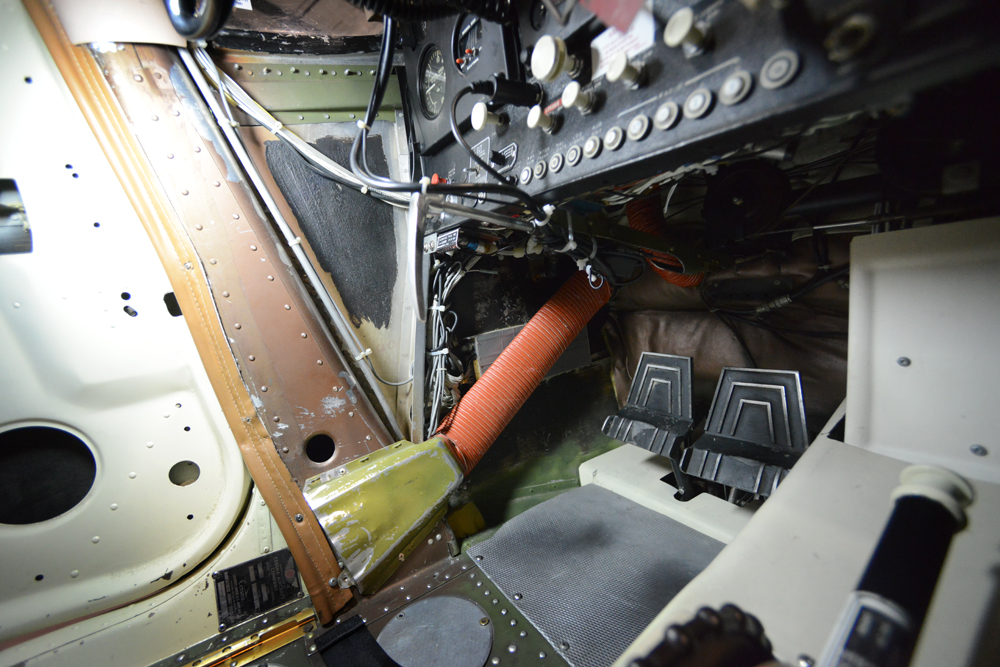
Kick Panel Area…
January 26, 2014
I got an eMail requesting some pics of the kick panel/pedal area… Here you go!


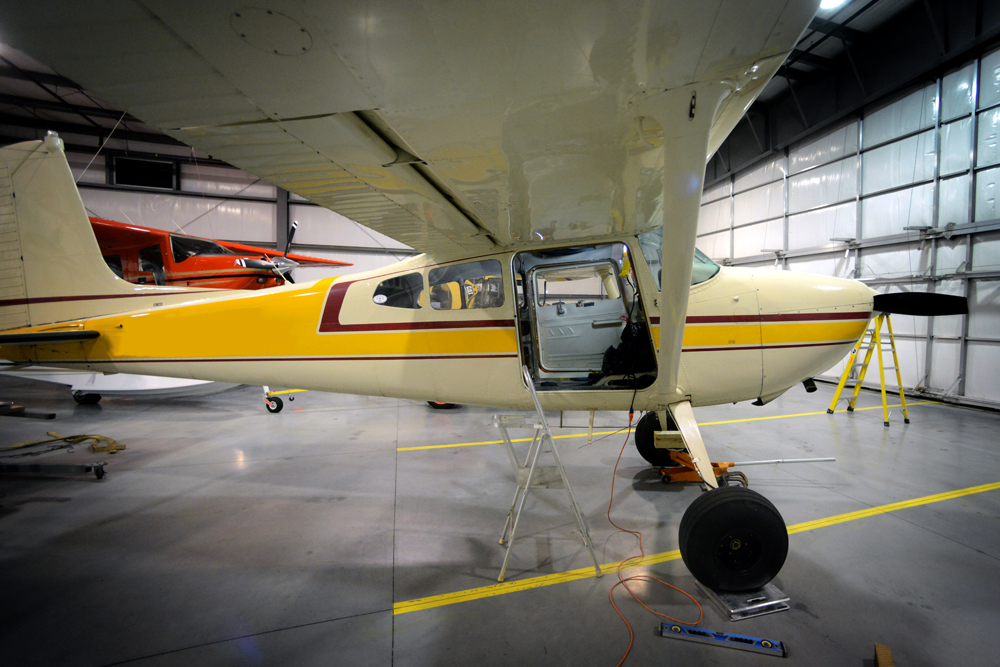
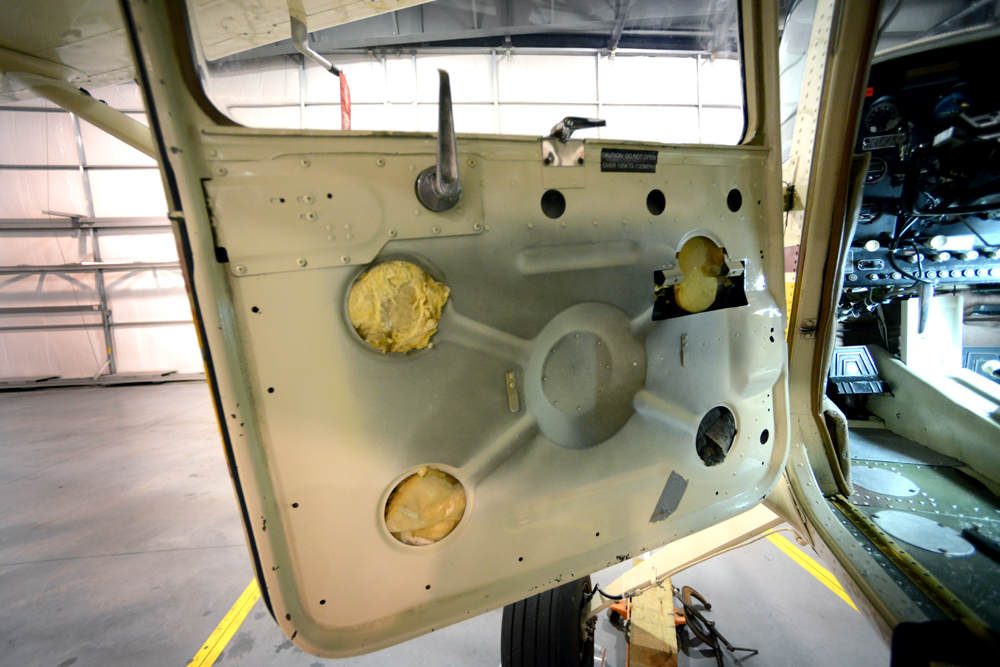
Doors Done…
June 6, 2013
Finally finished all the painting (interior anyway.) Feels good to be over that hump. Time to start installing the closed cell foam.
Purchasing Paint, Ready to Shoot…
April 6, 2013

Picked up the paint for the interior… Going with Imron 3.5HG… the stuff is the bomb and is really tough. Its an industrial paint and can take the abuse.
Interior/Headliner Thoughts…

plan is to make the Skywagon the same as the 170
I def not a headliner type… didn’t even think about installing it in my wagon. I love how much more headroom I get, and since I wont be working the airplane, I’m not that worried about buggering up the foam. I am going to be doing the same exact thing I did in my 170 with the same grey Imron and contrasting 1/4″ foam. It was way more quiet than the stock 170 w/ headliner and fiberglass insulation. Wasn’t that cold either…
Downstream if I change my mind, I can always install it since I am leaving most of the headliner attach points.
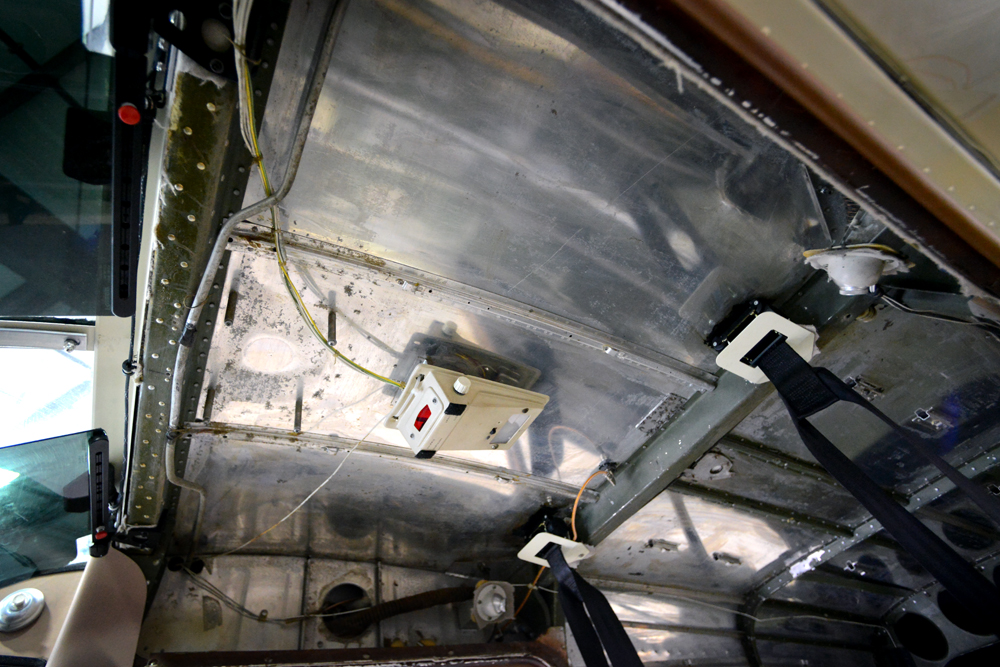
RE: the overhead light and light spill. I put UMA bezel lights in the panel on every instrument as well as a light under the glare shield, so I don’t really need the overhead for a panel flood. I am running red dimable LEDs up there, so the spill is kind of nice. It floods the cabin with a subtle red light for overall illumination if I want it.
So Close to Paint…
April 3, 2013
Skylights are installed and the interior is mostly prepped… Painting soon!


Jumps…
March 28, 2013

Got the Atlee Dodge jump seats installed today. They look great and are awesome… So glad I went with these over the stock bench seats. Sending them down to Ron at Aviation Creations tomorrow along with the fronts and 3rd row to get upholstered. Going to do the same leather as the C170.
Panel Progress…
March 21, 2013

I ended up tweaking the panel design a bit and I think it is a bit more aesthetically pleasing now. Test fit the mockup today and we are golden. Also finished prepping (soooo glad thats over.) So clean you can eat off it. Interior paint is just around the corner!


Bead Blasting…
March 7, 2013
Also finally finished all the lion’s share of the media blasting. Must have been a weeks worth of blasting. UGH. Dropped of TONS of parts to the powder coater. Here are two of the three boxes…


Yoke Refinish…
March 6, 2013

Got my yokes back from the re-finisher… nice to see some stuff shaping up.
Ordered Flooring…
February 28, 2013
Its called “Aerofloor DOT” purchased from AIP Source.
Super thin and light weight. Comes in different colors. I went with grey. Sells by the yard and is 54″ wide which is plenty (Skywagon cabin is about 38″ wide at the floor.) I ordered 4 yards which will be enough.
Here are images of the load surface, back, and its thickness.


Rip em and Strip em…
December 20, 2012
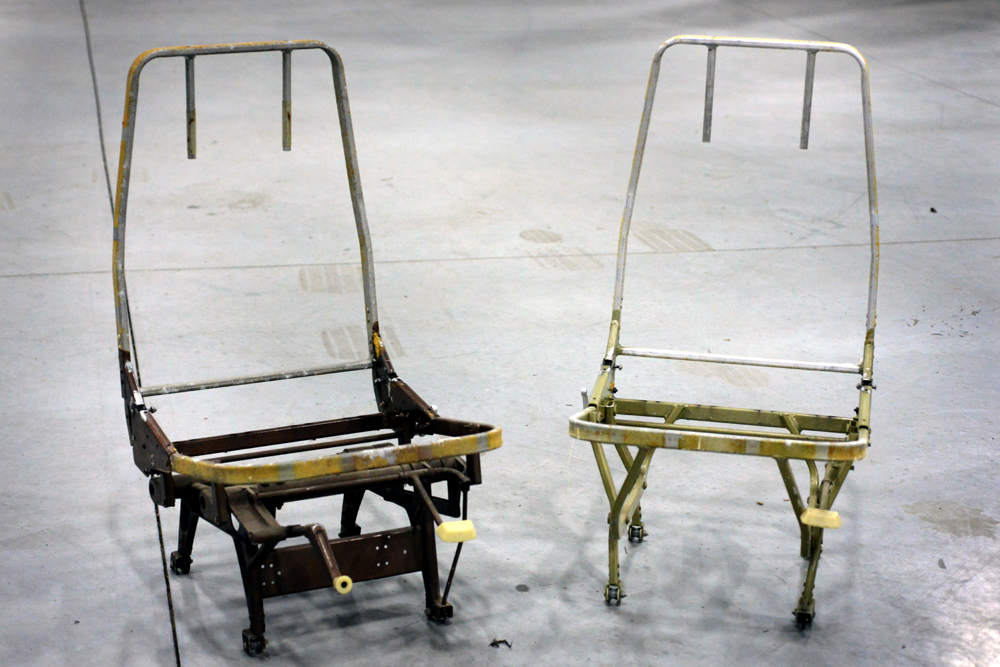
So obviously the first thing to do when you get new seats is to strip em down and give them a good once over. Luckily for us, both seats pass with flying colors and will be good to go for the restoration.
But all this talk about weight, the question is will it really be worth the fuss?

To answer the question, again, baseline weights are needed. Knowing what we are starting with will give us an idea of just how much we saved once they are back from Aviation Creations.
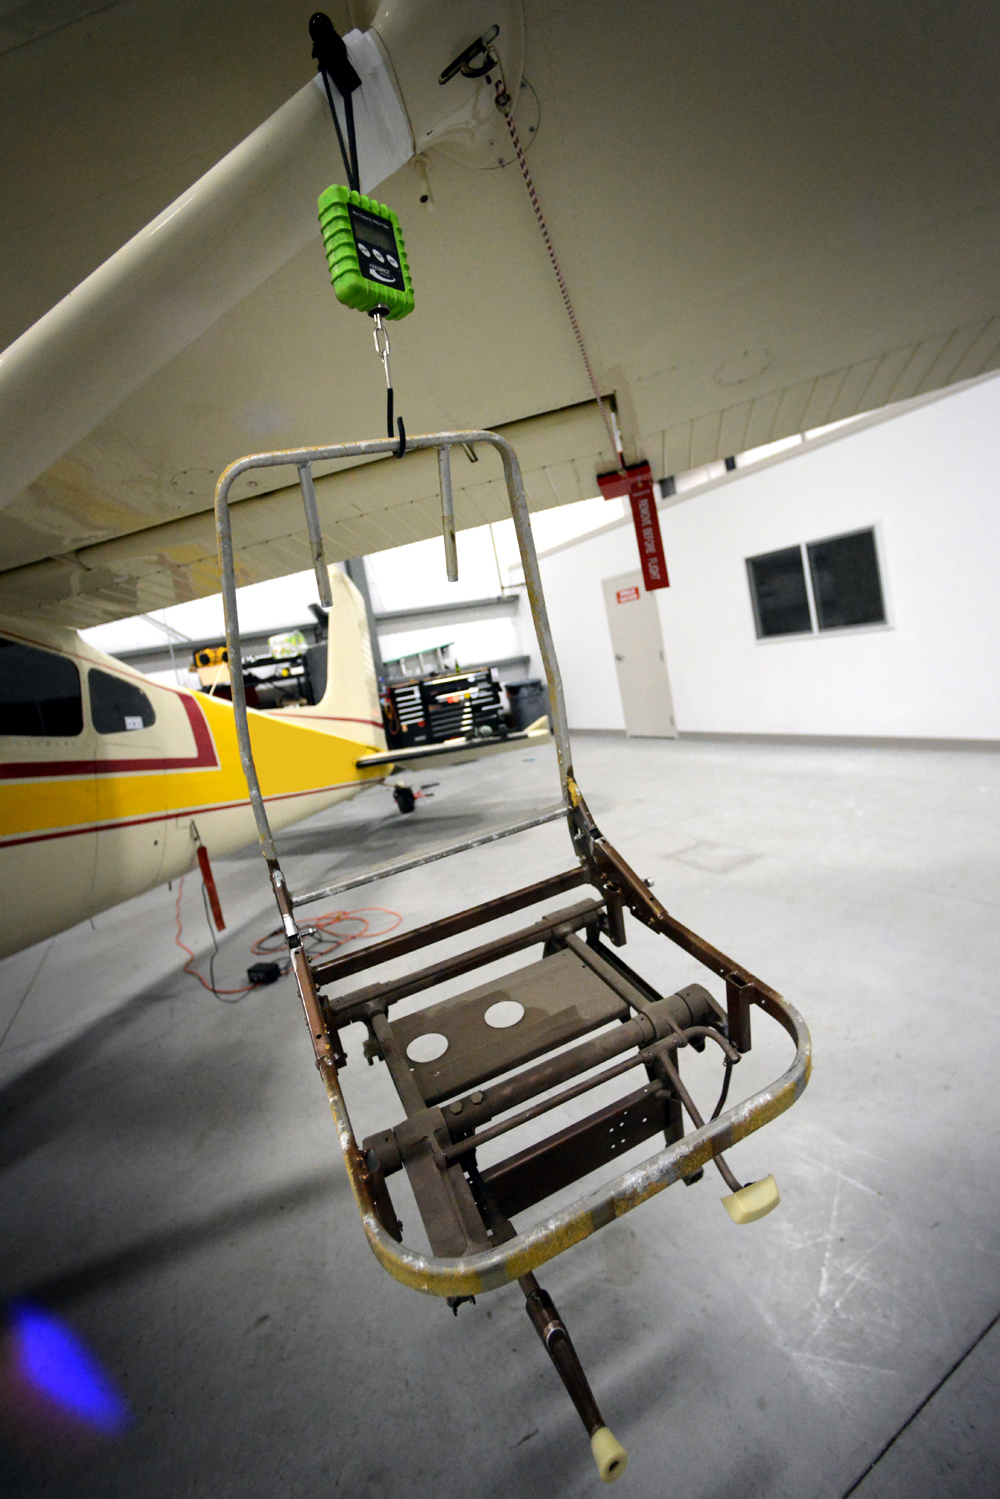
The Skywagon came with an articulating pilot seat, and a standard co pilot. We could of course gone really crazy and tossed the articulating seat for a standard seat to save even more pounds, but for this project, although we are weight conscious, we are not being insane. (There will be some comfort) So the articulating pilot seat goes back in.
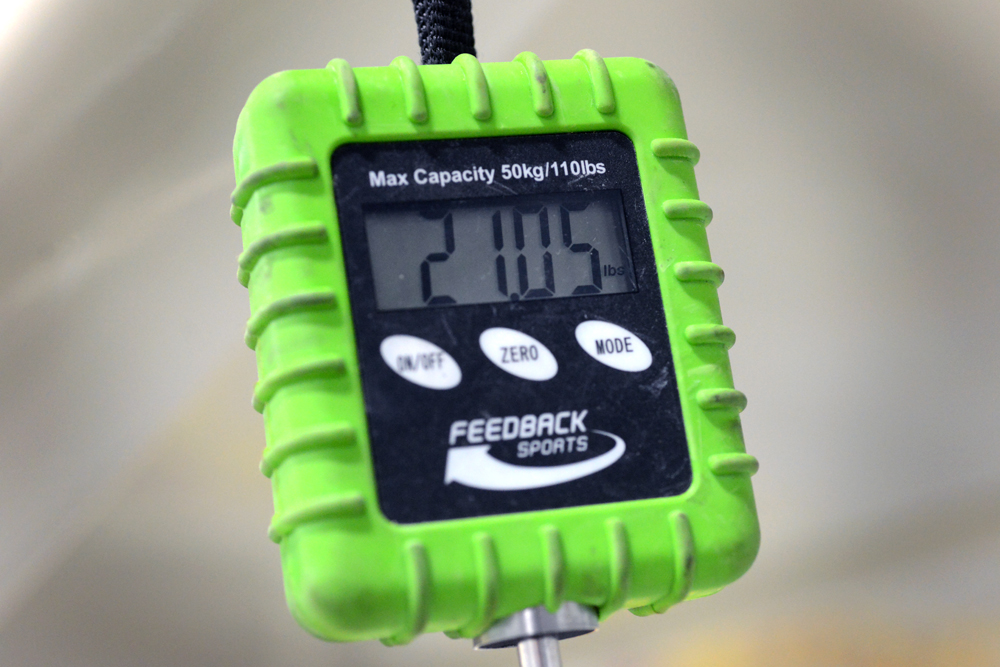
So here’s the deal… Articulating Pilot w/ upholstery: 21 lbs. Co Pilot w/ upholstery: 14.86 lbs. Keep in mind that I suspect that the sheep skin is a bit on the heavier side, but out comes 35.86 lbs of front seats. The goal for the new seats (finished) will be 25 lbs. For the C170, Ron was able to shave off 6 lbs per seat. Hopefully we will be able to do the same.

But what about the articulating seat vs/ the standard seat? What are those guys actually saving who forgo the articulating seats in lieu of the standard seat?
Stripped, our un-upholstered articulating seat weighed 10 lbs. The standard seat (stripped) weighed 6.46 lbs. So is it worth the extra 3.5? I really don’t know, but for me… it’s stayin.
Seats…
December 19, 2012
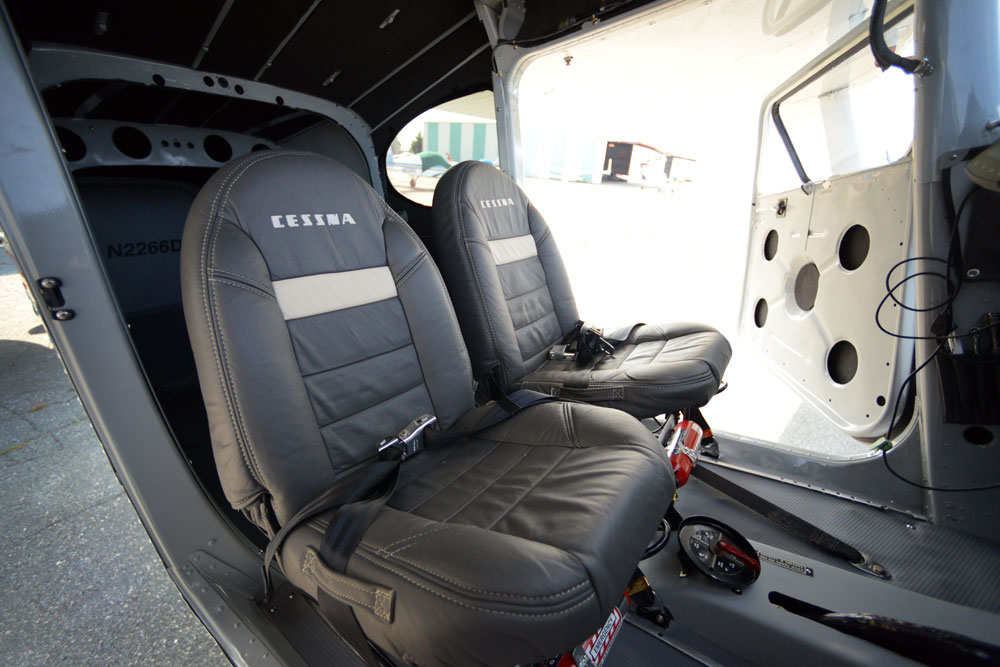
One of the best things I did for the C170, was to have Ron Matta at Aviation Creations in AZ redo the seats. It really did make a huge difference (and saved a bunch of weight,) and I was hell bent on doing the same thing for the Skywagon.
The wire frames are removed, subs are stripped, powder coated, and sent along to Ron. He then heat shrinks nylon to the frames, and builds up memory foam cushions. (super comfy.)
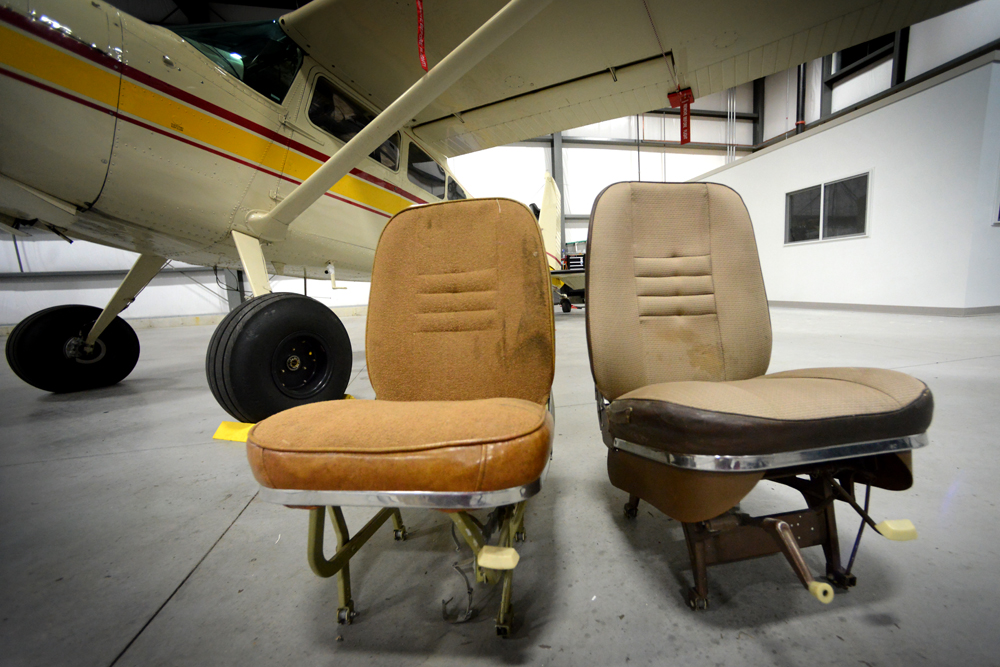
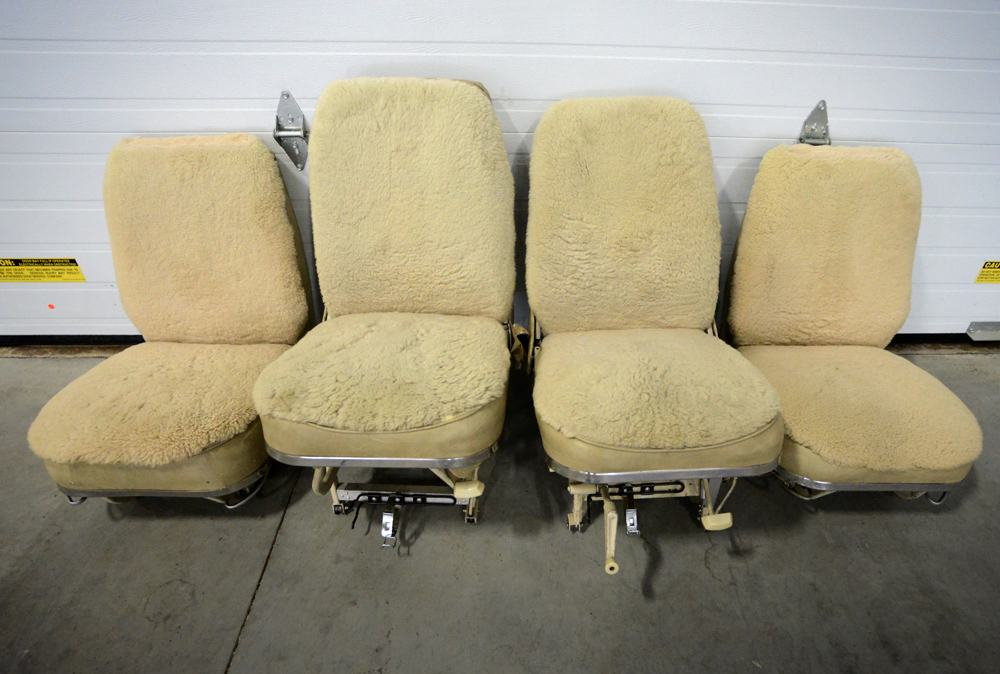
One of the things that the previous owner of my Skywagon was really proud of were the rear seats he had field approved and installed. During the install, he had all four seats custom upholstered with sheep skin and are actually really soft and comfy.
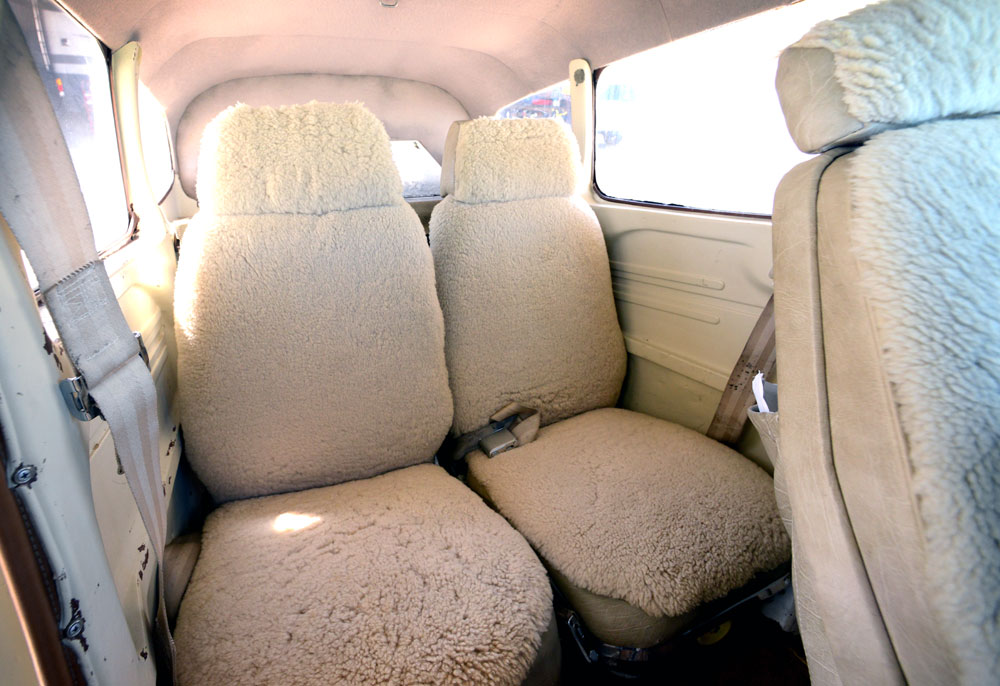
Although nice, I was sold on Ron working his magic, which meant the covers (if I used them) were going to have to be destroyed which would be a shame. What to do???
After a bit of searching (and scrounging) I ended up finding a pilot and co-pilot seat from the same 66 model year at Wentworth Aircraft. The upholstery on these are junk, but that doesn’t matter. The frames and mechanisms are sound, and are going to be the perfect foundation for the new seats.
The plan is to strip down these new seats, revitalize them, and send them off to Ron for a new ultra-light finish. (If your interested in a nice matching set of 4 sheep skin seats, give a shout. They will be going up on eBay this week. Use the Kenmore STC, or use my 337 paperwork for field approval. I will include the Cessna seat rails for the back seats. Rears have headrests, pilot is articulating, copilot standard.)
Goo-B-Gone…
December 18, 2012
I wish I could be more excited and wax poetic for paragraph after paragraph… But the simple fact is that getting this stuff off just plain sucks.
Was able to finish up at the office a bit early and hooky-it down to the hanger to spend some quality time in the respirator. We are almost finished with this stuff. Just the kick panels and this phase will be over.
Floor Choices. AIP Source…
December 17, 2012
 It is always amazing when you actually weigh every item that is inside an airplane. It’s so easy to just say, who cares. Just put it in… The fact is when you count every item, you can really see how easy it is to load up the airplane with all sorts of extra none-sense.
I am being very conscious of weight on this project. It’s not that I want to be a nutty extremest and throw the baby out with the bath water, but I want to have an understanding of how every choice affects the bottom line. If it makes sense, weight addition is ok, but if its unnecessary, than it doesn’t belong.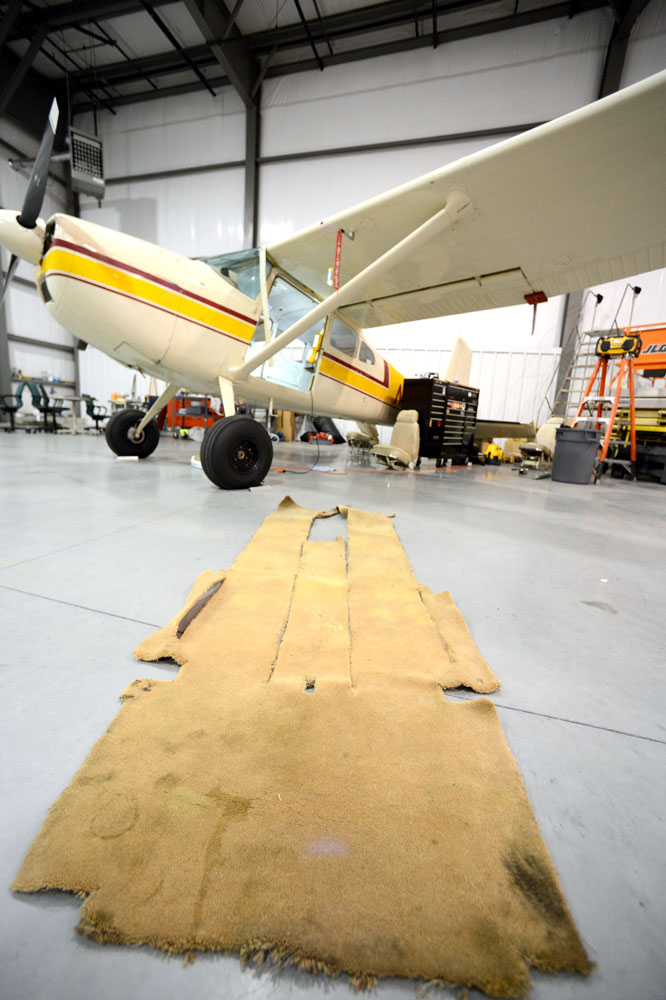
The carpet that was removed from the Skywagon was a residential nylon carpet. Besides being illegal and having no burn data, the damn stuff was super heavy weighing in at 10 lbs.
So the question is: What to replace it with??? If you spend any time perusing the boards, you will read all sorts of opinions. This is too heavy, that is too light… This one makes it too loud, and that one wont provide enough protection. Blah blah blah… The funny thing is that most of these opinions are from people who just choose one option. They never do any testing, or have any other experience other than what is in their airplane.
I guess I fall right there with the rest, and only know what I know. But I do know this… I have been flying the Skywagon without any carpet on the floor. In fact, I have been flying without any interior at all, and I can report that for me, at the temps I am flying, it is totally cool. It’s not to cold, and it’s not to loud. This is pretty liberating as I can do as little or as much as I want.

For the C170, I found a really cool product from AIP Source called Aerofloor DOT. You order it per yard, and comes with the important burn data. The floor I installed in the C170 weighed in at a paltry 3 lbs. Of course this product was super thin and provided NO padding for protection, but with the kind of flying I was doing, it didn’t matter.
AIP Source tends to work with larger orders, and I believe supplies Cessna with the new floor in their new airplanes, but still sells to us little guys. When I ordered for the C170, I found them to be cordial and very helpful. Their website has good photos of the colors and patterns, so its easy to make a decision. All that I had to do was discuss weight.
For the Skywagon, I have a bit more leeway with respect to weight, so the jury is out with which floor I am going to install… The Lonseal is thicker and provides more padding (and sound deadening) but is a bit more than twice as heavy.
I’ll be mulling it over this next week before I place my order, but chances are I will go with the same as the C170 and order the Aerofloor DOT. Keep it real light!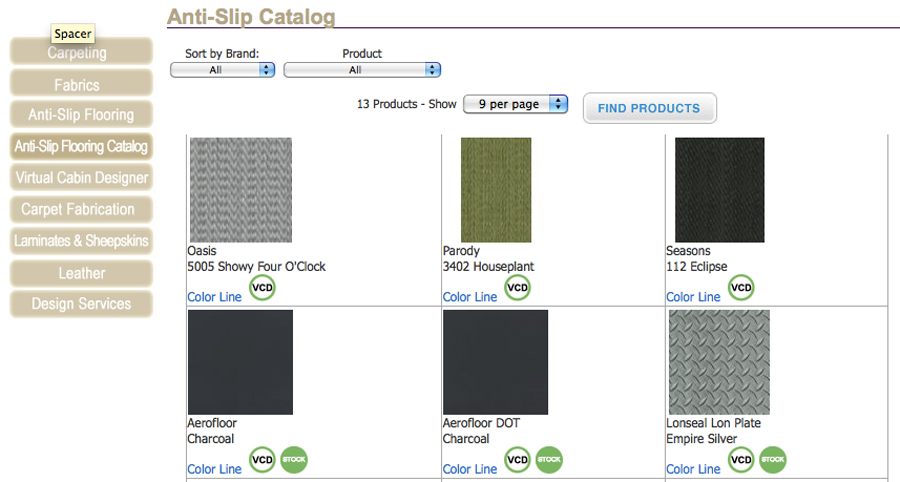
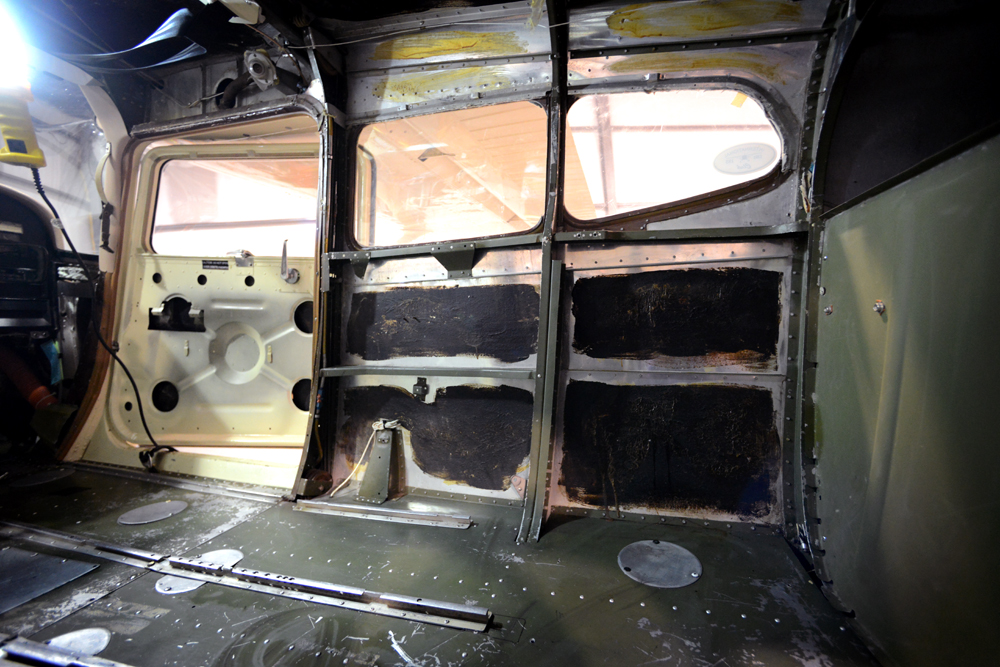
Guck Sucks…
December 15, 2012
Used up a whole lotta elbow grease today getting some panels clean. Anyone who has done this job knows just how much this sucks. It really is the worst…..
But nothing worth doing is easy, so I’ll carry on. 1/4 of the black guck is gone thank Christ!
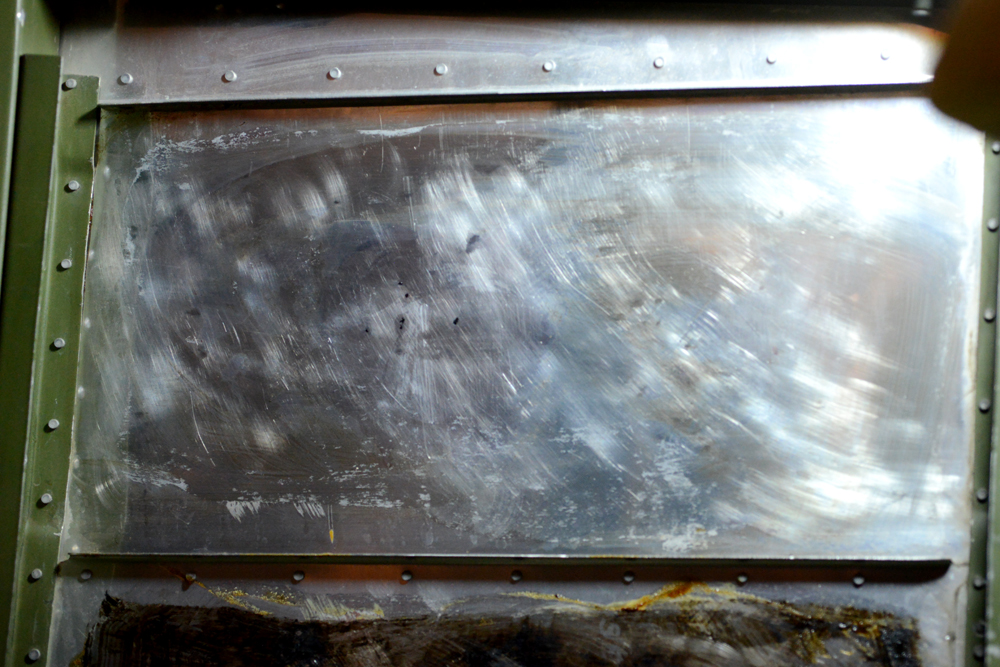
Stripping Begins…
December 14, 2012
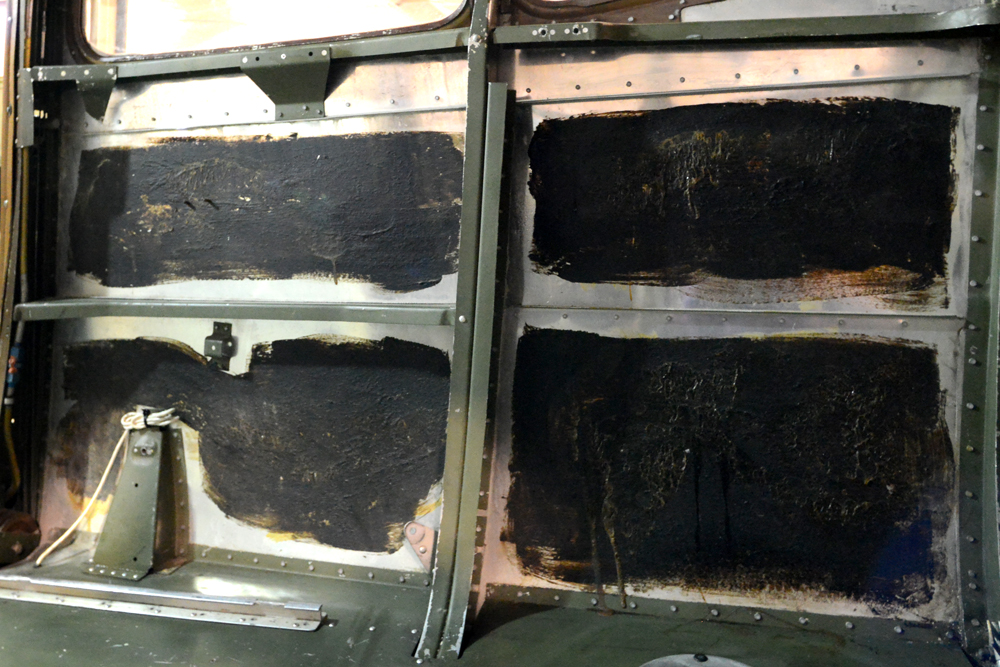
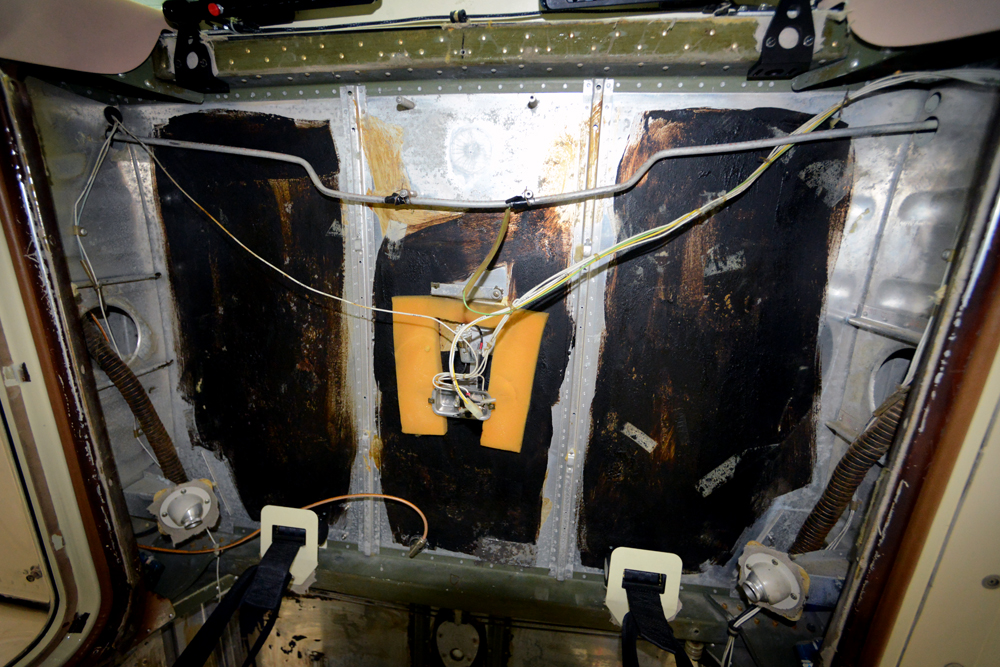
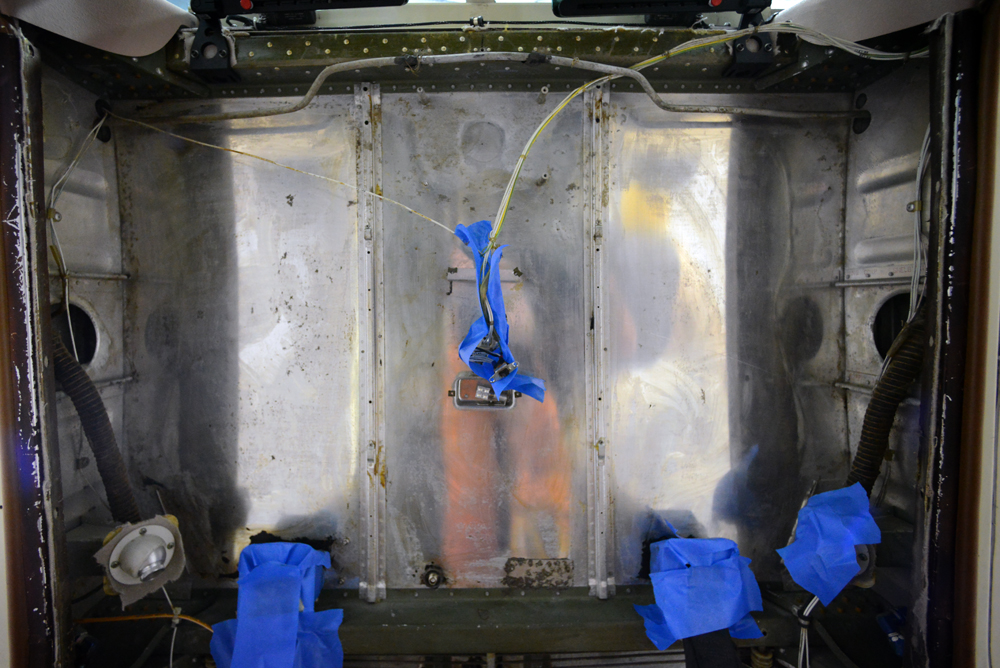
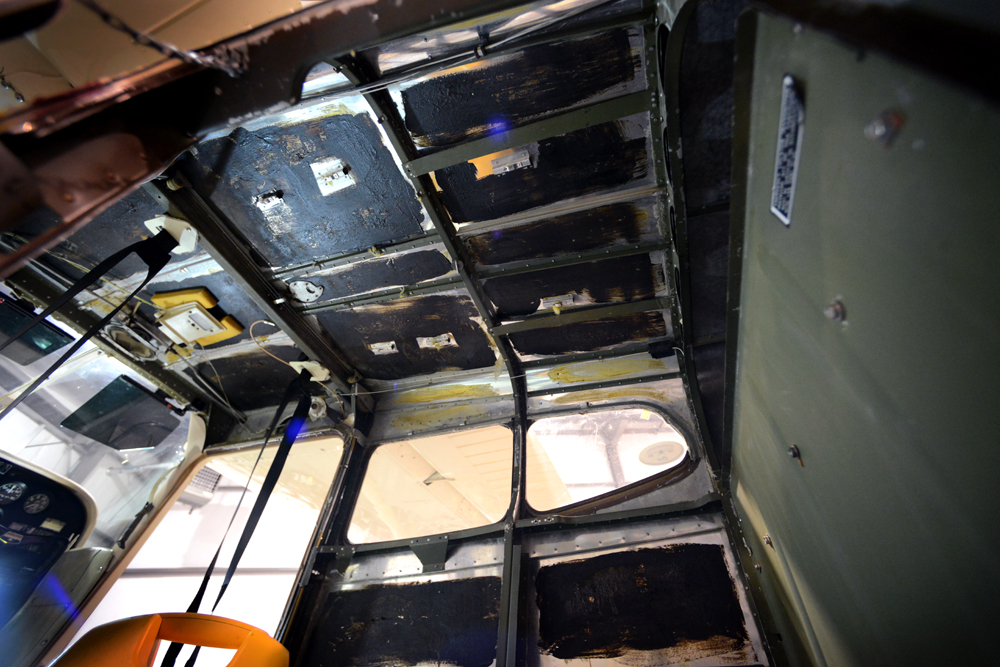
Started in on the stripping yesterday. I had fought with this stuff on the C170, and all I can say is it’s insidious. No fun at all.
I have no idea what Cessna called it, but the thick black mix of petroleum based goo ain’t no pick-nick. But as Kennedy said, “We choose to do these things not because they are easy, but because they are hard.”
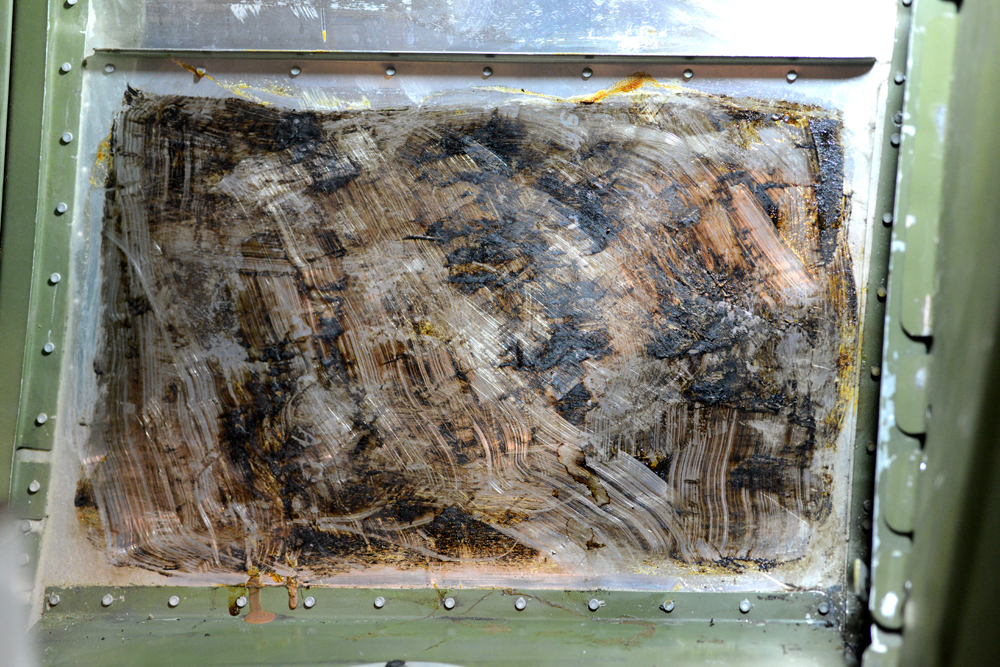
The best way I found to deal with this stuff is to paint on a layer of aircraft stripper (being very careful it doesn’t run between the seams) letting it soften up the material, then scrape off the heavy stuff with a plastic putty knife.
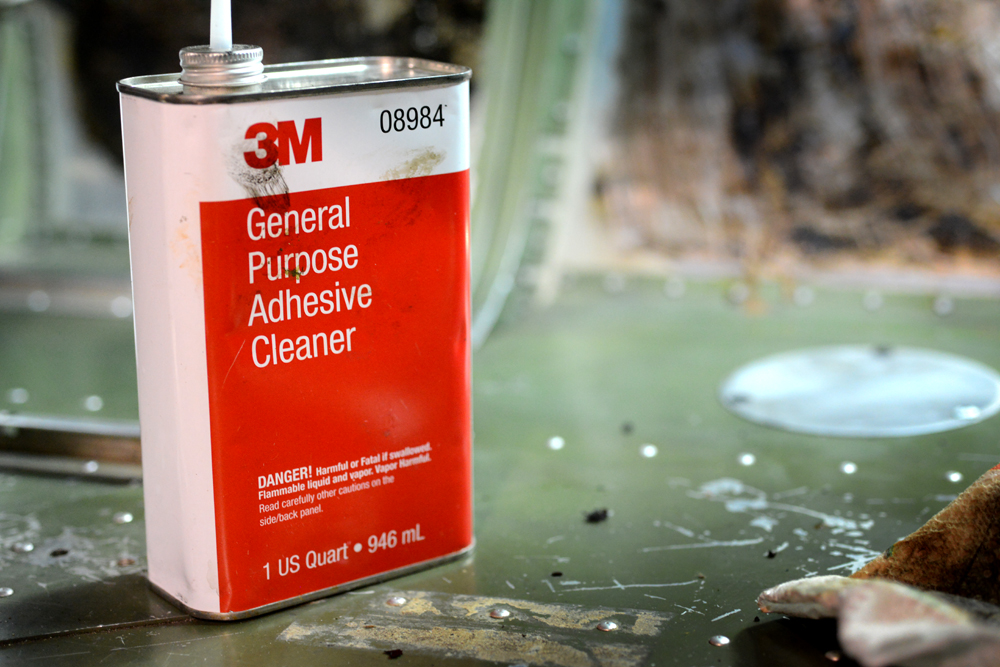
Once that is done, 3M makes an amazing elixir called “General Purpose Adhesive Cleaner.” This stuff is perfect for dissolving the goo and cleaning it right up. Its a long hard slog cleaning each of these panels, but will be well worth it once a fresh coat of paint is on!
It’s all About the Gut…
December 10, 2012
After we got the baseline weight, it was all about the gut. (mine will be next)
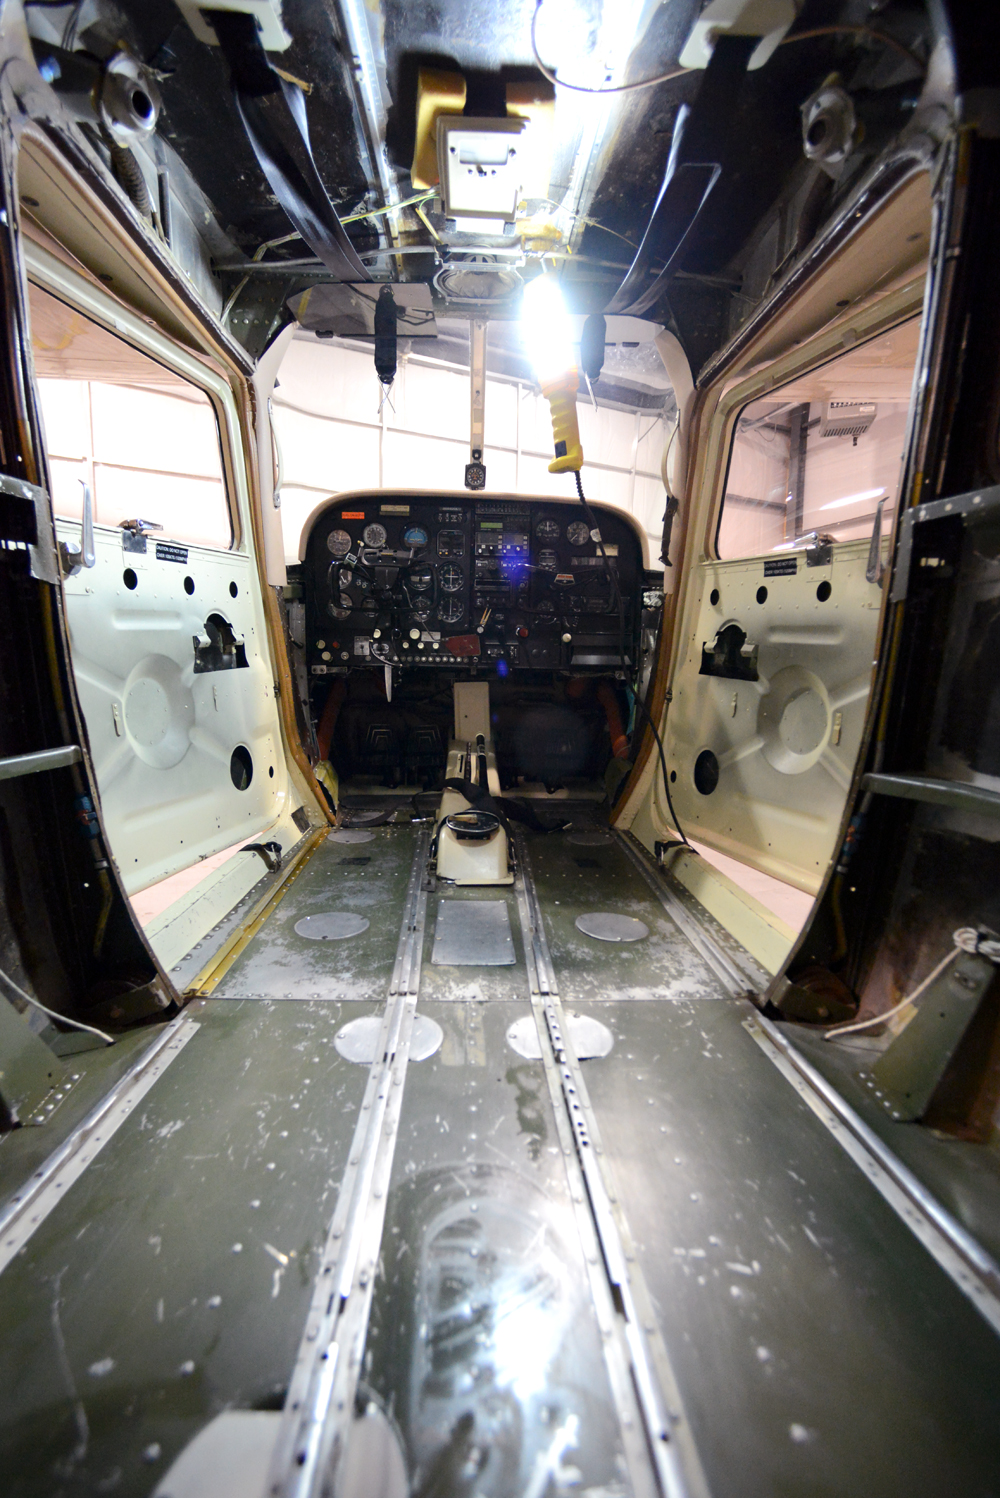
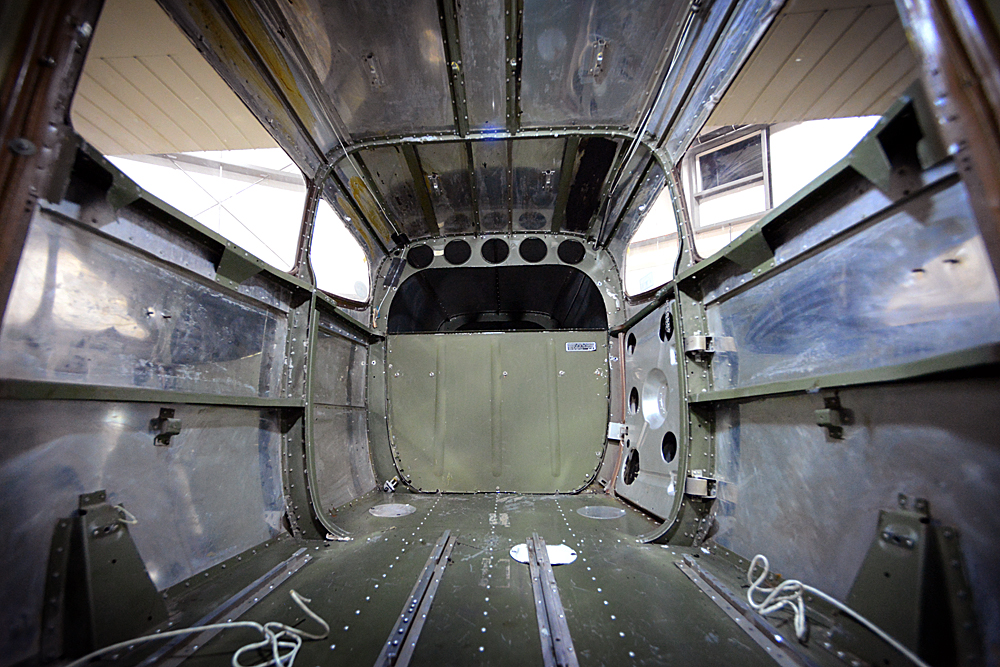
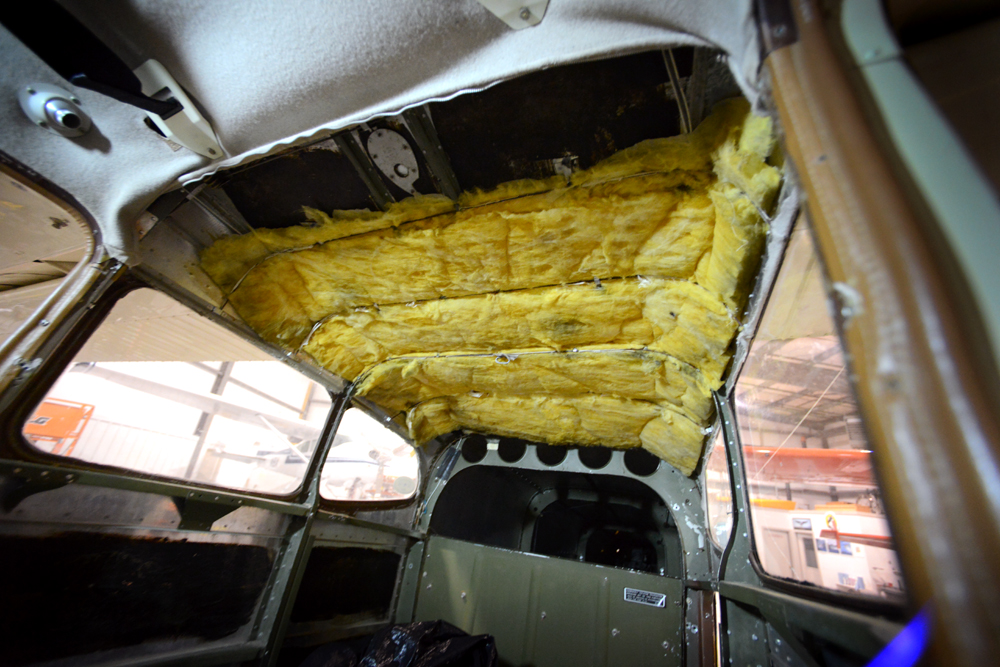
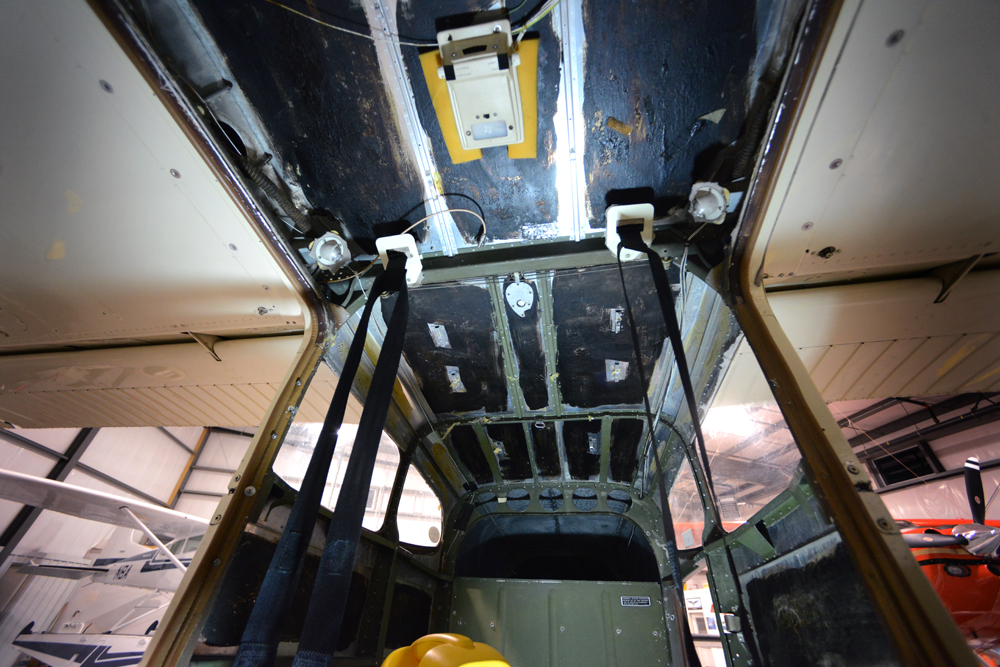
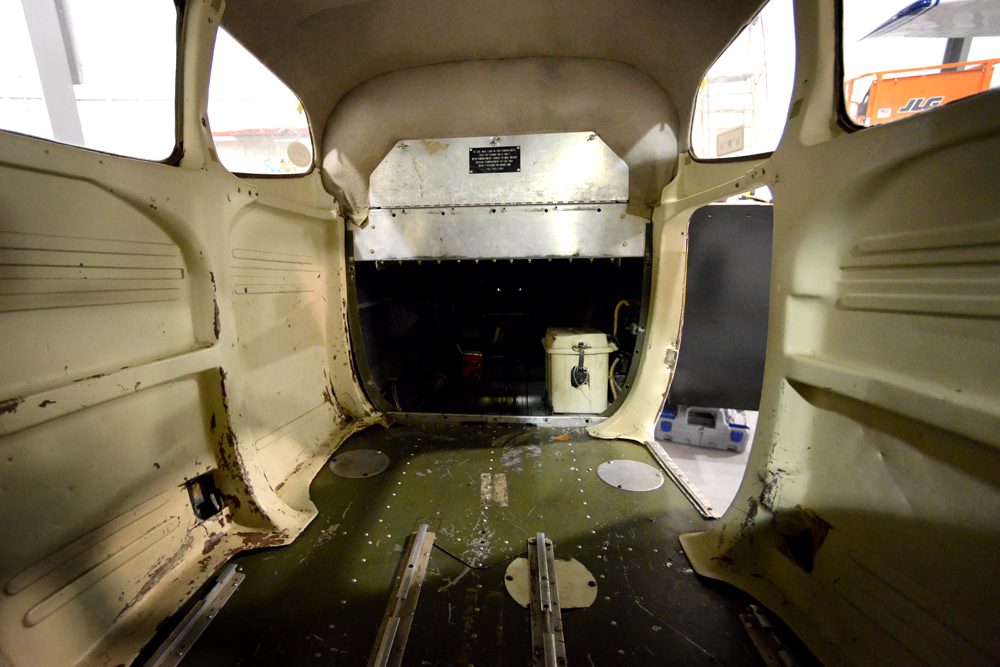
I really can’t leave anything alone, and the interior of the C180 is no different. Starting with the rear side panels, the interior was removed piece by piece until all the side insulation was exposed.

Next, the headliner was cut out, and each piece of old fiberglass insulation expediently made its way into the garbage bag.
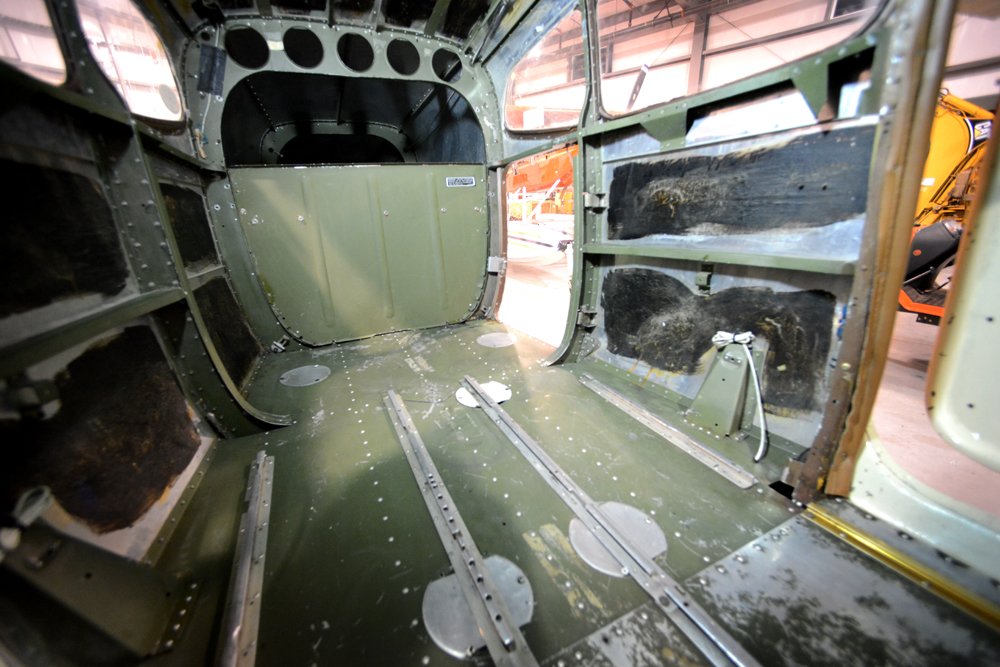
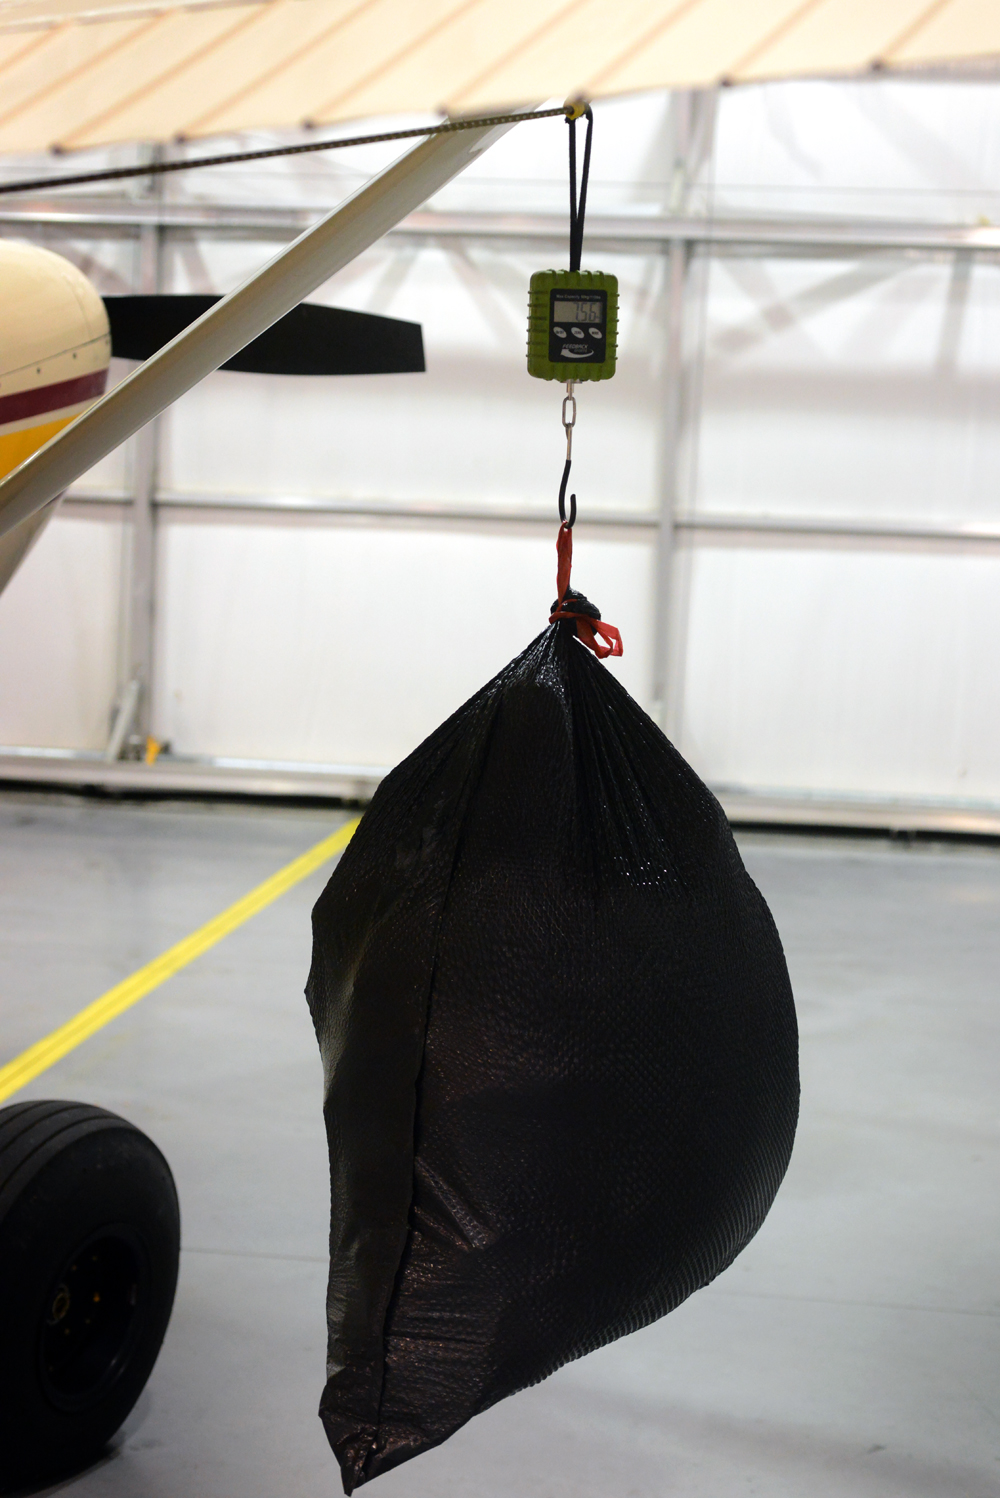
It’s amazing just how much this stuff weighs when you look at it item by item. Every single thing that came out was hung on the scale so we could keep track. By the end of the night, 84 lbs of interior had been removed (includes previously removed ski tube but does not include any old wiring, instruments or avionics.)
Next step will be to strip the interior to prep for paint. Then we deal with the panel…
Here is where the Skywagon stands from its purchase state RE: weight:
Day I purchased it: 1796 lbs (12 qts, 5 gal usable fuel, back seats, 600×6 tires, 10″ XP Mods TW)

As the Skywagon stands : 1749 lbs. This is w/ the interior removed and rear seats removed, 5 gal usable fuel, 12 qts oil, 8.5x10s, BAS harness installed, ABW 10″ wheels, ABW TW fork and 400×4 tire.)
The goal now will be to aim for a 1700 lb target and remove the last 50 lbs with a lightweight panel, lightweight seats, lightweight starter, lightweight ELT, MT prop, and moving the battery forward. I will be adding back in a 5 lb Hitchcock extended baggage, 3lb floor mat, and about 10 lbs of 1/4″ closed cell foam.
The count:
remove rear kick panels -9 lbs
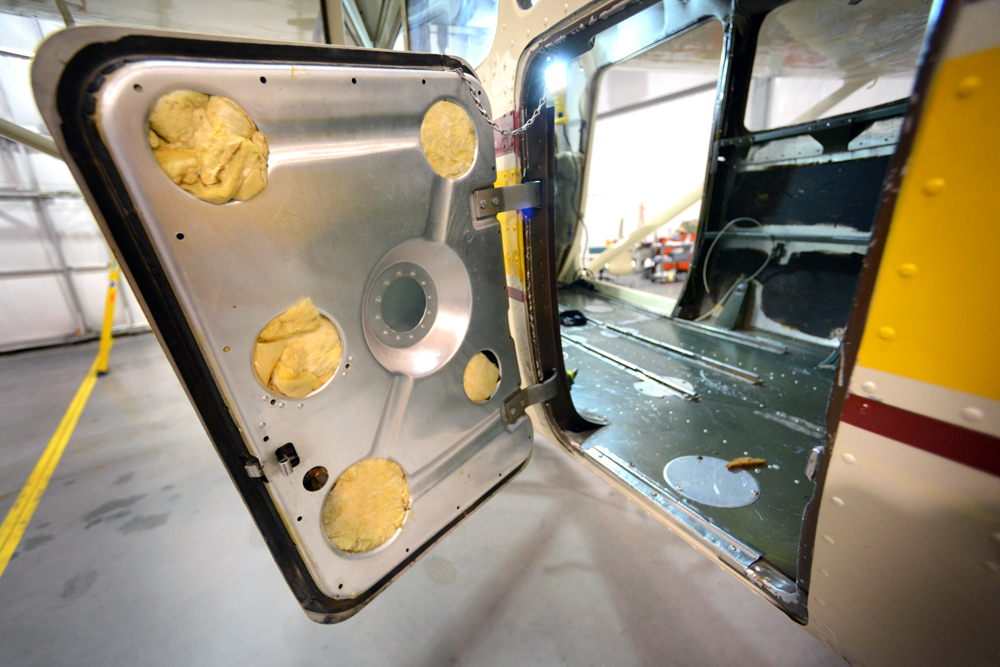
remove door panels -4.3 lbs
remove baggage door panel -1 lb
remove mid trim -5 lbs
remove hat shelf -2 lbs
remove carpet -10 lbs
remove headliner, ceiling insulation, and metal bows – 9lbs
remove door arm rest -1 lbs
remove Audiovox casset player -3 lbs
remove ski tube -18 lbs
remove 600×6 w/ 6″ wheels -27 lbs
remove stock visors -1 lbs
remove lap belt/harness -3.5 lbs
remove XP Mods TW fork and 10″ TW -10.7 lbs
add ABW TW Fork/400×4 +11.5 lbs
add 8.5×10 w/ ABW 10″ wheels +85 lbs
add Rosen Visors + 0.7 lbs
add BAS Harness + 5 lbs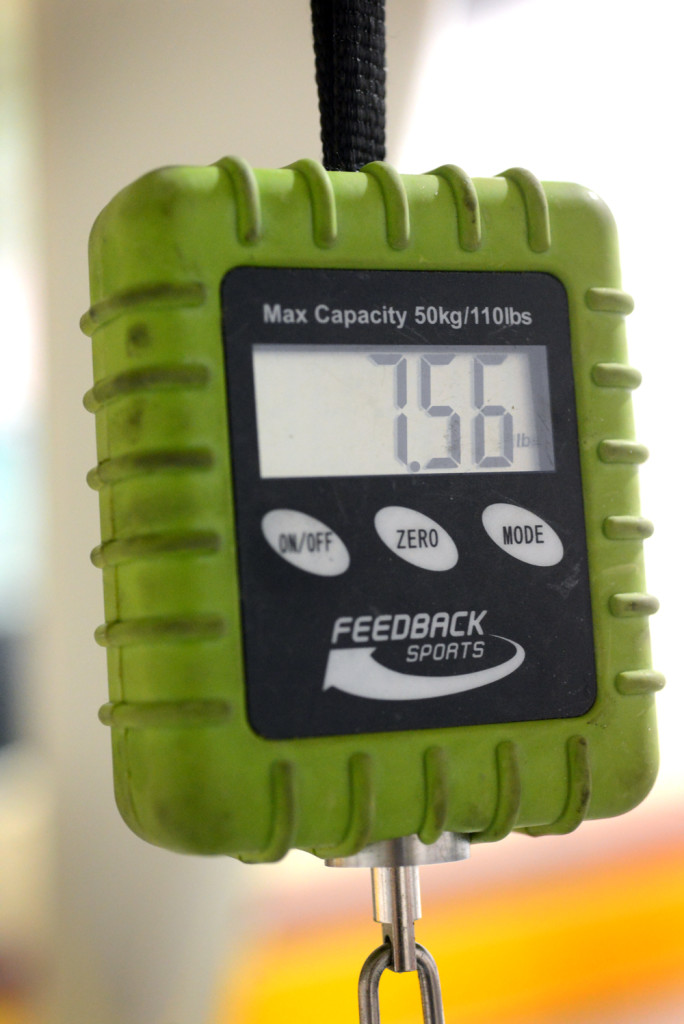

Ski Tubes and Crash Diets
November 27, 2012
 For this project, I am keeping a real keen eye on weight. Everything that is not needed is fair game for the chopping block. Im a utilitarian at heart, and the Skywagon will be a direct reflection of those principles.
Again, I am doing my damnedest not to get too deep into the restoration keeping my eye on flying for December, but today is a slushy dreary day so it was a good afternoon to be useful in the hanger.
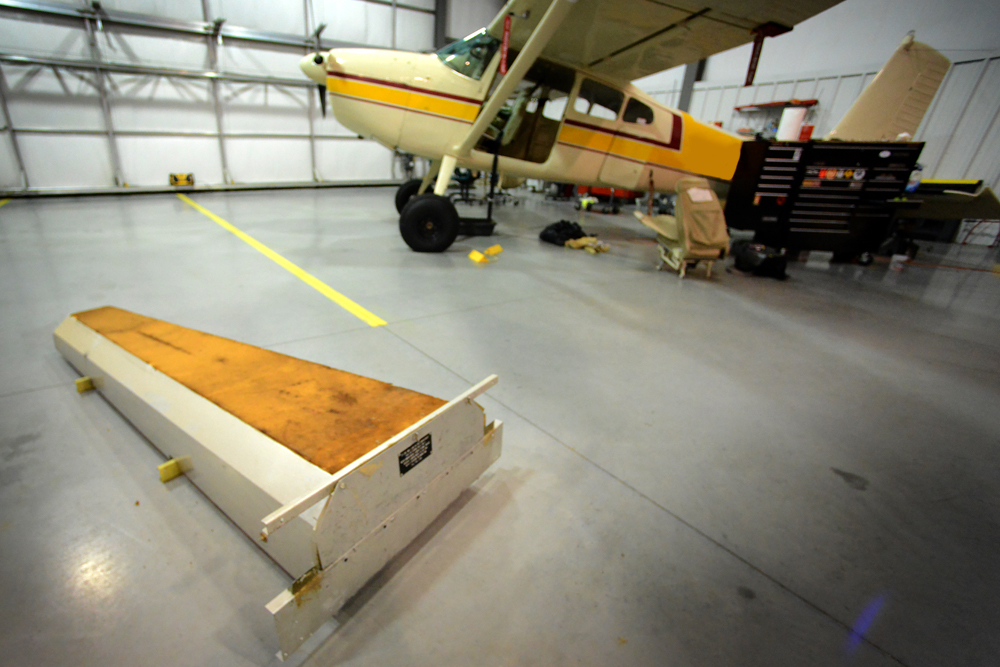
On the block this afternoon was a fishing pole/ski tube that was installed in the 80’s. Its actually a really well engineered/built box and was useful on the trip across country, but for me, it wasnt in the cards. Out it went. The biggest pain was crawling way back in the tail to unbolt the fasteners. The damn thing is 7 feet long! (BTW… if anyone is interested in this, it will be for sale.)
Placard and paperwork say 37lbs in the tube. Entire assy weighs 18lbs. It is 7′ long is flush mounted at the back of the hat shelf and drives back two stations.
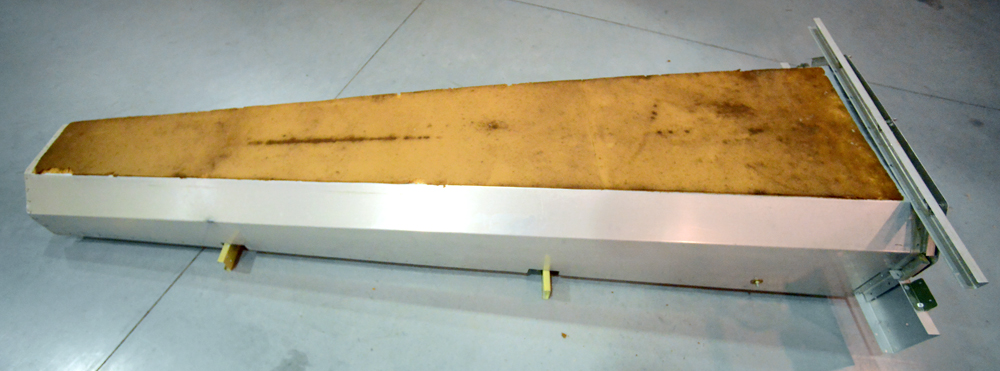
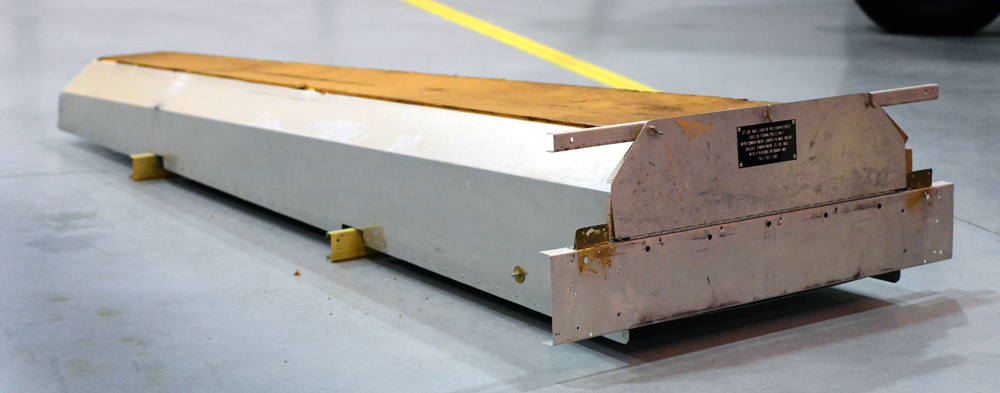
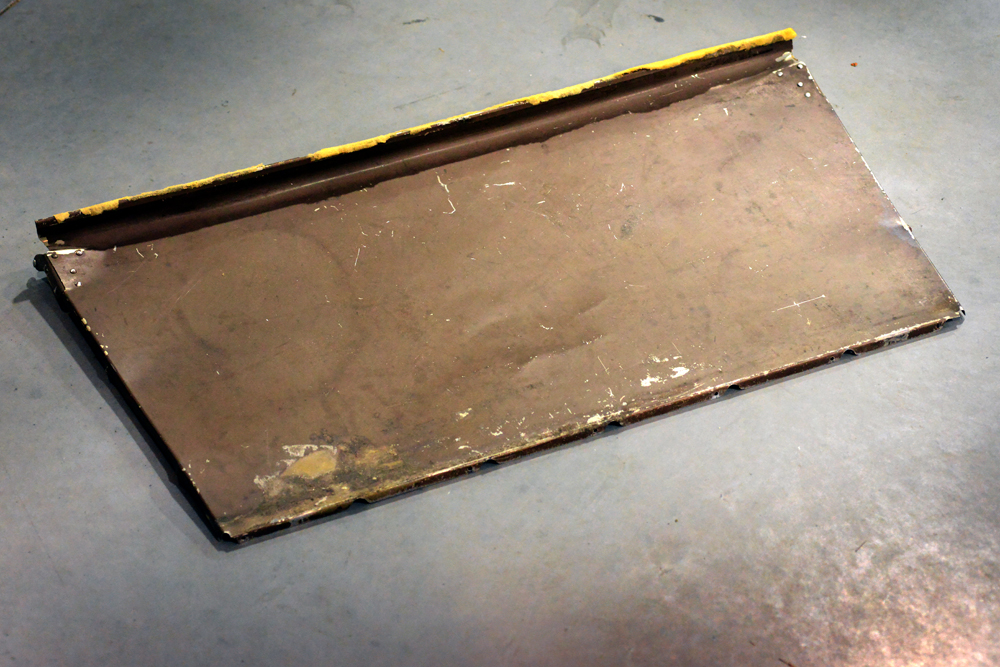
Since an extended baggage will be going in, we also pulled the hat shelf.